If you’re installing Windows 11 from a USB drive and the screen where you pick a drive is completely empty, or setup asks you to load a driver, even though your SSD shows up in the BIOS, and your PC has an Intel 11th gen or newer processor, setup most likely needs the Intel RST (Rapid Storage Technology) driver. This guide will show you how to get it, extract it and load it during the Windows 11 or 10 installation, plus the BIOS setting that skips it altogether.
Also see: How to Burn Windows 11 ISO to USB
Page Contents
Why can’t Windows setup see your drive?
Many PCs with an Intel 11th gen or newer processor connect the SSD through Intel Volume Management Device (VMD), part of Intel RST. Dell lists its 11th to 14th gen PCs as affected, and people have reported it on Dell, HP, ASUS and MSI laptops.
The problem is that the Windows installer doesn’t have a driver for the VMD controller. So the drive is there and the BIOS can see it, but Windows setup can’t. One Reddit user with a Dell Inspiron even found that diskpart could see the SSD while the setup screen couldn’t.
You can either load the Intel RST driver during setup, or turn off VMD in the BIOS before you install. Loading the driver keeps your BIOS as it is, so we’ll start with that.
Linked issue: HDD Not Detected After Installing M.2 SSD in Windows 11/10
Download the right Intel RST driver
You’ll need another working computer for this part. The best place to get the driver is your PC or laptop maker’s support page, since Intel itself recommends drivers from the system maker. On Dell’s site, for example, you enter your service tag, go to Drivers & Downloads, and pick the “Intel Rapid Storage Technology Driver” from the Storage category.
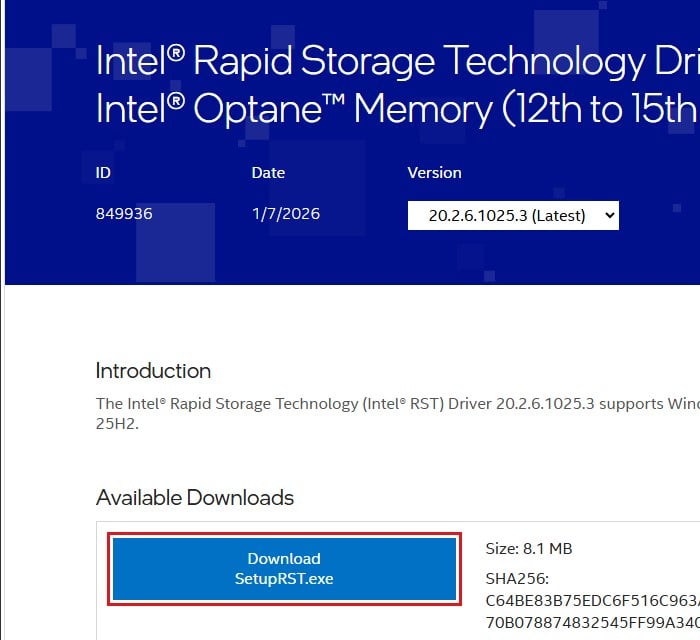
If your maker doesn’t list one, download it from Intel. Intel has a separate package for each processor generation, so pick the one that matches your CPU (that’s part of what fixed it for one asker on Microsoft Q&A):
- 10th and 11th gen: version 18.7.6.1010.3, at
https://www.intel.com/content/www/us/en/download/19512.html - 12th to 15th gen: version 20.2.6.1025.3, at
https://www.intel.com/content/www/us/en/download/849936.html - Intel Core Ultra Series 3: version 21.1.0.1006.2, at
https://www.intel.com/content/www/us/en/download/920456.html
All of them come as a single file called SetupRST.exe. Click Download SetupRST.exe, then accept Intel’s license terms to start the download.
Note: Intel has taken down the “11th up to 13th Gen” package that older forum answers link to.
Learn more: All SSD Connectors Types Explained (SATA, M.2, NVMe, etc.)
Extract the driver files from SetupRST.exe
The Windows installer can’t run SetupRST.exe, so you’ll need to pull the driver files out of it first. Intel has a command for that. Here’s how to do it:
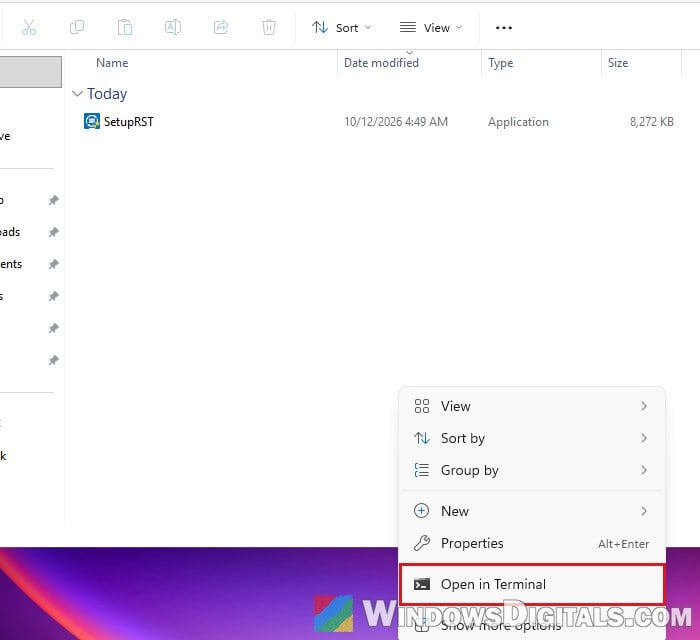
- Put SetupRST.exe in its own folder, for example in your Downloads folder.
- Right-click an empty space in that folder and select Open in Terminal.
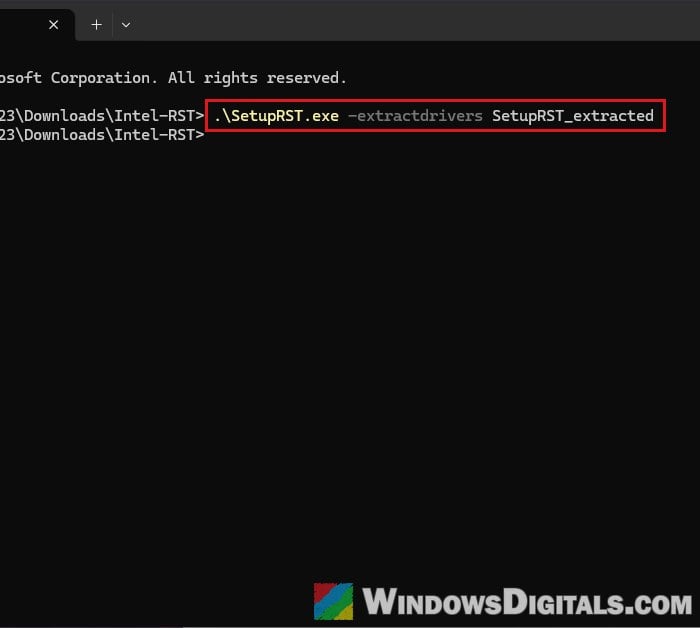
- Type the following command and press Enter:
.\SetupRST.exe -extractdrivers SetupRST_extracted
- Click Yes when User Account Control asks about the “Intel Rapid Storage Technology installer“. Nothing gets installed, and no message shows when it’s done.
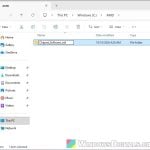
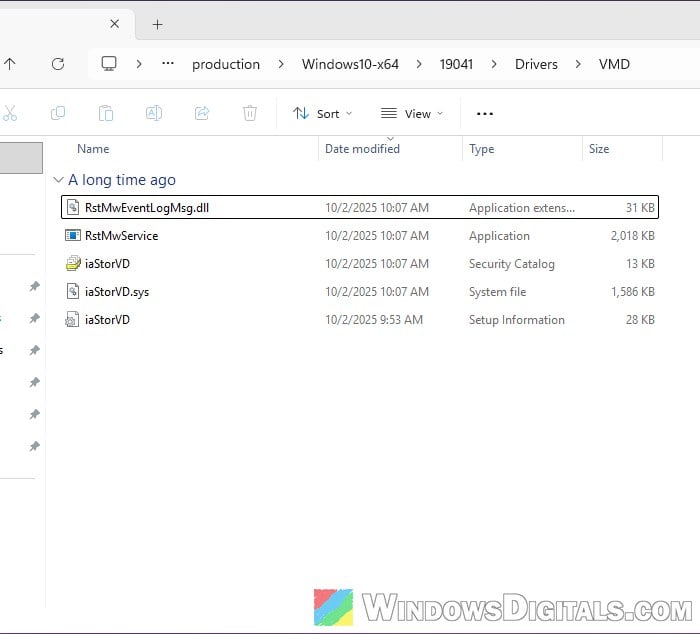
- After about 20 seconds, a new folder called SetupRST_extracted appears next to SetupRST.exe. In the current package, the VMD driver is in
SetupRST_extracted\production\Windows10-x64\19041\Drivers\VMD(the file iaStorVD.sys with its .inf and .cat files).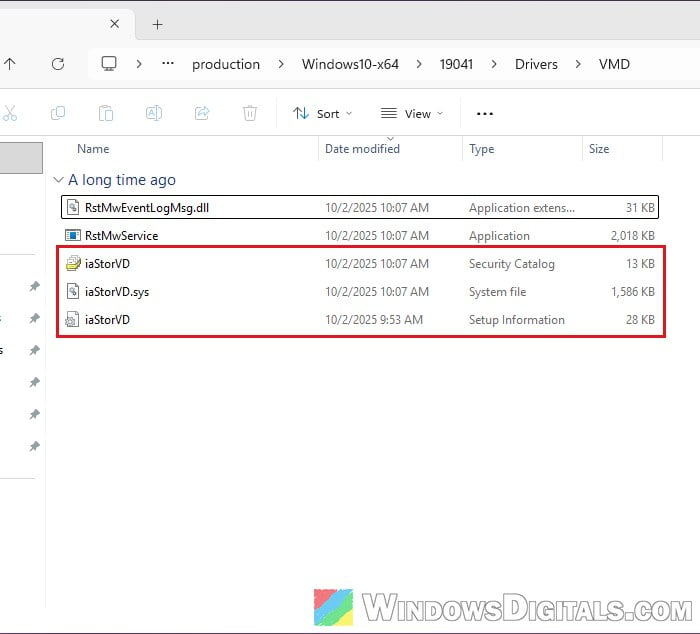
- Copy the whole SetupRST_extracted folder to a USB flash drive. The Windows installation USB itself works fine for this.
Dell’s own package extracts its files straight onto the install USB instead, to a folder like IRST\production\Windows10-x64\15063\Drivers\VMD. Whichever one you use, the folder you’ll need later is the one called VMD.
Load the Intel RST driver in Windows setup
Now boot your PC from the Windows installation USB and go through setup as usual until you reach the screen where you choose the drive to install Windows on, then follow the steps below:
- Plug in the USB drive with the extracted driver, if it isn’t the installation USB.
- Click Load driver.
- When it asks for the driver media, click OK, then Browse.
- Open the SetupRST_extracted folder on your USB drive and select the VMD folder inside it (
production\Windows10-x64\19041\Drivers\VMDin the current Intel package). - Select the Intel RST VMD Controller driver from the list and click Next.
Your SSD should now appear in the list, and you can carry on with the installation.
What if it says “No device drivers were found”?
Check that you downloaded the package for your processor generation, then try the other folders in the extracted package one by one, as answers on Microsoft Q&A suggest. If none of them work, turn off VMD instead, as shown below.
Turn off VMD in the BIOS (before installing)
If you don’t use RAID or Intel Optane memory, you can skip the driver altogether by turning off VMD in the BIOS. With VMD off, Windows setup can see the NVMe SSD with its own built-in driver. It’s also what the top answers on Microsoft Q&A and Microsoft’s Tech Community forum suggest.
Be warned: Only change this before you install Windows. Intel warns that changing these BIOS settings after Windows is already installed will stop it from booting with an “Inaccessible Boot Device” error. Turning off VMD also means you can’t use RAID arrays or Intel Optane acceleration. If you’re not sure what you’re doing, it’s better to get someone to help you.
Here’s how to do it:
- Restart your PC and press the BIOS key shown on the startup screen (usually F2, F10 or Del).
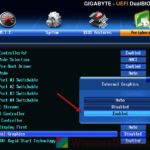
- Look for the storage settings. The names depend on the maker, for example:
- Intel VMD or VMD Controller: set it to disabled.
- Dell’s SATA Operation: switch RAID On to AHCI.
- SATA Mode Selection on some ASUS boards: switch it to AHCI.
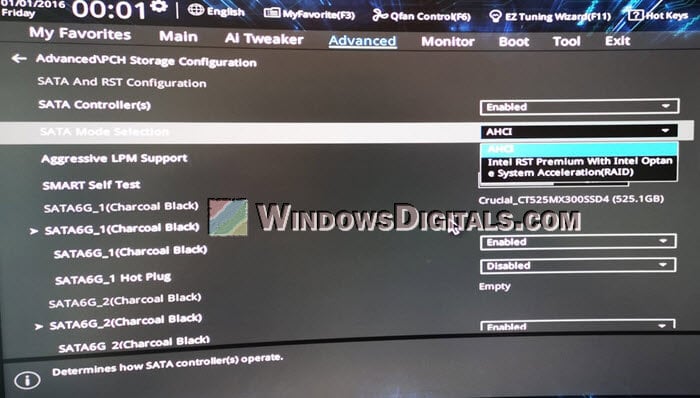
- Save the changes and exit the BIOS.
- Boot from the installation USB again. The drive should now be listed.
Note that one user on Microsoft’s Tech Community found that turning off VMD alone didn’t help. In that case, load the BIOS defaults first, then go with one setup only: either VMD/RST on with the matching driver, or AHCI.
Might be useful: Can’t find TPM 2.0 and Secure Boot options in BIOS
Still no drives in setup?
If neither worked, here are two more things to try:
- Recreate the installation USB with Microsoft’s Media Creation Tool. One user on Microsoft Q&A said USBs made with Rufus and Ventoy didn’t work for them, but one made with the Media Creation Tool did, after they reset the BIOS to its defaults.
- Disconnect any second drive during the installation, so only the drive you want to install Windows on is connected.
Related problem: Rufus Error “Access to the device is denied” Windows 11/10
If none of this helps, your PC maker’s support can tell you which storage setup and driver your model expects, which is what the Tech Community answer suggests as the last step.