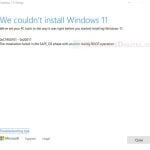
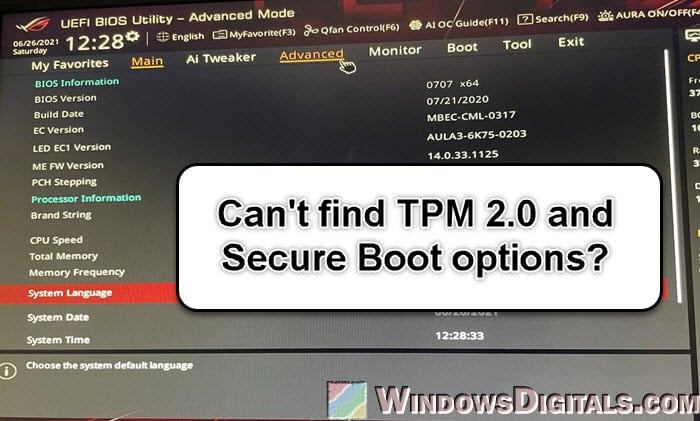
There are times when you might encounter problems with certain (usually new) apps or games because they require TPM 2.0 and Secure Boot before they can be opened. These are the security options that have to be enabled through the UEFI or BIOS settings, not within the OS. But what if you can’t find them in your BIOS? In this guide, we’ll talk about why you might not find TPM 2.0 and Secure Boot in your UEFI settings and what you can do about it.
Also see: How to Enable TPM 2.0 and Secure Boot on ASRock
Page Contents
What are TPM 2.0 and Secure Boot?
Let’s first look at what TPM 2.0 and Secure Boot are and why they matter.
TPM 2.0 (Trusted Platform Module)
This is a security feature built into the hardware that keeps cryptographic keys and is used for things like secure booting, disk encryption, and more. It’s very important for the overall security and integrity of your system, especially when you’re running newer operating systems and software that need better security.
Secure Boot
This is part of the UEFI (Unified Extensible Firmware Interface) specs and it makes sure your PC only starts with software that the PC maker trusts. When it’s on, it stops bad software from loading when your system starts, which is a key way to protect against many security threats.
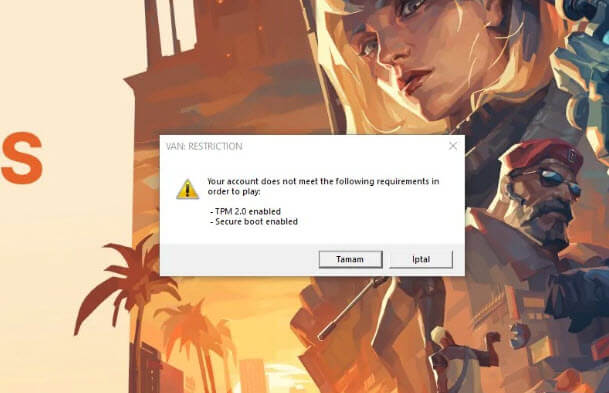
TPM 2.0 and Secure Boot are important not just for protecting your computer, but they are also becoming necessary to run certain advanced software and modern games. These features make sure your system meets the strict security standards needed by the newest apps, making them crucial for your BIOS.
Learn more: Enabling TPM 2.0 and Secure Boot on Gigabyte Mobo
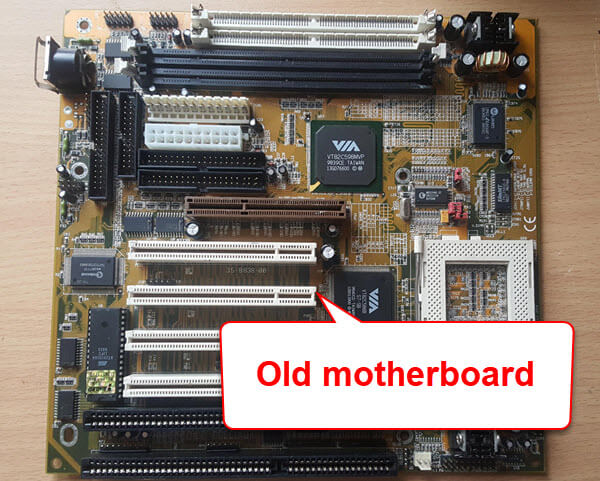
Motherboard doesn’t support TPM 2.0 and Secure Boot
The main reason you might not see TPM 2.0 and Secure Boot options in your BIOS is usually because of the type of motherboard you have.
Older motherboards
If your motherboard is an old model, it may not support TPM 2.0 or Secure Boot. These features have become standard more recently, so older motherboards might not have the needed hardware or firmware support.
To know if your motherboard actually supports TPM and Secure Boot, you can check the product details on the manufacturer’s website or just read the user manual. This info is usually in the security or boot options section.
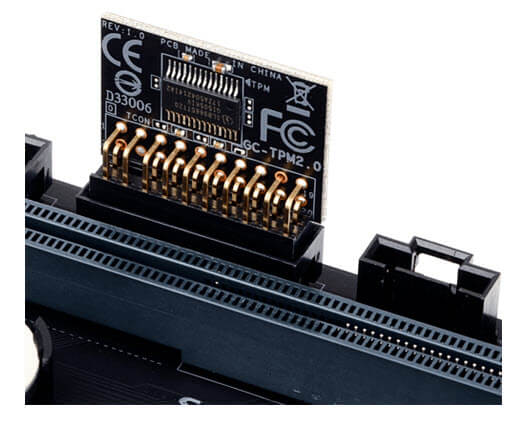
External TPM modules
For some older motherboards without built-in TPM, you might be able to add an external TPM module. This module can be bought and installed in a compatible slot on your motherboard if the firmware allows it.
If it is really because your motherboard simply doesn’t have the features, you can think about getting a newer motherboard or maybe adding an external TPM module, depending on what your hardware allows.
Pro tip: In-place Upgrade of Windows 11 on Unsupported Hardware
Different names for TPM and Secure Boot in BIOS
Another reason you might not find TPM 2.0 and Secure Boot options in your BIOS is because they could be called something else. This can vary depending on the maker of your motherboard and the version of the BIOS.
TPM 2.0 alternatives
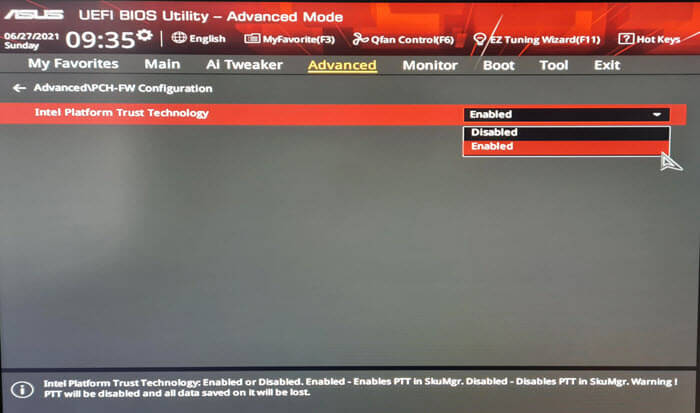
- On Intel motherboards, TPM might be called PTT (Platform Trust Technology).
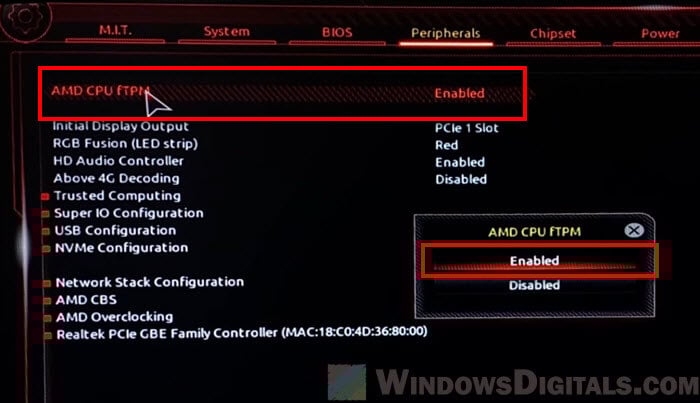
- On AMD motherboards, it might be known as AMD fTPM (firmware TPM) or PSP TPM.
Since these settings can be hidden under different menu layers, it’s important to thoroughly go through your BIOS. Look in sections like “Security”, “Advanced”, or “Boot”.
Check the manual
If the BIOS terms are confusing, the best place to get help is the motherboard’s manual. It will tell you exactly what terms are used and where to find these options in the BIOS. If you don’t have the physical manual, you can often find a digital copy on the manufacturer’s website.
Related resource: Virtualbox Windows 11: This PC doesn’t meet the requirements
Conditions for displaying Secure Boot option in BIOS
Secure Boot might not be immediately visible or changeable in your BIOS because of specific conditions that need to be met first. This is especially common with some motherboard brands, like Gigabyte.
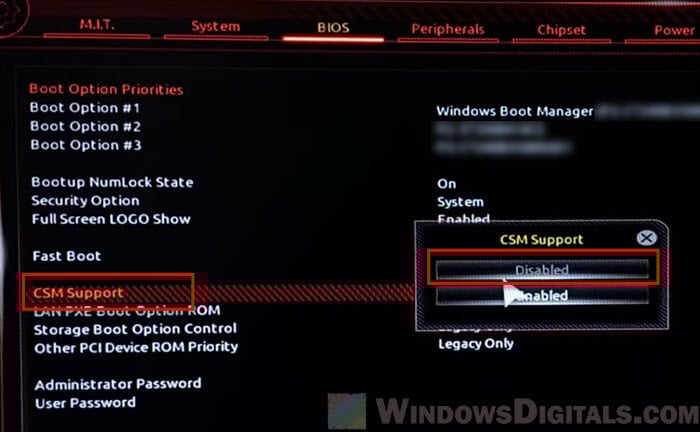
Disable CSM (Compatibility Support Module)
On some motherboards, like those from Gigabyte, you need to turn off ‘CSM Support’ to make the Secure Boot option show up or be changeable. CSM is for older OS compatibility and can hide Secure Boot when it’s on.
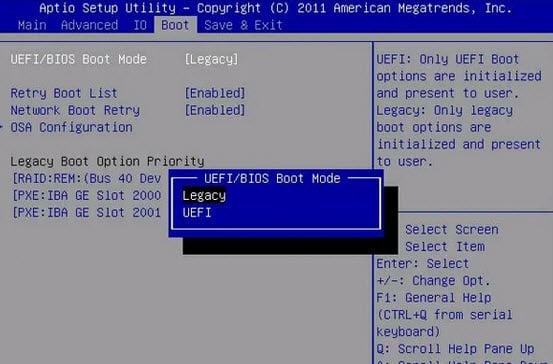
Switch from Legacy to UEFI mode
Switching from Legacy BIOS mode to UEFI mode is needed on some systems to turn on Secure Boot. This option is usually under ‘Boot’ or ‘Storage’ settings.
Operating system type selection
In some BIOS setups, you need to specify the operating system type (like ‘Windows UEFI mode’) to get to the Secure Boot options.
Set an admin password
Some systems ask you to set an Administrator password in the BIOS to unlock extra features, including Secure Boot.
Clear Secure Boot keys
You might need to clear existing Secure Boot keys before you can turn on or set up Secure Boot on some motherboards.
Disable fast boot
The “Fast Boot” feature might need to be turned off to see all the BIOS options, including Secure Boot settings.
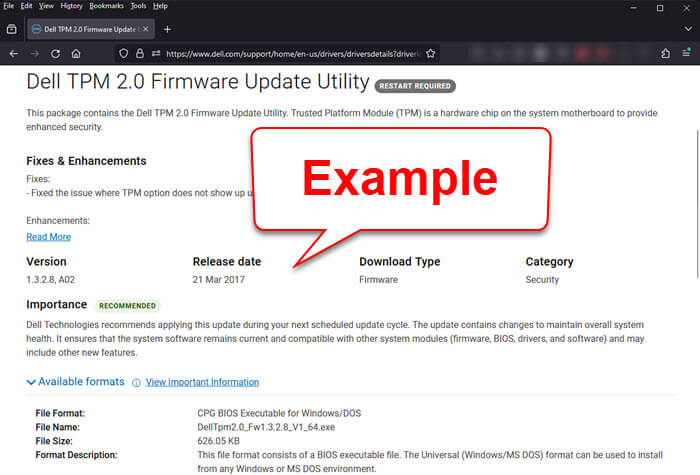
Update BIOS/UEFI firmware version for TPM 2.0 and Secure Boot support
If your motherboard supports TPM 2.0 and Secure Boot but these options are not showing in the BIOS, it might be because your BIOS or UEFI firmware is just outdated. In such cases, just go to your motherboard manufacturer’s website and see if there is any firmware update for your motherboard.
When you see that a newer BIOS version is available, and its release notes mention support for TPM 2.0 or Secure Boot, you can then decide if you want to update to this latest firmware. But, be careful because updating your BIOS the wrong way can cause very serious problems, like bricking your computer entirely (you won’t be able to even boot it if the firmware is corrupted).
If you’re not even sure about how to do it yourself, it might be better to get help from someone who actually knows.
A brief guide to enabling TPM 2.0 and Secure Boot
The following is a simple guide on how to turn on TPM 2.0 and Secure Boot on most motherboards.
Enabling TPM 2.0
- Start up your BIOS settings when your system boots, usually by pressing a key like Del, F2, or F12.
- Go to the security settings area. The exact spot and name can vary, so look at your motherboard’s manual if you need to.
- Find the TPM option, which might be called something like Intel PTT (Intel) or AMD fTPM (AMD).
- Turn on the TPM setting and save your changes.
Enabling Secure Boot
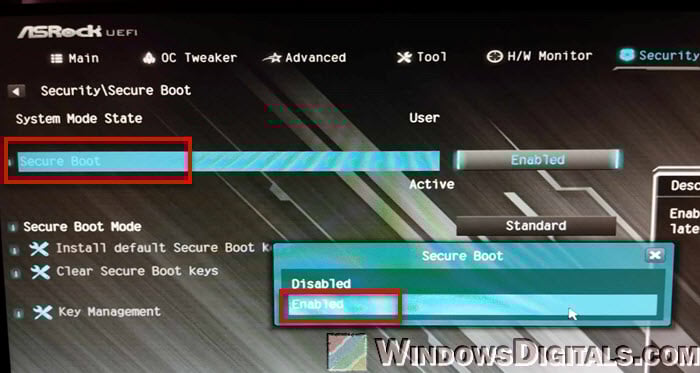
- Go to the boot or security settings area in the BIOS.
- Make sure your system is set to UEFI mode, not Legacy or CSM, because Secure Boot needs UEFI.
- Look for the Secure Boot option. If it wasn’t visible before, make sure you’ve done things like turning off CSM, as mentioned earlier.
- Turn on Secure Boot and save your changes.
After you turn on these features, your system will meet the security standards needed for certain software and games that require TPM 2.0 and Secure Boot, like Valorant. If you run into problems or the settings still don’t show up, look at your motherboard’s manual or get in touch with the manufacturer’s support can give you specific advice. These settings are part of your system’s security setup, so it’s important to understand what they do before deciding to enable or disable them.