Windows 11 has much stricter system requirements than Windows 10, and this has caused a lot of people to see the error message “This PC can’t run Windows 11 – This PC doesn’t meet the minimum system requirements to install this version of Windows” when they try to install it on a virtual machine (VM) using VirtualBox or other VM software like VMware. In this guide, we’ll talk about the problem in detail and show you a way to get around the requirement check.
Also see: How to in-place upgrade to Windows 11 on unsupported hardware
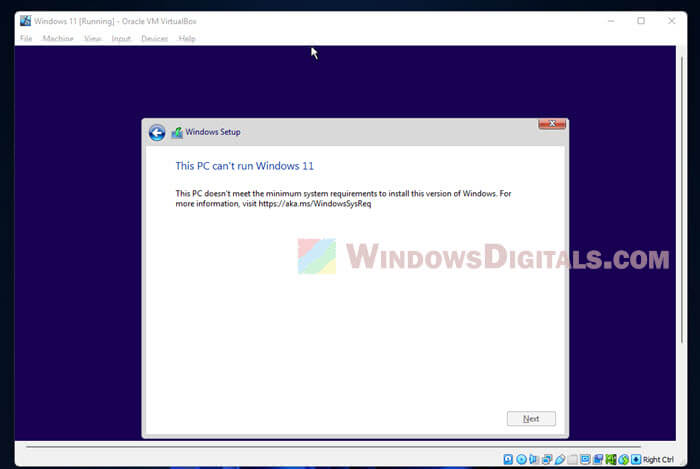
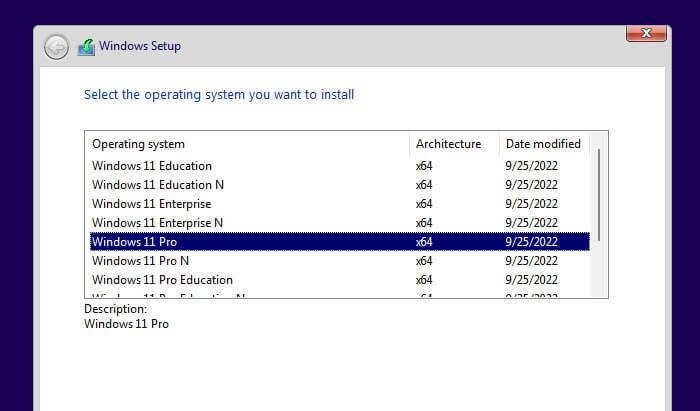
This issue usually shows up right after you select Windows 11 Pro (or another version) and hit “Next”. If your PC doesn’t meet the system minimum requirements, the installation stops in its tracks with that error message.
Linked issue: We couldn’t install Windows 11: Safe_OS with boot operation
Page Contents
Getting to know Windows 11’s minimum system needs
Let’s break down what your computer needs to have to play nice with Windows 11. These specs are there to make sure Windows 11 runs smoothly and keeps your system secure:
- A 64-bit processor that’s clocking at least 1 GHz with 2 or more cores
- At least 4 GB of RAM
- A minimum of 64 GB storage space
- Graphics that are friends with DirectX 12 and have a WDDM 2.0 driver
- A screen that’s 720p or better, 9 inches across or bigger
- UEFI firmware that can do Secure Boot
- TPM version 2.0
While this might sound like a lot, it’s all about making sure you get the best experience and security. But, yeah, it can be a bit much when trying to set up a VM with VirtualBox or VMware.
Recommended guide: How to Install Windows 11/10 with Digital License from USB
How to skip past the system check for Windows 11 on VirtualBox
Our trick to get around the system needs involves a bit of registry tweaking. It’s handy for testing stuff out but think twice if you’re planning to use it all the time, as it might not be the smoothest experience.
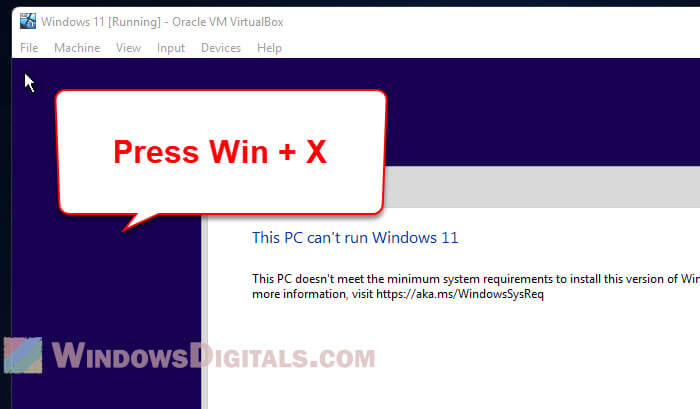
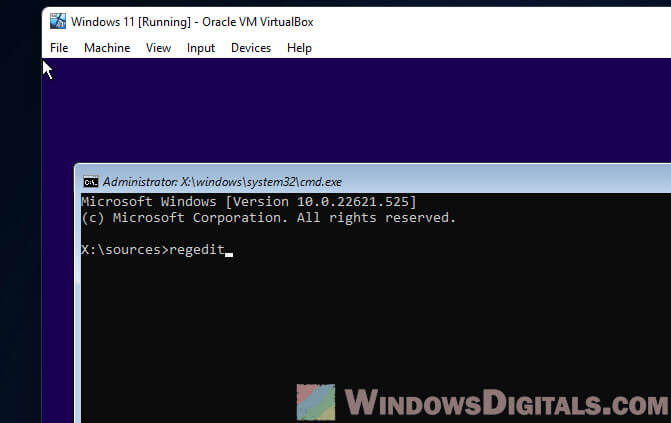
Step 1: Opening Command Prompt on the Windows install screen
Hit Win + X when you see that error message. This gets you to the command prompt where the magic begins.
Step 2: Get into the Registry Editor
Type regedit in the command prompt and hit Enter. This opens up the Registry Editor for some tweaking.
Step 3: Head over to the Setup key
On the left side of the Registry Editor, navigate to:
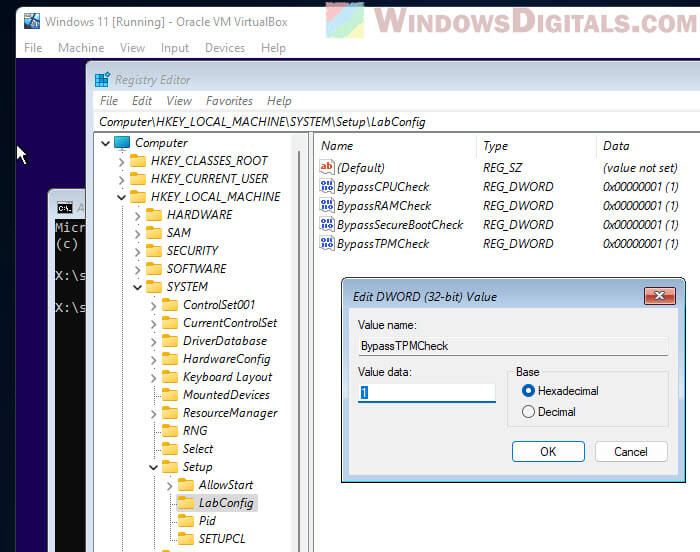
Computer\HKEY_LOCAL_MACHINE\SYSTEM\Setup
Step 4: Making a new key called LabConfig
Right-click the Setup key and choose New > Key. Name it LabConfig.
Step 5: Creating a BypassCPUCheck value
With the LabConfig key selected, right-click in the right pane and pick New > DWORD (32-bit) Value. Call it BypassCPUCheck. Double-click it, set the value to 1, and hit OK.
Step 6: Adding more bypass values
Do the same thing for:
BypassRAMCheckBypassSecureBootCheckBypassTPMCheck
Set each of their values to 1 and click OK.
Step 7: Finishing up
Once you’re done, close the Registry Editor and the command prompt. You’re now good to go with your Windows 11 install without any nagging error messages. The tweaks you’ve made will let you bypass the system checks and get Windows 11 onto your VM.
Related resource: How to Open VMDK File in Windows 11

Watch out for these problems
Taking this shortcut might be handy, but it’s not without its bumps. Here’s what to keep an eye out for:
- Performance might take a hit: Skirting around the official requirements could mean Windows 11 doesn’t run as smoothly as you’d like on your VM.
- You could be opening up security gaps: Requirements like TPM and Secure Boot beef up your security. Skipping them might leave you more exposed.
- Help might be harder to find: Since this isn’t the Microsoft-approved route, you’re kind of on your own if things go sideways.
Think about these points before deciding to go ahead with the workaround.
Relevant problem: This host supports Intel VT-x, but Intel VT-x is disabled
One last note
When security is in the way, there is really not much of a choice but to really consider hardware that comes with those minimum requirements for installing Windows 11, specifically the TPM 2.0 and Secure Boot technology. Now, most motherboard manufacturers are already making sure all new models contain these technologies, but it means we will need to dig up some money for almost a brand new computer again. As for VM, well, you can try the workarounds but it’s not really meant for daily use if security is a concern.