Many people want to upgrade to Windows 11, but not all computers have what it takes, like TPM 2.0 and Secure Boot. You’ll find a lot of guides on how to install Windows 11 from scratch on these PCs, but this guide focuses on how to upgrade directly without losing your files, settings, or apps (what we call an “in-place upgrade“). We’ll show you how to get around the TPM and Secure Boot checks and upgrade from Windows 10 to Windows 11 even if your PC doesn’t officially qualify.
Also see: Virtualbox Windows 11 “This PC doesn’t meet the requirements”
It’s important you know that using Windows 11 on PCs that aren’t officially supported (due to the absence of TPM 2.0 or Secure Boot) is not recommended by Microsoft and might cause security issues in the future.
Page Contents
What is a Windows 11 in-place upgrade?
An in-place upgrade lets you update your operating system while keeping all your files, settings, and apps just as they are. Unlike a clean install, which erases everything, this method is much simpler and keeps everything in place.
Upgrading in this way is really useful if you don’t want the trouble of setting everything up again. You can usually do this upgrade through Windows Update, which is the easiest way.
In this guide, we focus on how to upgrade from Windows 10 to Windows 11 on PCs that don’t have TPM 2.0 or Secure Boot. This is good for those who want to keep their current setup and skip a full reinstall.
Linked issue: We couldn’t install Windows 11: Safe_OS with boot operation
How to do an in-place upgrade to Windows 11 on unsupported hardware
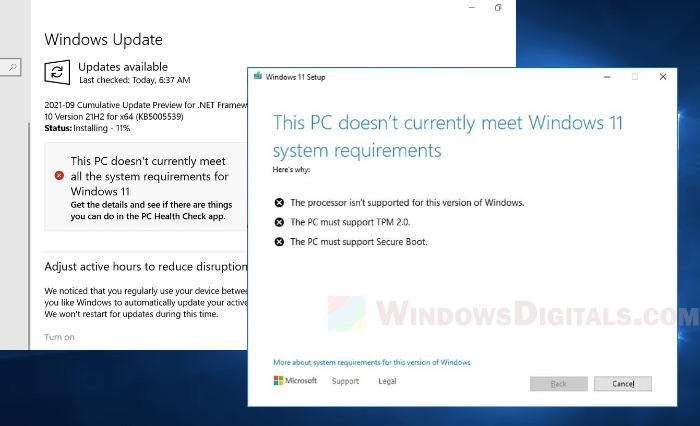
Windows 11 asks for more from your PC than Windows 10, especially in terms of security features like TPM 2.0 and Secure Boot. If you don’t have these, you’re usually out of luck.
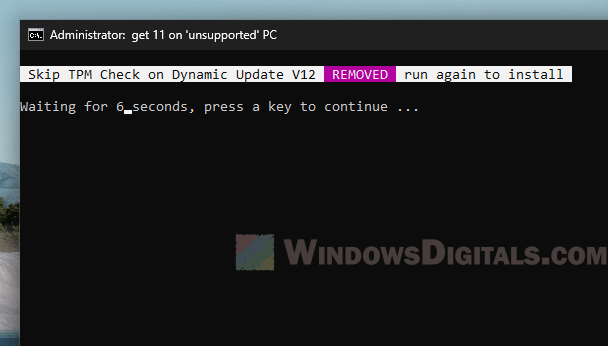
But, you can get around these requirements with a specific script called Skip_TPM_Check_on_Dynamic_Update.cmd. This script is part of the MediaCreationTool.bat on GitHub. You only need this script, not the whole tool, to help you bypass the checks.
How to use this script and install Windows 11
- Visit this GitHub page. Click on the “Download raw file” button to download the script. You can also copy and paste it into a text file and save it as
Skip_TPM_Check_on_Dynamic_Update.cmd.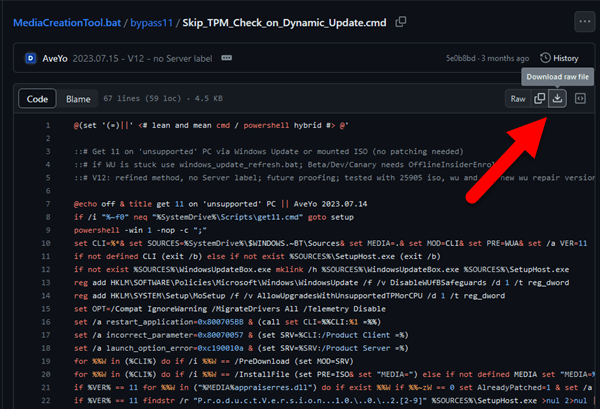
- Find the script on your computer, right-click on it and choose “Run as administrator” to execute it. This will turn off the TPM and other checks for Windows 11.
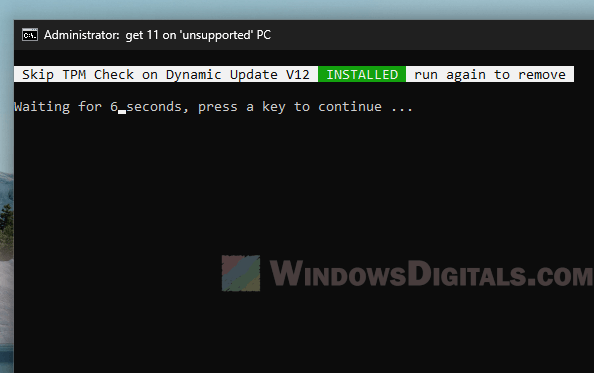
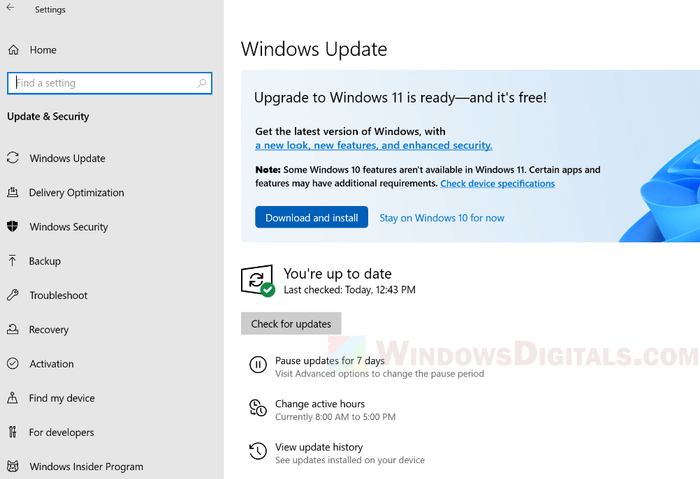
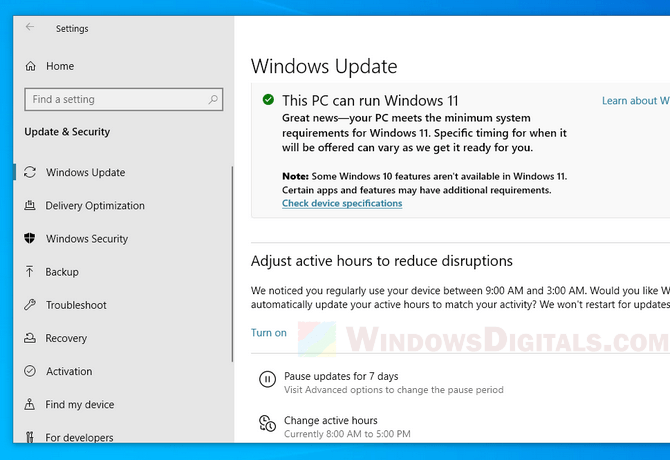
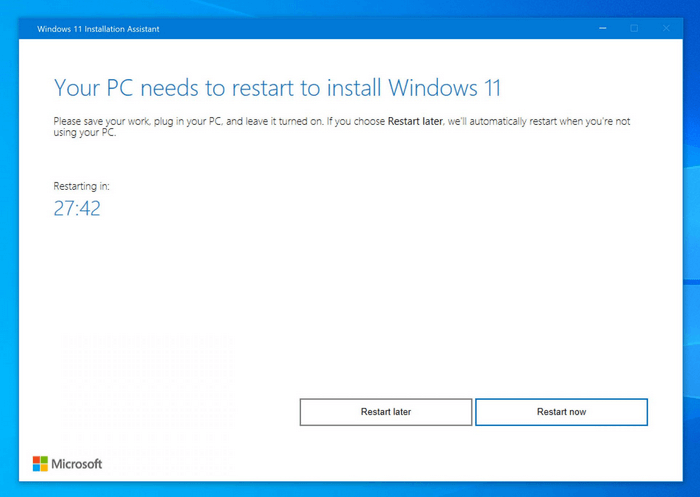
- After the script works, go to your system’s Settings and check Windows Update. You should see an option to upgrade to Windows 11 like on a supported PC.
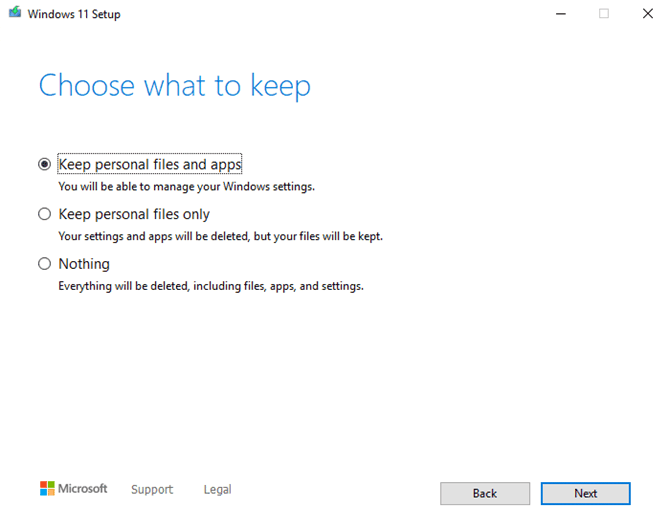
- Alternatively, download the Windows 11 ISO, mount it on your Windows 10 system, and run the setup. Choose to keep all your files and apps.
- Alternatively, download the Windows 11 ISO, mount it on your Windows 10 system, and run the setup. Choose to keep all your files and apps.
- Just follow the prompts to start and finish upgrading to Windows 11. You won’t run into any issues with TPM or Secure Boot.
Undo the changes if you want to
If you change your mind and want your PC to check for TPM and Secure Boot again, just run the Skip_TPM_Check_on_Dynamic_Update.cmd script a second time. This will turn the checks back on.
Related resource: How to Install Windows 11/10 with Digital License from USB
Temporarily use a supported computer to do the Windows 11 in-place upgrade
If you have another computer that meets all the Windows 11 requirements, you can use it to upgrade your main PC. This method is a bit more hands-on, especially with the internal hardware.
Things you need
- Make sure both computers boot the same way and have the same type of partition, which is usually UEFI mode and GPT type.
- Have the Windows 11 ISO file ready for the upgrade.
Upgrade a computer running Windows 10 or an older version of Windows 11
- Make sure both computers use the same boot method and partition type.
- Turn off both computers and move the boot drive from the PC that’s not supported to the one that is. Turn on the supported PC. It should start getting some devices ready.
- Once you’re in, put in the Windows 11 ISO and start the upgrade. Since this PC meets the requirements, the upgrade should go smoothly.
- When the upgrade’s done, turn off the PC, take out the boot drive, and put it back in the first PC.
If you don’t need to keep existing data
- Do a clean install of Windows 11 on the supported PC using the ISO file.
- Create an image of the drive using software like Macrium Reflect.
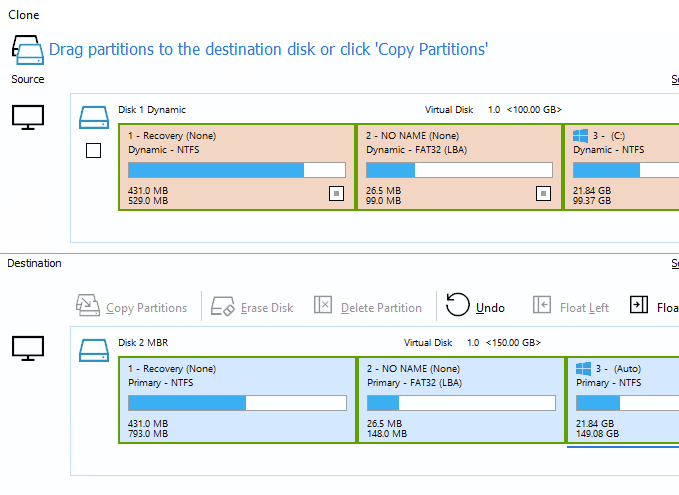
- Restore that image onto a drive in your main PC. Make sure your hardware has a digital license for Windows 10 or 11 or you’ll need to activate Windows again.
One last thing
It’s really important to be mindful though, as using Windows 11 on unsupported hardware is considered to be slightly risky and not really recommended by Microsoft. If security is a top concern, like for a work computer, you should either stop the upgrade or try to get a newer hardware for Windows 11.