Gigabyte’s App Center is a software suite packed with a lot of amazing features for Gigabyte motherboard users. It lets you manage many motherboard-specific tools like RGB Fusion, @BIOS, Cloud Station, and more. But for some people, this might seem like a bloatware and they prefer to just turn it off or even get rid of it completely. If you are the same, this guide will show you how to turn off the Gigabyte App Center through your system’s BIOS or UEFI and how to uninstall it from your Windows 11 or Windows 10 OS.
Also see: How to Uninstall Drivers in Windows 11
Page Contents
Step 1: Access the BIOS
Before you can get to the options to turn off things, you first need to get into your computer’s UEFI BIOS (Basic Input/Output System). If you’re new to BIOS, it’s the basic software that helps your computer’s hardware work together. Be careful when you’re in the BIOS because making the wrong changes can mess up how your computer works.
- Restart your computer. Watch the initial screen closely, which usually shows the manufacturer’s logo.
- While the computer starts up, you need to press a specific key to enter the BIOS setup. For most Gigabyte motherboards, this key is usually the “Delete” key. It might also be F2 or another function key depending on your model or setup. The screen will briefly show which key to press during startup.
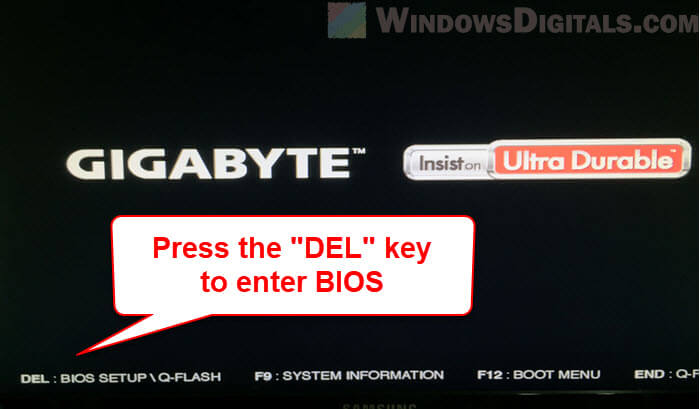
- Press the required key several times in a steady rhythm (don’t hold it down) until the BIOS screen shows up.
- Once you’re in the BIOS, navigate using your keyboard. The mouse usually doesn’t work in this environment.
Note: If you can’t get into the BIOS with these steps, check your motherboard’s manual or Gigabyte’s official website for specific instructions for your model.
Access BIOS/UEFI from Windows:
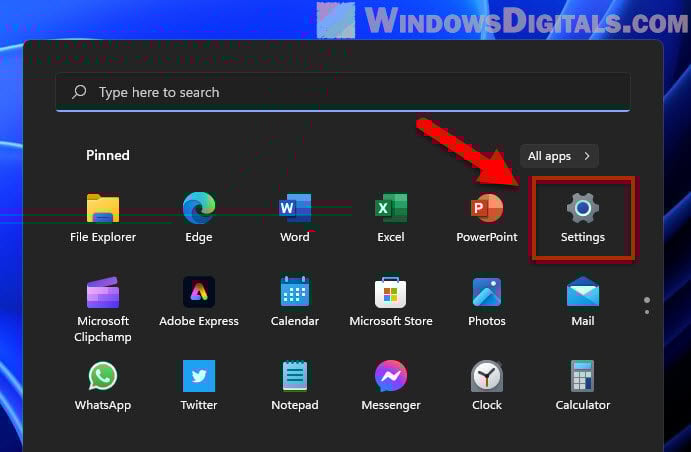
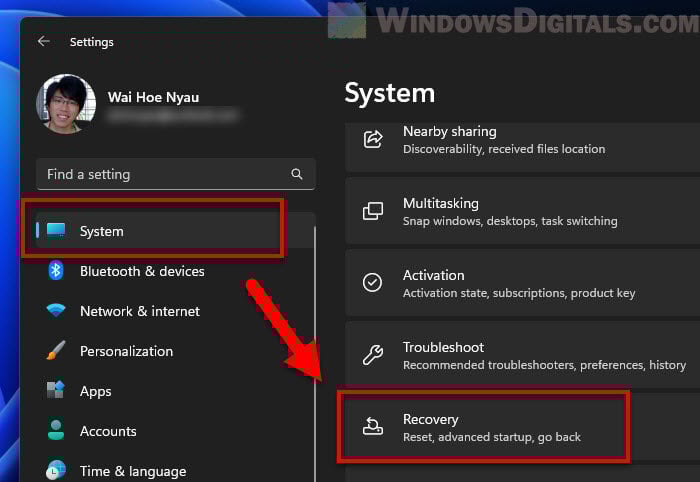
- Click on the “Start” button or press the Windows key on your keyboard.
- Select the “Settings” gear icon to open the Windows Settings app.
- In the left pane, choose “System.”
- On the right, click on “Recovery”.
- Under the “Advanced startup” section, click on “Restart now”.
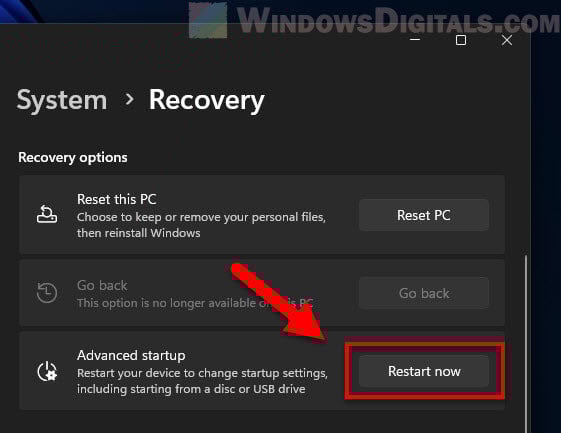
- Your computer will restart into the Windows Recovery Environment. Here, click on “Troubleshoot”.
- Next, click on “Advanced options”.
- Among the options, click on “UEFI Firmware Settings”.
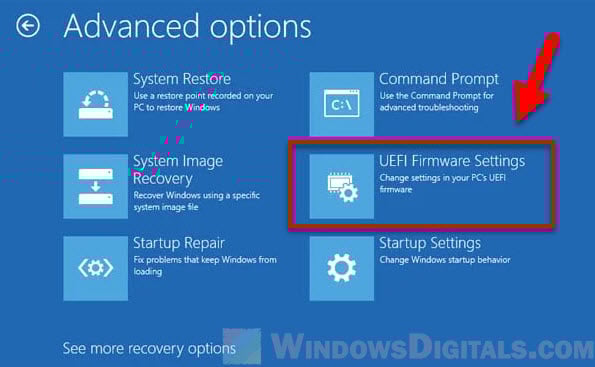
- You’ll see an option to “Restart” which will take you straight into your computer’s BIOS.
Note: The option to enter UEFI Firmware Settings might not be available on all systems. If you can’t find it, try the traditional way to get into the BIOS.
Now that you’ve made it into the BIOS, let’s find and turn off any features related to the Gigabyte App Center.
Related resource: How to Disable Desktop Pop Up Notifications on Windows 11
Step 2: Disable Gigabyte App Center in BIOS
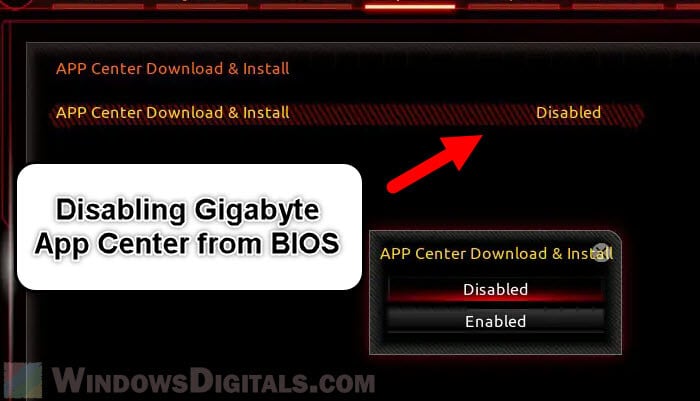
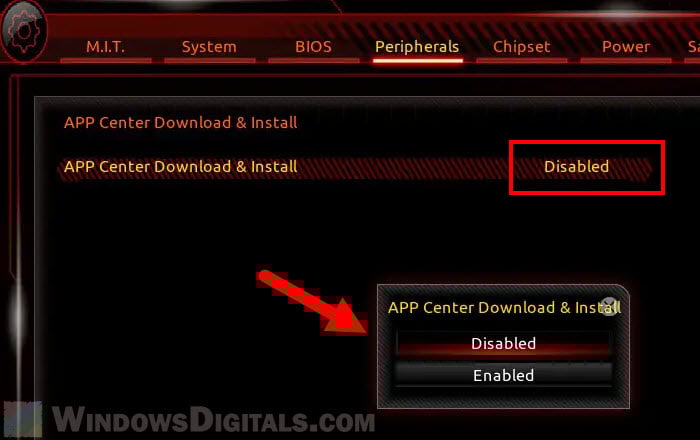
The Gigabyte App Center isn’t directly in the BIOS, but some settings related to it can be turned off there. This includes the “App Center Download & Install Configuration” which manages automatic updates for the App Center.
- When you boot into the BIOS, you might see a simple “Easy Mode” view.
- For more detailed settings, press “F7” on your keyboard or click on “Advanced options” or “Advanced Mode” shown on the screen.
- In Advanced Mode, go to a tab or menu called “Peripherals” or something similar using the arrow keys on your keyboard.
- Under the Peripherals section, look for “App Center Download & Install Configuration”.
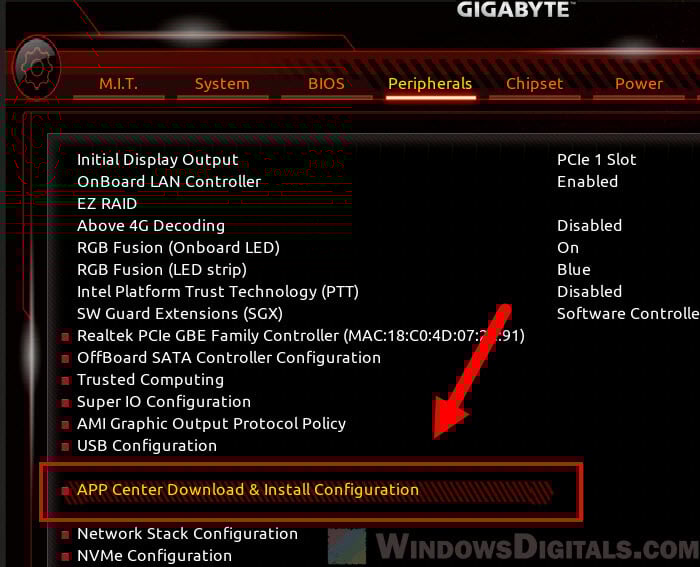
- Make sure you set this feature to “Disabled”.
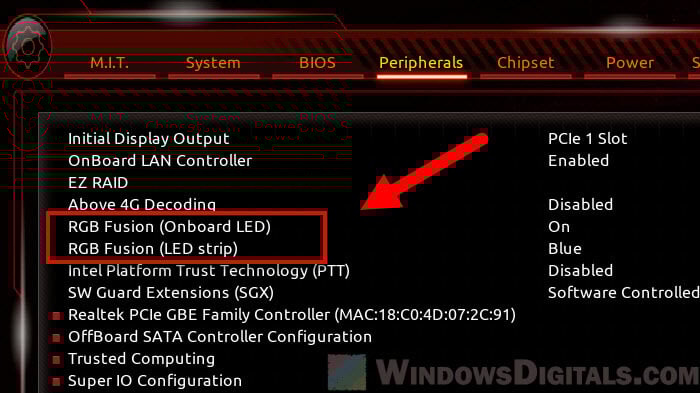
- While you’re there, it’s smart to check for other settings linked to Gigabyte App Center features like “RGB Fusion” or any onboard LEDs controls. Turn off any that you don’t need anymore.
- After you’ve changed everything you need, go back to the main BIOS screen or the exit menu and choose “Save & Exit”. This will save your changes and restart your computer.
Linked issue: Can’t Completely Uninstall a Driver in Windows 11 (Fix)
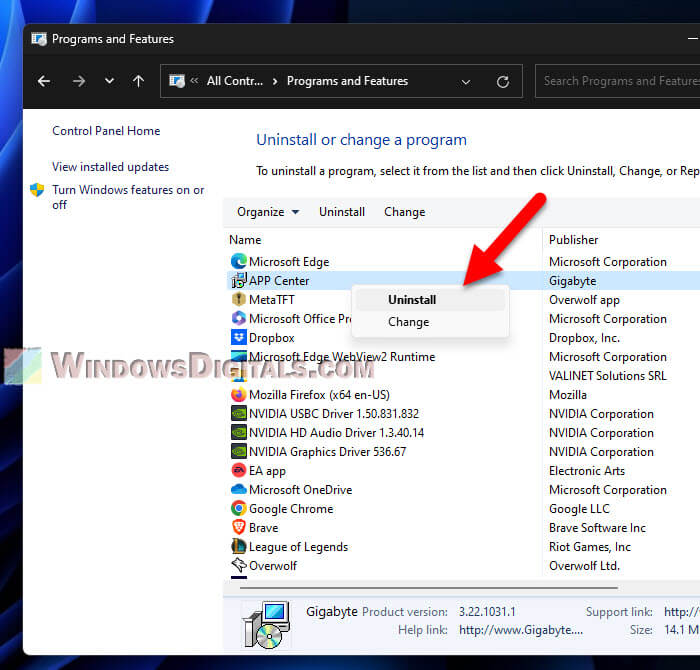
Step 3: Uninstall Gigabyte App Center from Windows
Now that you’ve disabled the BIOS-related features, you can uninstall the Gigabyte App Center software from your PC. The steps to so are pretty simple and similar to removing any other program from Windows.
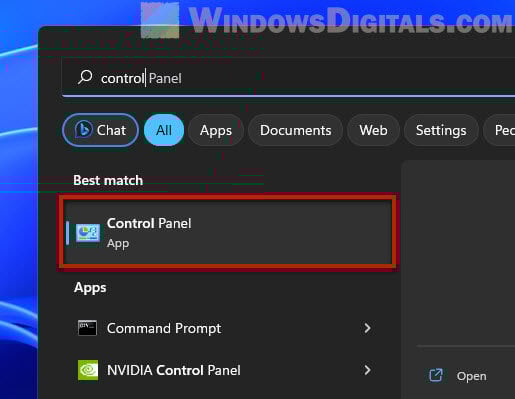
- Press the Windows key on your keyboard or click on the Windows icon in the taskbar to open the start menu.
- In the search bar, type “Control Panel” and press Enter. Click on the “Control Panel” app that shows up in the search results.
- In the Control Panel, find and click on “Programs and Features”. This shows you a list of all programs installed on your computer.
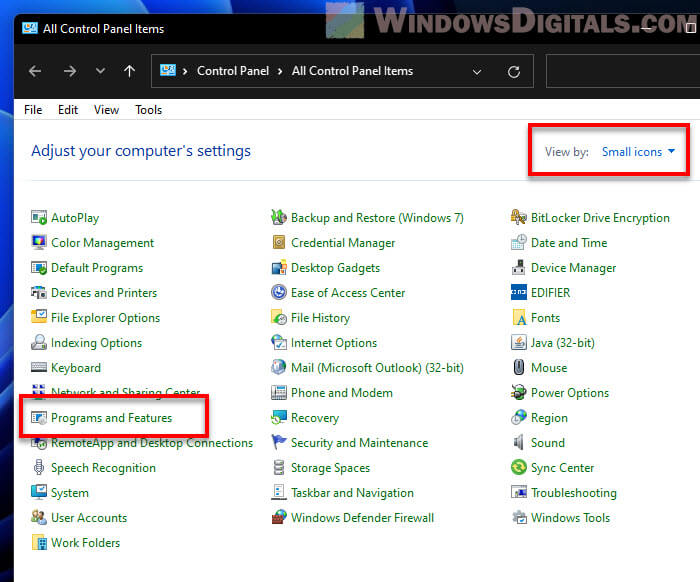
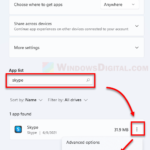
- Look through the list for “Gigabyte App Center” or any related Gigabyte utilities you want to remove.
- Once you find it, click on it to select it. At the top, you’ll see an “Uninstall” button. Click on it.
- Follow the on-screen instructions to finish uninstalling. This might include confirming your choice or choosing specific parts of the App Center to remove.
- After you’ve uninstalled it, it’s a good idea to restart your computer to make sure everything is completely gone.
Tip: Some people recommend using third-party uninstallation tools like “Revo Uninstaller” or “IObit Uninstaller” to make sure no leftover files or registry entries remain after uninstallation. These tools can be helpful, but they’re usually not necessary for most users.
With the App Center uninstalled from your Windows system, your computer should now be entirely free of the software, stopping it from reinstalling itself ever again if that’s what you were aiming for.