If a Windows 11 or 10 update downloads and installs, then rolls back after the restart with “Something didn’t go as planned. Undoing changes” and Windows Update shows error 0x800f0922, retrying usually fails the exact same way, sometimes for months. This guide will explain what causes it and how to fix it.
Also see: Windows 11 “Updates failed” with a “Retry” button
Page Contents
Why does error 0x800f0922 happen?
0x800f0922 is a fairly general error. It means one of the installers inside the update failed, so Windows rolls the whole update back. Microsoft lists insufficient disk space and problems with the .NET Framework or other components as the reasons.
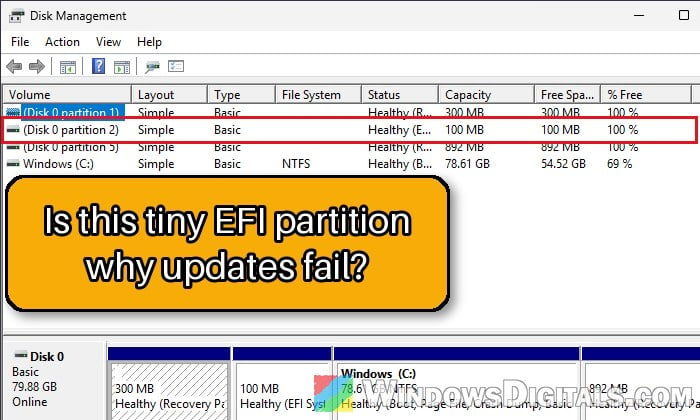
The “disk space” part often isn’t your C: drive, though. Your PC has a small hidden partition called the EFI System Partition, which holds the files your PC needs to boot. Updates may need to write new boot files there, and if the partition is nearly full, the update fails during the restart. Some antivirus and security apps, as well as tools from your PC’s maker, save their own files there and fill it up over time.
Of all the causes, this one is the best known. In May 2026, Microsoft confirmed that the May security update for Windows 11 failed with this exact error on PCs with little free space on the EFI partition, especially 10 MB or less, and fixed that in later updates. But a partition that’s almost full can still make updates fail.
Linked issue: Windows Update “Install error – 0x800f0993” in Windows 11
Disconnect your VPN and try again
This one takes a minute, so do it first. A VPN connection can get in the way of Windows Update, and Microsoft suggests turning it off for 0x800f0922.
Disconnect from the VPN, close the VPN app, then run Windows Update again.
Pro tip: How to Disable VPN in Windows 11
Free up space on the EFI System Partition
If the VPN wasn’t it, check the EFI System Partition. You can see it in Disk Management (press Win + X and select Disk Management), as a small partition on your system disk with the status “Healthy (EFI System Partition)“, often only 100 MB in size.
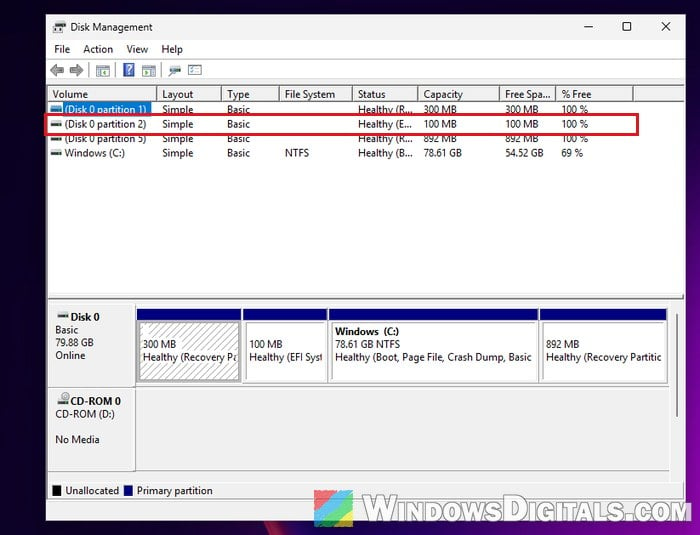
Don’t trust the free space Disk Management shows for it, though. On our test PC it listed the partition as 100% free, while it actually had about 65 MB free. So we’ll check the real free space with a command first.
Then we’ll delete the boot font files in its EFI\Microsoft\Boot\Fonts folder. These are only fonts for the screens you see while your PC starts, and Microsoft’s own instructions for this error delete these same files to make room. If you’d like to confirm the cause first, see the CBS.log check below the steps.
Be warned: You’re working on the partition your PC boots from. Type each command exactly as shown, and don’t delete anything else on it. A mistake here can leave your PC unable to start. If you’re not comfortable with commands, it’s better to get someone who knows to help you, or try the other fixes below first.
These steps are for PCs that boot in UEFI mode, which is how nearly every Windows 11 PC runs. Some older Windows 10 PCs still use the legacy BIOS mode instead. If the first mountvol command below gives an error, that’s probably your case, and this method doesn’t apply.
Here’s how to do it:
- Click Start, type “cmd“, and select Run as administrator for Command Prompt, then click Yes.
- Type the following commands one by one, and press Enter after each:
mountvol Y: /s
dir Y:\EFI\Microsoft\Boot\Fonts
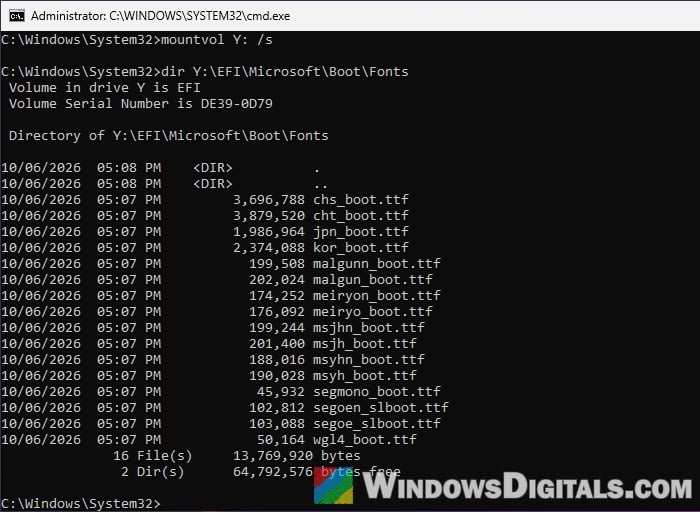
- The first command gives the EFI partition the drive letter Y:. If you already use Y:, pick another unused letter and use it in every command.
- The second lists the font files, and the last line shows how many bytes free the partition has. If it’s only a few MB, that’s very likely your problem.
- Now type the following commands one by one, and press Enter after each, to delete the font files and remove the drive letter again:
Y:
cd EFI\Microsoft\Boot\Fonts
del *.ttf
dir
C:
mountvol Y: /d
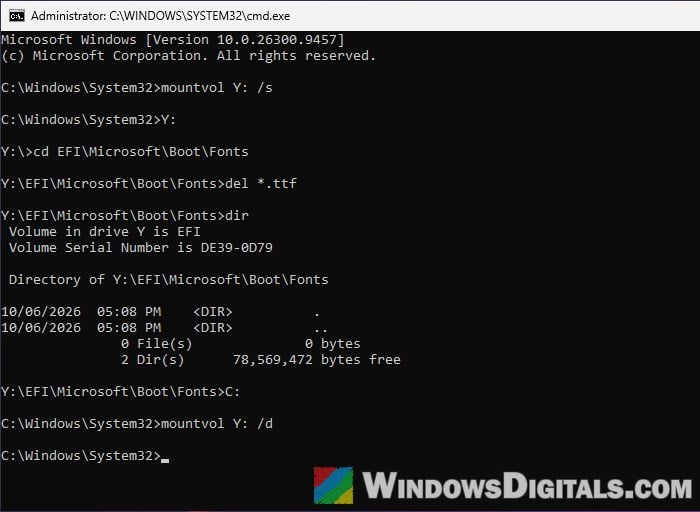
- The
dirline shows the folder is now empty and how much space is free. On our Windows 11 test PC, the font files took up almost 14 MB. - The last command removes the Y: letter, so the partition is hidden again.
- The
- Restart your PC and install the update again.
If the update now gets through the restart without “Undoing changes“, the full partition was the problem.
Not sure if this is your problem?
Windows keeps a detailed log of every update it installs at C:\Windows\Logs\CBS\CBS.log. After a failed attempt, copy that file to your desktop, open the copy in Notepad, press Ctrl + F and search for “SpaceCheck” or “ERROR_DISK_FULL“. If either one shows up near the end, the EFI partition is very likely what’s blocking the update.
Related problem: Windows Needs More Space for Windows 10/11 Update
Repair system files with DISM and SFC
If the EFI partition had plenty of free space, damaged system files could be what’s making one of the update’s installers fail. DISM repairs Windows’ component store (the files updates are built from), and SFC then checks the system files against it. These don’t fix 0x800f0922 for everyone, but they’re safe and worth a try.
Follow the steps below:
- Open Command Prompt as administrator again.
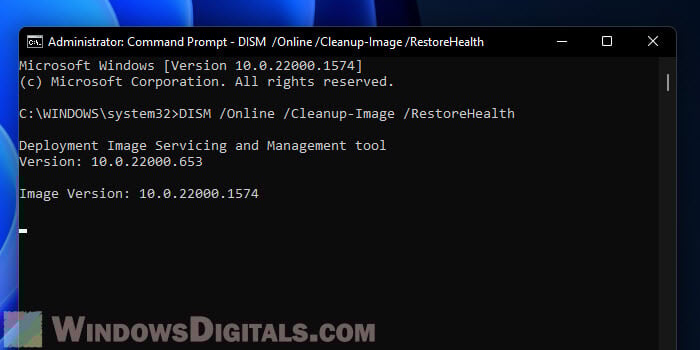
- Type the following command and press Enter. It can take a while.
DISM /Online /Cleanup-Image /RestoreHealth
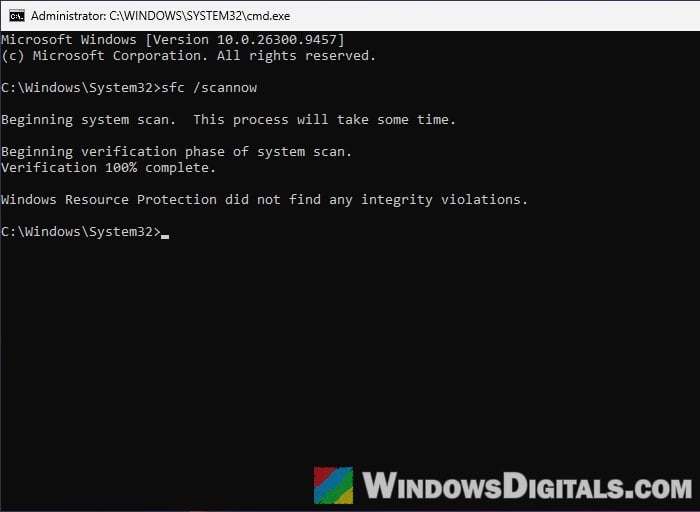
- When it’s done, type the following command and press Enter:
sfc /scannow
- Restart your PC and try the update again.
Turn on .NET Framework in Windows features
Microsoft also names .NET Framework problems as a cause of 0x800f0922, and sometimes .NET updates fail along with it. It’s a long shot, but turning on the .NET Framework features only takes a minute.
Here’s what you should do:
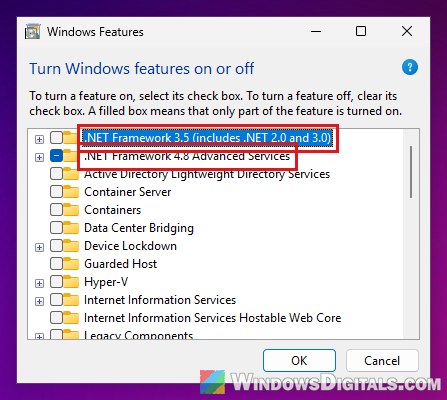
- Press Win + R, type “optionalfeatures“, and press Enter. This opens Turn Windows features on or off.
- Check “.NET Framework 3.5 (includes .NET 2.0 and 3.0)” and “.NET Framework 4.8 Advanced Services“.
- Click OK and let Windows download the files, then restart your PC if it asks.
After that, try the update again.
Might be useful: How to Check .NET Framework Version in Windows 11
Use “Fix problems using Windows Update” (Windows 11)
This option only exists in Windows 11. If you’re on Windows 10, you won’t find it in Settings.
If nothing above helped, this built-in option downloads a fresh copy of your current version of Windows and reinstalls it over the top. It’s a heavier fix, but it can get a stuck update to install when nothing else works. According to Microsoft, your apps, files and settings stay as they are. Keep your PC plugged in and connected to the internet until it’s done.
Here’s how to do it:
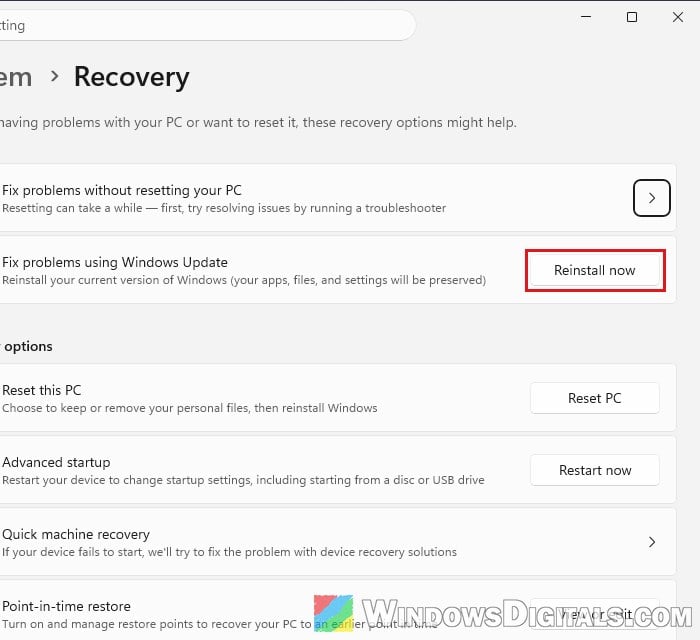
- Press Win + I and go to System > Recovery.
- Under “Fix problems using Windows Update“, click Reinstall now.
- Choose whether Windows should restart by itself 15 minutes after the installation, then click OK.
Once Windows is back up, open Windows Update and check for updates. In many cases, the update that kept failing with 0x800f0922 then installs normally.
Learn more: “Reinstall your current version of Windows” Message