The .NET Framework is a software development platform developed by Microsoft. It is made up of programming languages, libraries and tools for developers to build Windows applications such as games, web apps, etc. .NET Framework is also required to be installed in Windows in order to run an application built with .NET Framework.
A software built with a specific version of .NET Framework will require exactly the same version of .NET Framework to be installed on the Windows in order for it to run successfully. For example, if a game or app is built with .NET Framework version 4.8, you will need to install .NET Framework Runtime 4.8 in order to run the software.
Besides, .NET Framework is backward compatible. It means that the latest version of .NET Framework will includes all previous versions. For instance, if you install .NET Framework 4.8, you should also be able to run apps that requires older versions of .NET Framework such as 4.7, 4.6, 4.5, etc.
However, there are some exceptions where software may require explicitly a specific .NET Framework version in order to run. You will need to install the required version of .NET Framework in order to run the software successfully.
If you are not sure what version of .NET Framework is installed on your Windows, this guide will show you 3 methods on how to check .NET Framework version in Windows 11.
Page Contents
Method 1: Check .NET Framework version using PowerShell command
In Windows 11, you can execute a few lines of PowerShell commands to quickly check all the versions (including older versions) of .NET Framework ever installed on your PC. There is a Windows built-in command and also a community command-line tool you can use to check the .NET Framework version in Windows.
We recommend to try using the community tool called DotNetVersionLister first. If it doesn’t work, use the built-in command. You can execute these PowerShell commands in either Windows PowerShell or Windows Terminal (Windows 11) with administrative privileges.
DotNetVersionLister
The DotNetVersionLister is community tool available at GitHub. You don’t need to manually download or install anything. It can all be done using one line of command in PowerShell. To check .NET Framework version in Windows 11, follow the steps below.
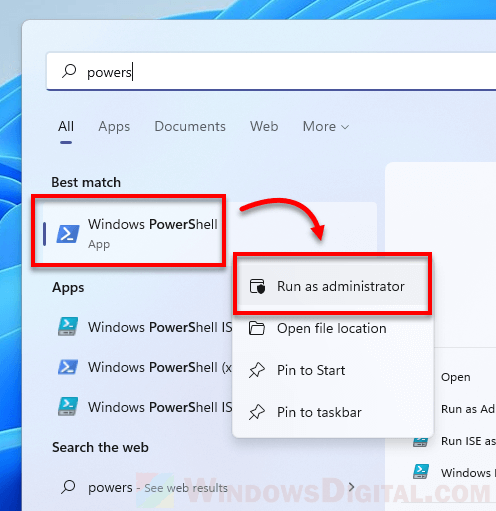
1. Search for Windows PowerShell via Start. Then, right-click the top result and select Run as administrator.
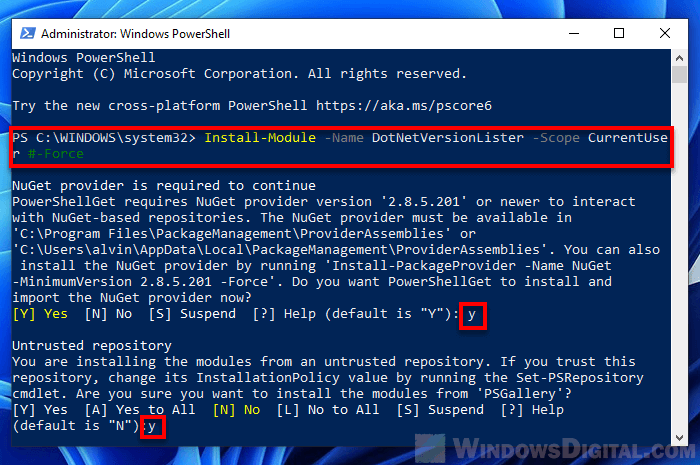
2. In the PowerShell window, enter the following command.
Install-Module -Name DotNetVersionLister -Scope CurrentUser #-Force
3. If you have never installed NuGet provider which the module requires, you will be prompted to install it. Type Y and hit Enter to continue.
4. When asked if you are sure you want to install the module, type Y and hit Enter to install it.
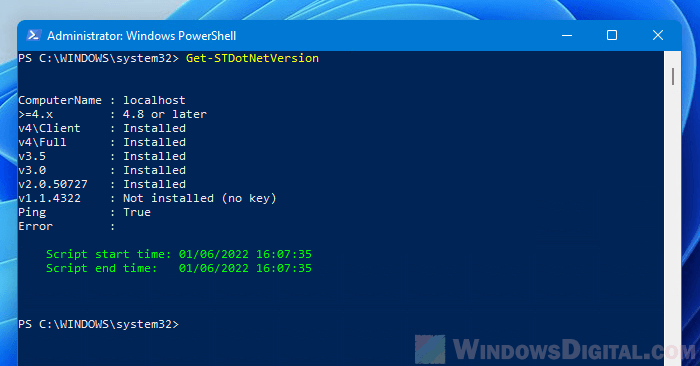
5. After installing the module, execute the following command to view the .NET Framework version in Windows 11.
Get-STDotNetVersion
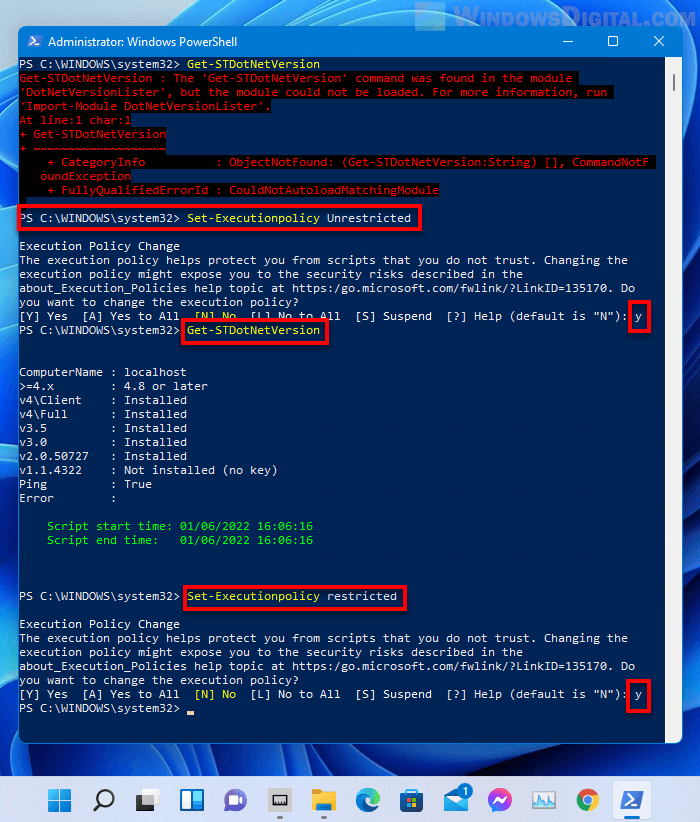
If you get error that says “The ‘Get-STDotNetVersion’ command was found in the module
‘DotNetVersionLister’, but the module could not be loaded“, it is because the Execution Policy is set to Restricted. This is to protect your PC from scripts that do not trust. You can temporary set the Execution Policy to unrestricted by typing the following command.
Set-Executionpolicy Unrestricted
Type Y and hit Enter to confirm the changes. Then, execute the get dot net version command to view the installed .NET Framework version.
Get-STDotNetVersion
After viewing your .NET version, set the execution policy back to restricted again. After entering the command below, type Y and hit Enter to confirm the changes.
Set-Executionpolicy Restricted
Check .NET version using Get-ChildItem command
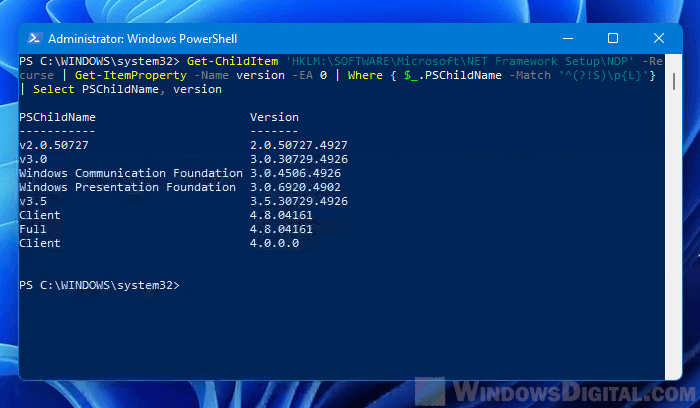
If you prefer not to install any module, you can use the following command instead to check the version of .NET Framework installed on your PC. The following command will work in both Windows PowerShell and Windows Terminal.
Get-ChildItem 'HKLM:\SOFTWARE\Microsoft\NET Framework Setup\NDP' -Recurse | Get-ItemProperty -Name version -EA 0 | Where { $_.PSChildName -Match '^(?!S)\p{L}'} | Select PSChildName, version
Method 2: Check .NET version via Command Prompt
To check .NET Framework version via Command Prompt in Windows 11, follow the steps below.
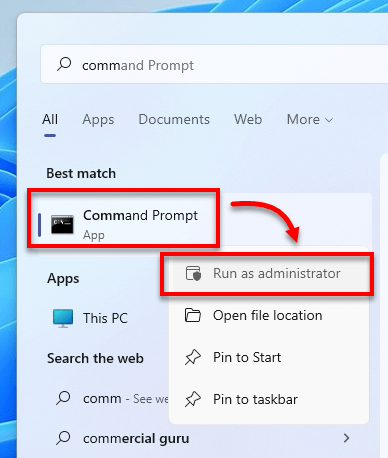
1. Click Start. Search for Command Prompt or CMD and run it as administrator.
2. In the elevated Command Prompt window, enter the following command.
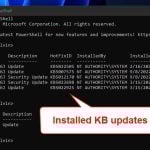
reg query "HKLM\SOFTWARE\Microsoft\Net Framework Setup\NDP" /s
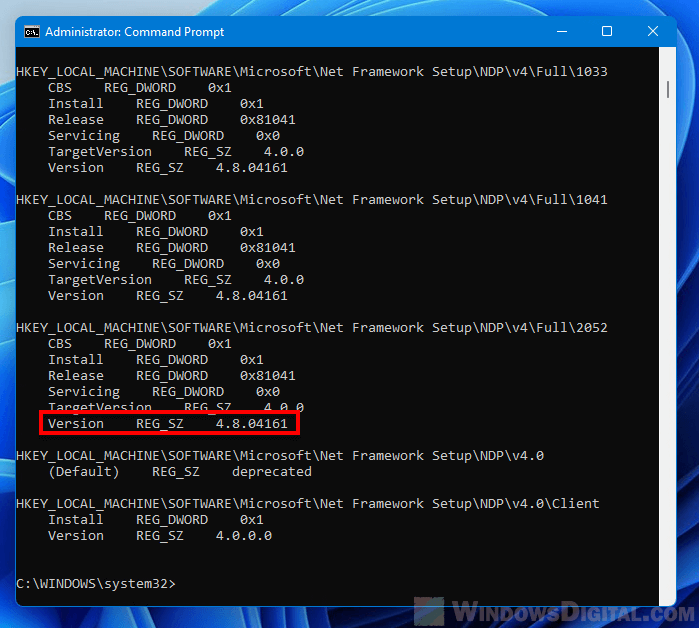
This command will display a list of .NET Framework versions that were installed in your Windows. The downside of checking .NET version using command in CMD as compared to using PowerShell is that the output that shows the installed .NET versions in CMD using the command above is not as clean and easy to view as using the PowerShell command in Windows PowerShell.
Method 3: Check .NET version through File Explorer
If you don’t want to use any command in CMD or PowerShell, you can manually check the installed .NET Framework versions via File Explorer in Windows 11. Here’s how to do so.
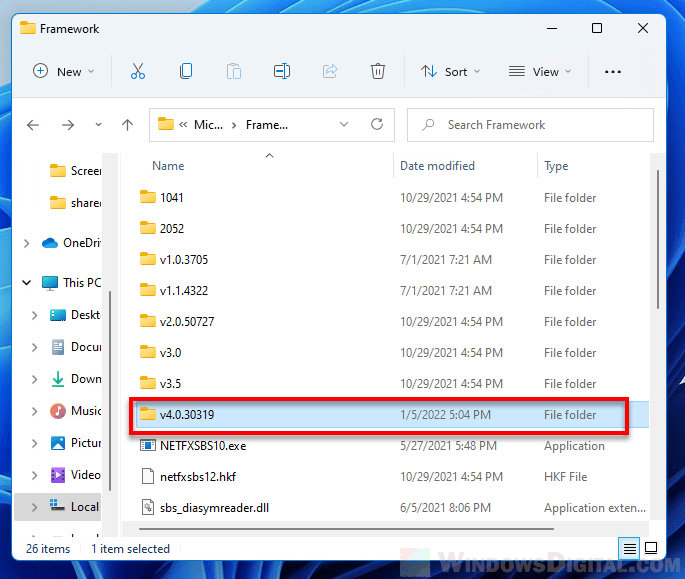
1. Open File Explorer and browse to the following location. Change the C: drive if your Windows was installed on a different drive.
C:\Windows\Microsoft.NET\Framework
2. Next, select the folder that shows that latest version.
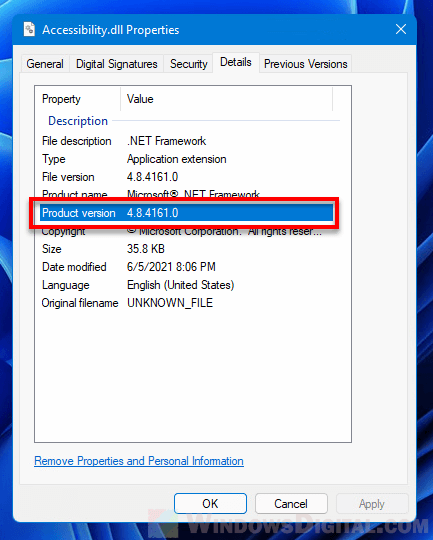
3. In the selected folder, right-click a file called “Accessibility.dll” and select Properties.
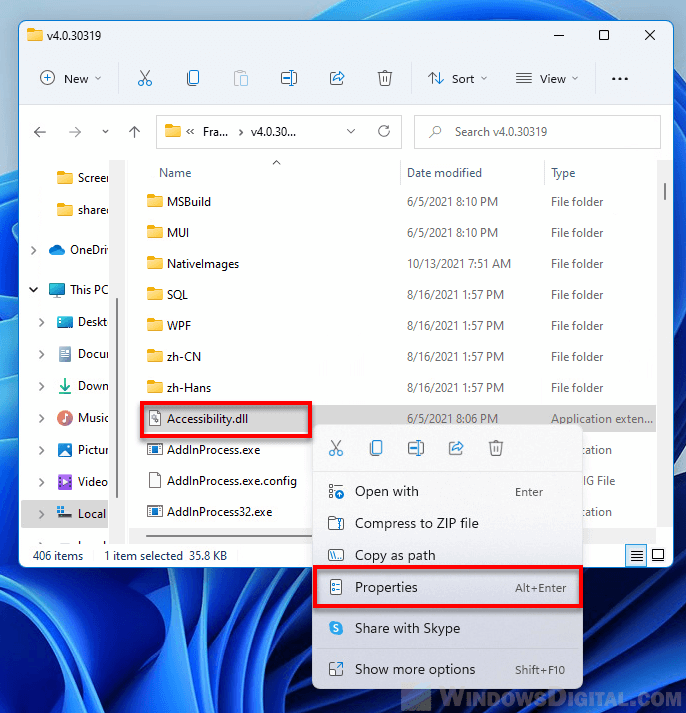
4. Then, click the Details tab. The installed .NET Framework version will be shown next to Product version.