If you’ve noticed that Windows 11 Settings only lets you set when the screen turns off and when the PC sleeps, you might be wondering where to set how long it waits before it hibernates. The timer usually sits right next to the sleep timer, but Windows hides it when hibernation isn’t available. This guide will show you three ways to change it, and what to do if it doesn’t show up at all.
Also see: How to Add Hibernate Option in Windows 11
Page Contents
What does the hibernate timer actually do?
Hibernate saves your open documents and apps to the drive and then turns the PC off, so it uses less power than sleep. The setting that controls when this happens is called “Hibernate after“, and it’s part of your current power plan.
According to Microsoft, it sets how long the PC stays asleep before it wakes up by itself and goes into hibernation. Windows only shows this timer when hibernation is available on your PC. Laptops with Modern Standby may not have hibernate turned on by default, which is one reason the timer can be missing.
Pro tip: Sleep vs. Hibernate vs. Hybrid Sleep vs. Shutdown in Windows
How to change the hibernate time
All three methods below change the same setting, so use whichever is easiest for you. If the timer doesn’t show up in Settings or Control Panel, skip to the last section first.
Using Settings
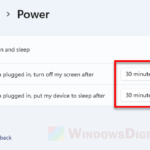
On PCs where hibernation is available, Windows 11 Settings shows the hibernate timer right next to the sleep timer.
- Press Win + I to open Settings.
- Go to System > Power & battery (just Power on desktop PCs).
- Click “Screen, sleep, & hibernate timeouts” to expand it.
- Next to “Make my device hibernate after“, choose how long Windows should wait. Laptops have separate choices for “Plugged in” and “On battery“, while desktops only show the plugged-in one.
If you only see the screen and sleep options here, try the Control Panel method below.
Using Control Panel (Power Options)
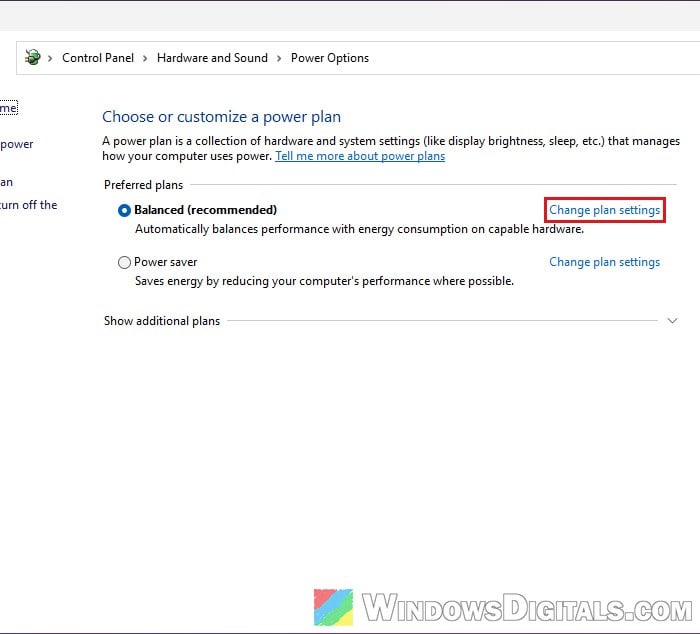
The older Power Options window has the same setting, under “Hibernate after“.
- Press Win + R, type
powercfg.cpland press Enter to open Power Options. - Click “Change plan settings” next to the power plan you’re using.
- Click “Change advanced power settings“.
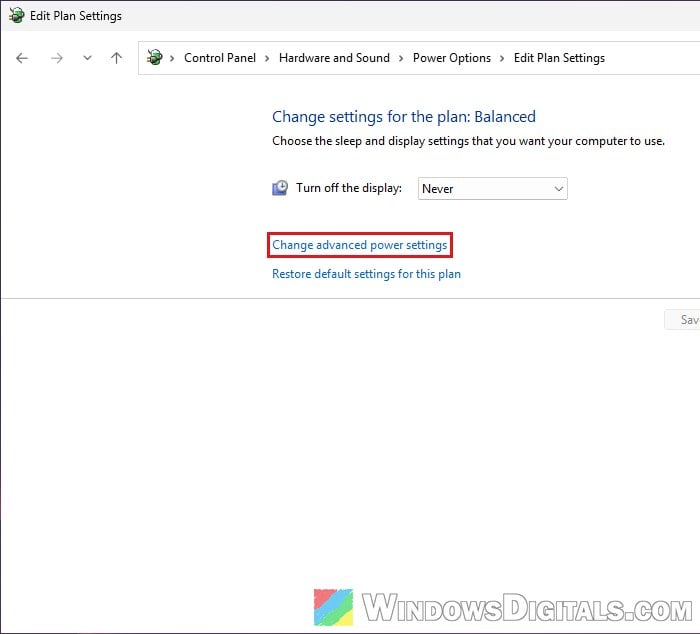
- In the window that opens, expand “Sleep“, then expand “Hibernate after“.
- Enter the number of minutes. On a laptop, set both “On battery” and “Plugged in“.
- Click “Apply” and then “OK“.
Next time the PC goes to sleep, it should switch to hibernation once that time has passed.
Using a command (powercfg)
If you prefer a quicker way, you can set the timer with the built-in powercfg command. The number at the end is in minutes.
- Search for “cmd” in the Start menu, right-click “Command Prompt” and select “Run as administrator“.
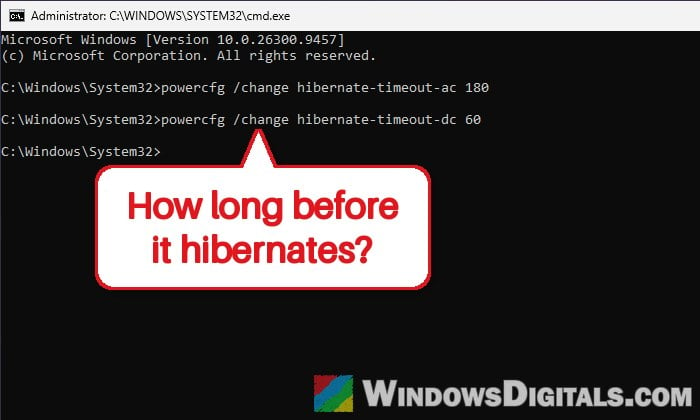
- Type the following command and press Enter to set the timer for when the PC is plugged in (180 minutes in this example):
powercfg /change hibernate-timeout-ac 180
- For laptops, set the timer for when it’s on battery as well (60 minutes in this example):
powercfg /change hibernate-timeout-dc 60
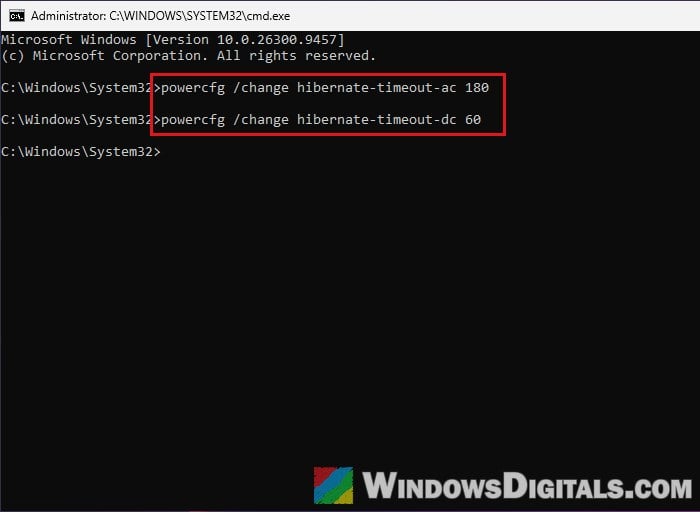
- To check that it worked, run the following command:
powercfg /query SCHEME_CURRENT SUB_SLEEP HIBERNATEIDLE
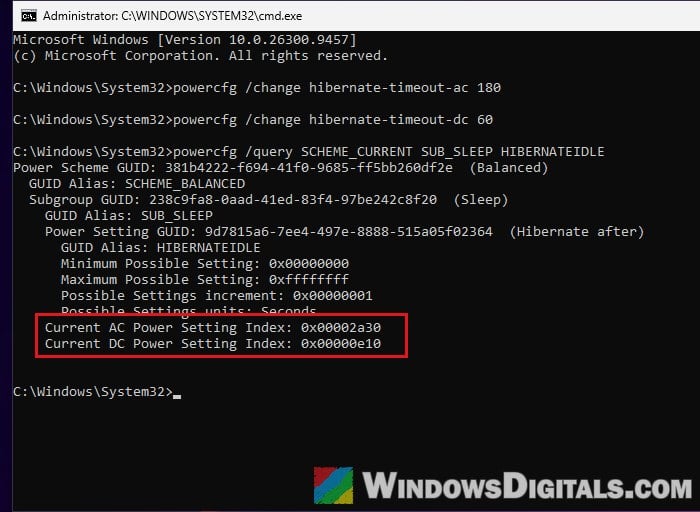
Look for “Hibernate after” in the result. The “Current AC Power Setting Index” (plugged in) and “Current DC Power Setting Index” (on battery) values are shown in seconds and in hexadecimal, so 180 minutes shows up as 0x00002a30 (10,800 seconds). Keep in mind that the command saves the time even on a PC where hibernation isn’t available, so it only has an effect once hibernate works.
Might be useful: Laptop Stuck on Black Screen After Sleep (Windows 11/10)
How to stop Windows from hibernating by itself
If your PC seems to shut down completely after it’s been asleep for a few hours, it may be going into hibernation, which looks just like a full shutdown when you come back. To stop that, set “Make my device hibernate after” or “Hibernate after” to “Never“, or use 0 in the commands above:
powercfg /change hibernate-timeout-ac 0
powercfg /change hibernate-timeout-dc 0
This only stops the automatic switch. You can still hibernate the PC yourself from the power menu if the option is there. On some Modern Standby laptops, though, Windows may still decide on its own when to hibernate, even with this set to 0.
What if the hibernate timer doesn’t show up at all?
If you can’t find the timer anywhere, hibernation is probably turned off, or your PC doesn’t support it. To check, open Command Prompt as administrator and run:
powercfg /a
It lists the sleep states your PC supports, and the ones that aren’t available with the reason why. If “Hibernate” is under the states that are not available, read the reason below it.
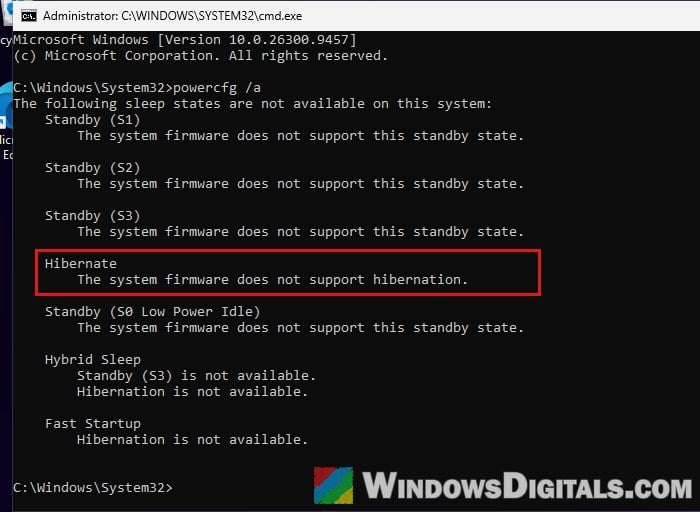
If hibernation is simply turned off, you can turn it back on:
- Open Command Prompt as administrator again.
- Type the following command and press Enter:
powercfg /hibernate on
- Close the window, then open Settings or Power Options again and look for the hibernate timer.
Don’t use the opposite command, powercfg /hibernate off, just to stop the timer, since it also turns off Fast Startup.
Please note that if powercfg /a says that the system firmware does not support hibernation, the command above won’t work. On some Modern Standby laptops, hibernate stays unavailable until Modern Standby itself is changed, which is a deeper change that I wouldn’t suggest unless you really need hibernate.