Sleep mode helps save battery and time. But what if you’re all set to get back to work and your laptop screen just won’t light up? This frustrating scenario, often called the black screen of death, is actually pretty common and happens across different laptop brands like Dell, Lenovo ThinkPad, Acer, ASUS, HP, MSI, and many more. It’s like your computer takes a nap and refuses to wake up.
In this guide, we’ll look at several troubleshooting steps to get your laptop’s screen from black to bright. We’ll cover everything from checking your power settings and updating your graphics drivers to considering hardware issues. Let’s find a way to fix this together.

Page Contents
Why a laptop might stay black after sleep
A black screen after sleep can be caused by a few different things.
- Sometimes, the issue is with the software, not the hardware. This can be from a recent update, or apps that can change how your laptop sleep and wake.
- Outdated or wrong drivers, especially graphics drivers, can cause issues like this.
- Wrong power management settings might stop your laptop from waking up properly.
- Though it’s less common, a problem with hardware like a bad RAM stick, hard drive, or even the motherboard can also cause the issue.
- Things like USB drives, external hard drives, or a second monitor can prevent your laptop from waking up.
Linked issue: Second Monitor Keeps Going to Sleep (Fix)
How to fix the laptop black screen after sleep issue
Since the cause of the problem can be different, you should try the following fixes in the order listed below to find what works.
Reset power configurations to default
Sometimes, your power settings can get messed up, which can cause problems when waking from sleep. Setting them back to the default settings in Windows might fix these issues.
- Press the Windows key, type “cmd” to look for the Command Prompt. Right-click on it and choose “Run as administrator”.

- Open the command line, type in
powercfg -restoredefaultschemesand hit Enter.
- After running the command, restart your laptop to see if the issue is fixed.
Might be useful: How to Stop Windows 11 From Turning Off Screen or Sleeping
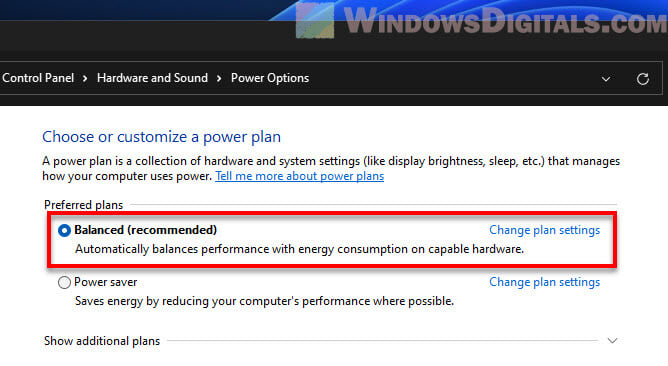
Set power plan to “Balanced”
If you’ve tweaked your power settings a lot, these changes might be causing your screen to stay black after sleep. Setting your power plan back to “Balanced” through the Windows settings might help fix the problem.
Note that manually choosing the “Balanced” plan won’t reset any custom settings within that plan. If you’ve made too many changes, the command line method in the first solution might work better.
- Press Win + S on your keyboard to open the search bar.
- Type “choose a power plan” into the search box and select it from the results.
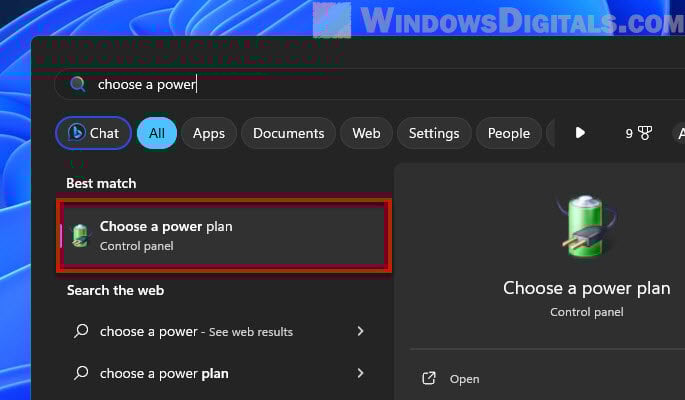
- Select the “Balanced (recommended)” option by clicking on its radio button.
- Close the Control Panel and restart your laptop.
Useful tip: How to Keep Laptop On When Lid is Closed in Windows 11
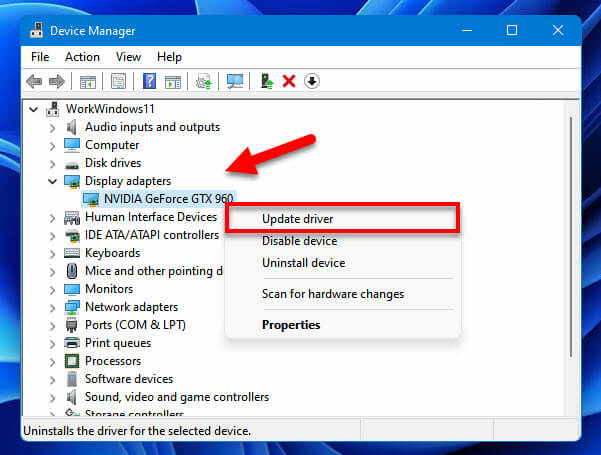
Update your GPU driver
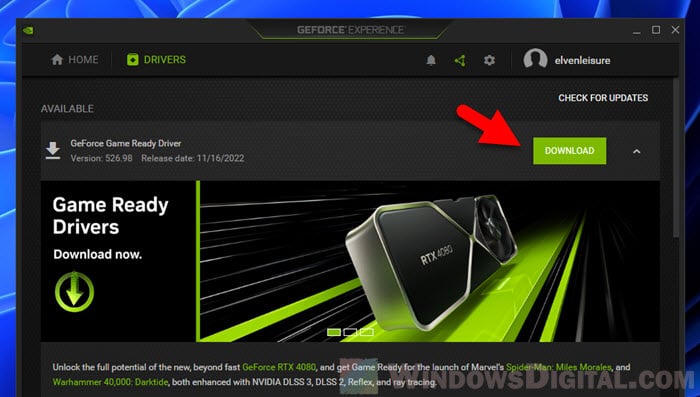
Many users on forums like Reddit have fixed their black screen (after sleep) problems by updating their graphics drivers. If you haven’t updated yours yet, doing so might just solve the issue.
There are three ways to update your graphics card in Windows 11 or 10. For more details, please see: How to Update Graphics Driver in Windows 11.
- Manually download the latest drivers from NVIDIA or AMD websites.

- Update the GPU driver through Device Manager in Windows.
- Update via NVIDIA GeForce Experience.
Rollback your graphics driver
Sometimes, the latest graphics driver might have bugs or compatibility problems. If you’ve just updated your driver and started having black screen issues, rolling back to an earlier version might help.
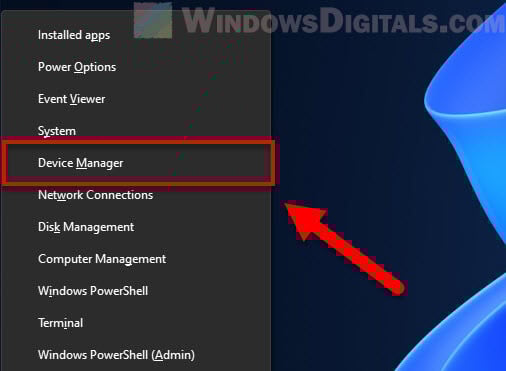
- Right-click on the Start button and choose “Device Manager”.
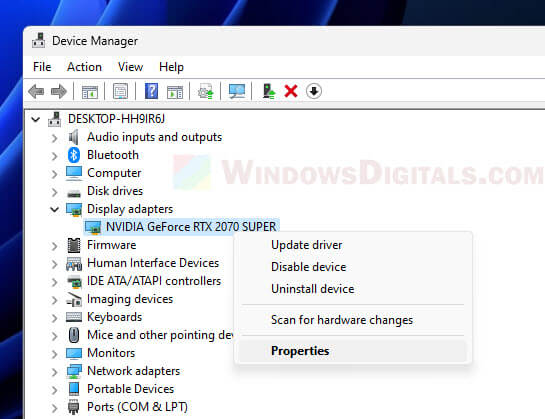
- Expand the “Display adapters” section.
- Right-click on your graphics card and choose “Properties”.
- Go to the “Driver” tab.
- Click on the “Roll Back Driver” button. If it’s grayed out, this means there’s no previous driver version to go back to.
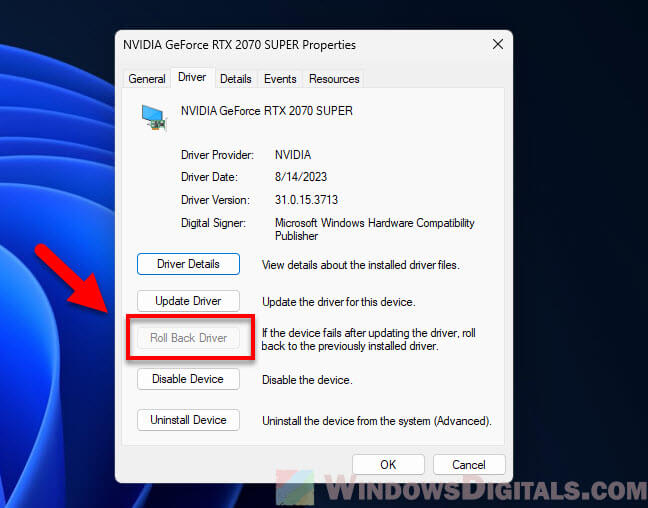
- A pop-up will ask why you’re rolling back. Pick the reason that fits best, and continue with the rollback.
- Once done, restart your laptop.
Rolling back to an earlier driver can be a good fix if a new driver is causing problems.
Related resource: How to Roll Back Windows 11/10 Update to Previous Version
Windows Update
Windows updates are not just about new features or looks; they also include fixes and improvements. If you’re behind on updates, the fix for the black screen might already be included in a recent patch.
- Press Win + i on your keyboard to open Windows Settings.
- Click on “Update & Security”.
- In the Windows Update tab, click on “Check for updates”.
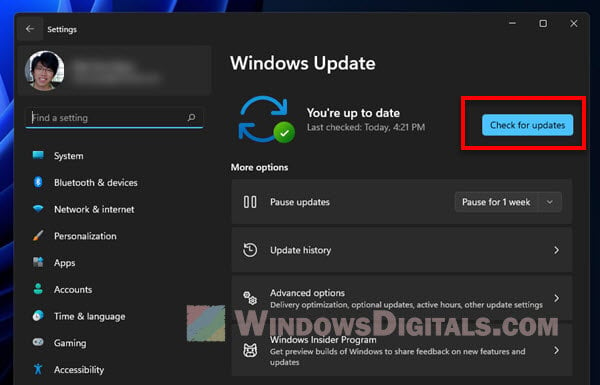
- Let the updates download and install.
- Once all updates are installed, it’s a good idea to restart your laptop.
Also see: “Turn off hard disk after: (minutes)” setting in Windows 11
Disable ULPS (Ultra Low Power Savings)
ULPS is meant to save power by turning off all but the main GPU in systems with more than one graphics card. While it sounds efficient, it can sometimes cause issues like crashes or black screens after waking from sleep.
Due to recent updates, especially from AMD, you now have to edit the system’s registry to change ULPS settings. If you’re going to do this, be very careful; wrong changes to the registry can cause other problems. Always make sure you have a restore point or backup before making changes.
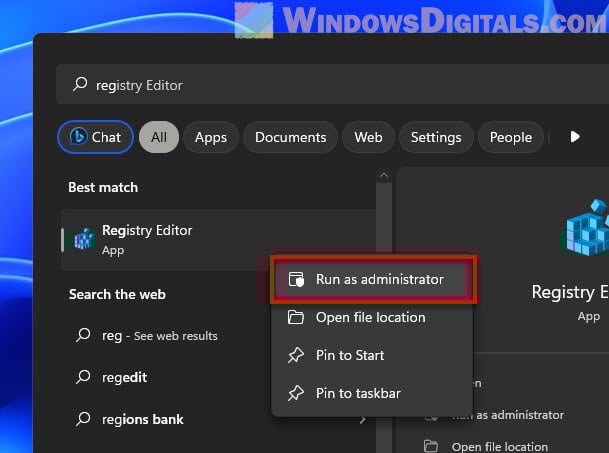
- Click on the Start button, type “regedit.exe”, and press Enter to open the Registry Editor.
- In the Registry Editor, press
F3. In the search box that pops up, type “EnableUlps” and hit Enter. - Keep hitting
F3until you find a registry entry called “EnableUlps” under a folder named “0000”. - Double-click on this entry and change its value from 1 to 0.
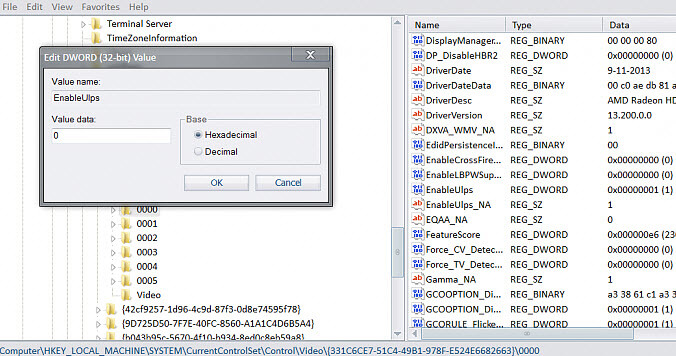
- Continue using
F3until you find another “EnableUlps” entry under a “0001” folder. - Double-click this entry and change its value from 1 to 0.
Turning off ULPS via the registry can help fix the black screen issue, but always check how your system acts after making changes.
Maybe hardware issue, specifically GPU
Sometimes, a black screen after sleep isn’t due to software or settings but a hardware problem, especially with the Graphics Processing Unit (GPU). Over time, or because of overheating, power surges, or physical damage, the GPU might start causing issues, like not waking up from sleep.
- Inspect your laptop for any physical damages, especially around the display and GPU area.
- Listen for unusual noises or clicks that might suggest something’s wrong inside.
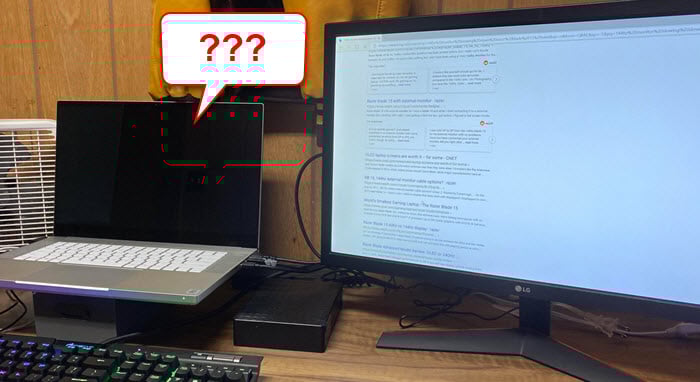
- Connect an external monitor to your laptop. If the monitor works fine but the laptop screen stays black, it might be a GPU issue.
- Try getting into your laptop’s BIOS or UEFI settings (usually by pressing keys like F2, F10, or DEL during startup). If the BIOS screen shows up fine, your GPU probably isn’t completely broken.
If you think there’s a GPU problem:
- If your laptop is still under warranty, contact the manufacturer’s support.
- If it’s out of warranty, you might want to take it to a professional technician to check and possibly replace the GPU.
Suggested read: GPU 100% Usage When Idle or Gaming (Good or Bad)
Check RAM using MemTest
In rare cases, not being able to wake up from sleep properly could be because of memory errors. RAM is important for lots of system functions, and any issues with it can cause unexpected behavior, including a black screen after sleep.
MemTest is a well-known tool for testing and finding problems with RAM. Using this tool can help you see if your memory sticks are to blame.
- Download the latest version of MemTest86 from their official website.
- Follow their guide to make a bootable USB or CD/DVD.
- Restart your laptop and boot from the USB or CD/DVD with MemTest86. You usually need to press a specific key (like F12, F8, or ESC) during startup to pick the boot device. This key can be different depending on the laptop brand.
- Let MemTest86 run through all its tests. It can take a few hours, depending on how much RAM you have and how many tests you do.
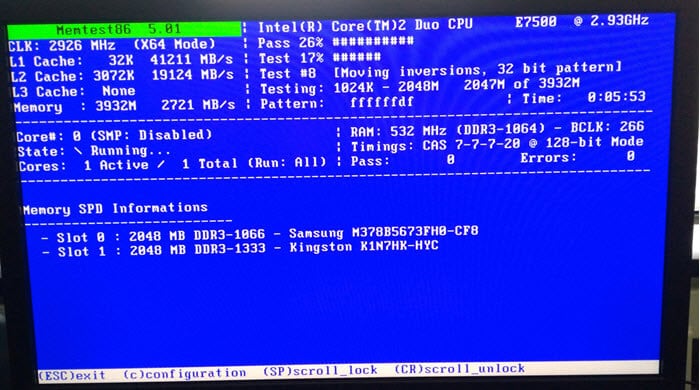
- Watch the results. If MemTest86 finds errors, it means there’s likely a problem with one or more of your RAM sticks.
If RAM issues are found:
- If you know how to work inside your laptop, try turning it off, unplugging it, and reseating the RAM sticks. Sometimes just reseating them can fix minor issues.
- If reseating doesn’t work or you’re not sure how to do it, you might need to replace the bad RAM stick. If your laptop is still under warranty, contact the manufacturer first.