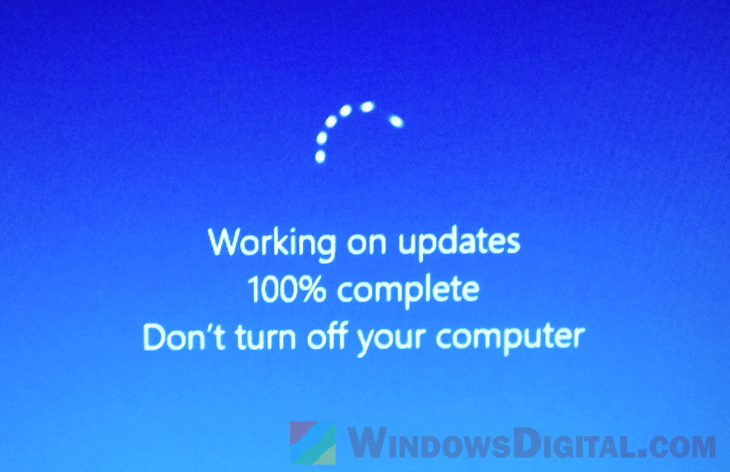
If you are having trouble restarting or shutting down your Windows 11 or Windows 10 computer and getting stuck on a loading screen that says “Working on Updates 100% Complete – Don’t turn off your computer“, there are a few things you need to know about this loading screen and how to resolve the issue.
This loading screen usually appears after a Windows update has been applied during a shutdown or restart. In most cases, the screen should only display for a few seconds or a few minutes at most after it reaches 100% complete. But there has been a common issue where users would get stuck on the “Working on Updates” screen even though it shows 100% complete after waiting for a long while. This guide will explain why and how to fix the issue.
Page Contents
Why is Windows 10 or 11 stuck on “Working on updates – 100% complete”?
Knowing what could cause the error can give you some ideas on what to look for when fixing the issue. The following are some common reasons that can cause your PC to get stuck on the “Working on Updates 100% Complete” screen.
- Slow disk speed can happen if your hard drive is old or full, or if it has bad sectors. This can mess with the update process and cause the screen to freeze.
- If Windows system files are corrupted, they can mess up the update process too. This might be from malware, sudden shutdowns, or updates that didn’t finish properly.
- If the Windows Update service isn’t starting or working right, Windows might not be able to finish updating, which can cause this issue.
- Outdated or incompatible drivers might clash with Windows updates, causing them to get stuck.
- Not having enough space on your hard drive can also stop the updates from installing properly.
Wait it out
Believe it or not, most of the time, waiting it out solves the issue without having to do anything to your system. If you’ve only waited 30 minutes or so, give it another two hours. If even after two hours, it still cannot go past the screen, move on to the next solution.
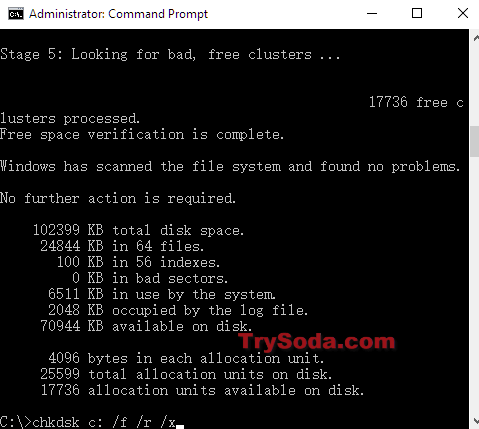
Run CHKDSK
Being stuck on the “Working on Updates 100% Complete” screen is often due to slow disk read and write speeds. This is common with older hard drives or those that haven’t been maintained well, and more so if it’s not an SSD. Running CHKDSK on your system drive might help sort out any disk errors or bad sectors.
If you’ve been stuck for a while, you might need to force restart your PC and then run the CHKDSK command to check your system drive. For how to do this, check out: How to Run CHKDSK in Windows 11/10.
Delete the SoftwareDistribution folder
Normally, you shouldn’t mess with the SoftwareDistribution folder, but if you’re having trouble with Windows Update, like getting stuck on the update screen, deleting files from this folder might help.
The folder contains files that Windows Update uses before installing them. If something goes wrong (like getting stuck), removing these files will make Windows Update start over and re-download the needed components.

Find the folder at C:\Windows\SoftwareDistribution. Select all the files, hit the DEL key to delete them, then restart your computer and try updating again.