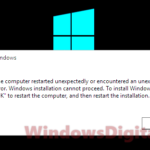
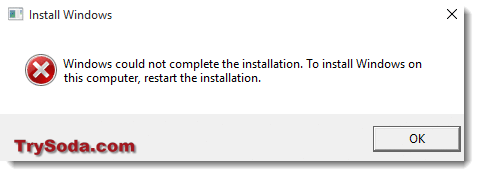
If you’re updating your PC to the latest Windows version, like Windows 11 or 10, you might see a message that says “Windows could not complete the installation. To install Windows on this computer, restart the installation.” But, it doesn’t really tell you what to do next.
We have, however, found some workarounds that might just work to resolve the “Windows could not complete the installation” error for Windows 11 and 10 installation. We will show you the fixes here in this post.
Page Contents
What is actually causing the error?
This specific error usually indicates that there’s a problem with the Windows setup itself. It could be because of corrupted installation files (which is quite common if the download has been paused multiple times), hardware issues, outdated drivers, or not having enough resources like CPU and RAM (which is rare) to process and complete the installation.
Also, the error can pop up if there’s a conflict with existing software or antivirus programs on your PC. These conflicts can stop the installation from doing what it’s supposed to do.
Note that this error can occur at any step of the installation process, be it you’re upgrading the OS, doing a clean install, or restoring your system.
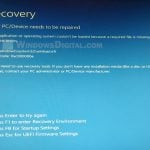
Force your Windows 10 or 11 to boot into Automatic Repair
If you’re seeing the “Windows could not complete the installation” error message during the installation or upgrade of Windows 11 or 10, one of the most common ways to fix it is to force your Windows to boot into the Automatic Repair screen (a screen before entering into Windows).
To force your Windows 10 or 11 to boot into Automatic Repair, follow the detailed steps below:
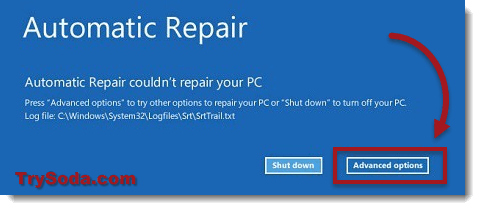
- If you’re on the “Windows could not complete the installation” error screen, turn off your computer by long-holding and pressing your computer’s power button until everything turns off.
- Turn on your PC again. As soon as it starts loading your Windows, turn it off again. Repeat this step three times (this is what it takes to trigger Windows to think that your PC is encountering a startup issue and will then boot into the Automatic Repair screen).
- It will then boot into the following screen. Click on “Advanced options.”
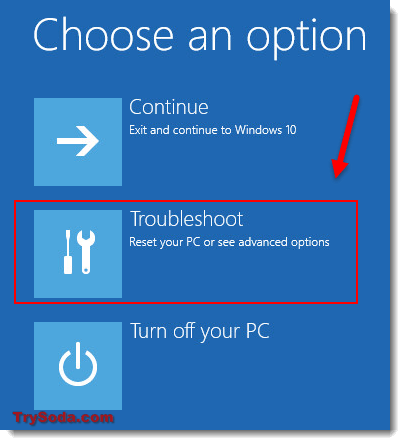
- Click on “Troubleshoot.”
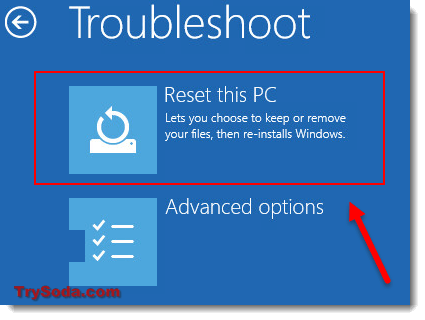
- Click on “Reset this PC.” Don’t worry, we’re not going to reset your PC.
- Click on “Keep my files.”
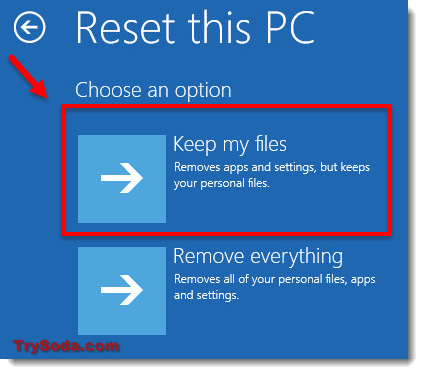
- Do not click “Reset.” Instead, just click “Cancel.”
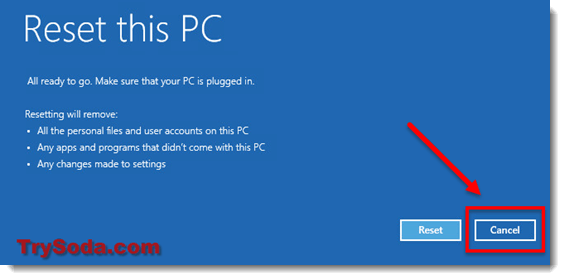
- Select “Continue.”
- The Windows 10 or 11 installation should resume now.
This method works because it clears any temporary files or corrupted data that may be causing the installation to fail.
Use the old OOBE MSOOBE method
The OOBE MSOOBE method is a classic way to fix the “Windows could not complete the installation” error on Windows 7 and 8. People have also said it works for Windows 10 and 11.
OOBE means “Out-of-Box Experience,” which is the setup you see when you first start your computer. MSOOBE means “Microsoft Out-of-Box Experience.” Using this method makes your computer run through the OOBE again and sets up a new account and user profile.
To fix the “Windows could not complete the installation” error with the OOBE MSOOBE method, do these steps:
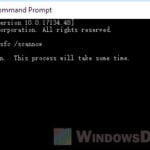
- At the error screen, hold Shift and press F10. This opens the command prompt.
- Type this in the command prompt:
cd %windir%/system32/oobe/ - Hit “Enter.”
- Next, type:
msoobe - Hit “Enter” again.
- In the window that comes up, make an account with a username and password.
- Restart your computer and check if the problem is gone.
This method makes a new user profile on your computer. This can solve problems stopping the installation from finishing.
Replace your installation disc, USB, or setup files
If nothing works, the disc or USB you’re using to install Windows 10 or 11 might be broken or damaged. You should get a new, working copy of your installation media.
It’s important to know, if you keep seeing this error or it happens with different tries to install, your computer might have a deeper problem. If so, it’s a good idea to get help from a pro to find and fix the problem.