SFC or System File Checker is a built-in tool in Windows that can be accessed via Command Prompt. It is a powerful tool that can scan for missing or corrupted system files, and automatically replace or repair them in both Windows 10 and Windows 11.
This guide will show you how to run the “sfc /scannow” command in two different scenarios:
- If you can boot into Windows and are able to open Command Prompt
- If you cannot boot into Windows and have to run SFC at boot
Also see: How to Startup Repair Windows 10/11 using Command Prompt
Page Contents
How to run “SFC /scannow” in Windows 11/10
If you are still able to boot into Windows on your PC and can access the command prompt without any issues, you can run SFC right away. Here’s how to do it.
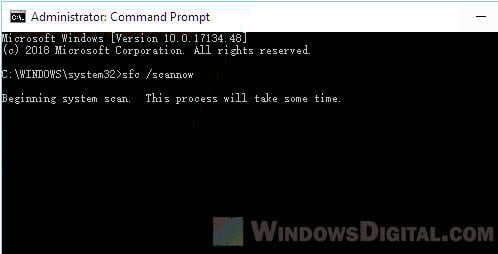
- On the Windows search bar, search for “Command Prompt“. Right-click on the search result and select “Run as administrator“. Note: You must have administrator privileges to run the SFC /scannow command.
- In the Command Prompt window, enter the following command:
sfc /scannow
- Press Enter to execute the command. The system file check process may take some time. Once completed, it will show you if any errors were found and repaired.
Run “SFC /scannow” command at boot
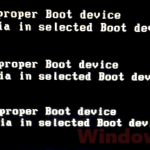
If your computer is in serious trouble and cannot boot into Windows, you can run the SFC /scannow tool before booting into Windows. There are two methods to force open a command prompt session:
Method 1: Force boot into Windows Recovery first
Here’s how you can force your PC to boot into Windows Recovery without using a Windows 10 or 11 installation media:
- Hold and press the power switch on your computer casing for about 5 seconds until your computer is completely turned off.
- Power it on again.
- As soon as the Windows loading screen shows up, hold and press the power switch again to force another shutdown.
- Repeat this for 3-4 times.
- When Windows detects too many failed startup attempts, it will automatically boot into Windows Recovery on the next restart.
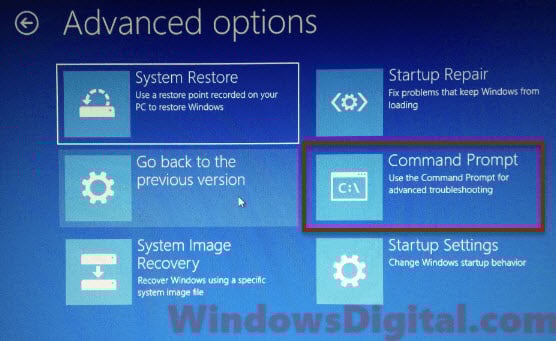
When you are in Windows Recovery, select “Troubleshoot” > “Advanced options” > “Command Prompt“. This will open up a command prompt session right away.
To run SFC, enter the following command in the command prompt window:
sfc /scannow
Method 2: Boot from a Windows 11/10 installation media
Another method to force open a command prompt at boot is by using a Windows 10 or 11 setup installation media. If you already have the Windows 10 or 11 installation media (in the form of DVD or USB), follow the steps in the second part of this method below to force open a command prompt during the Windows 10 or 11 setup.
If you don’t have a Windows 10 or 11 installation media, you can create one using the Media Creation Tool from Microsoft. You will have to do this on another computer that is working, as you will need access to the internet to download the media creation tool and to create a Windows 10 or 11 installation media from it.
- Go to this page.
- Under “Create Windows 10 installation media”, click on “Download tool now” to download the Media Creation Tool.
- Plug in an empty USB flash drive (or insert an empty DVD if you prefer to burn it onto a DVD instead).
- Run the Media Creation Tool.
- Click to accept the End-user License Agreement.
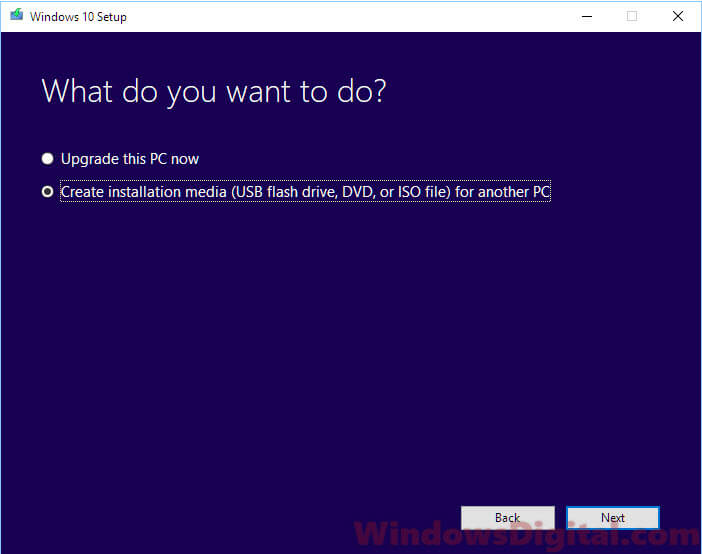
- Next, select “Create installation media for another PC“.
- Choose the correct settings for your Windows 10 or 11 version – language, Windows 10 or 11 version, 32-bit or 64-bit.
- When you’re prompted for which media to use, select USB flash drive (or DVD if you have a DVD instead).
- Click “Next” to start creating the Windows 10 or 11 installation media.
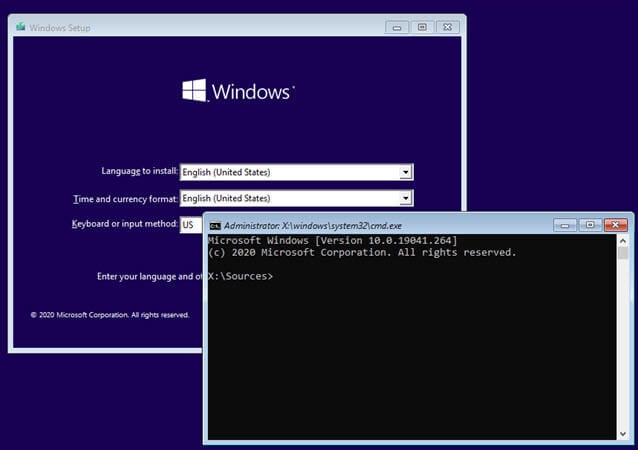
Once you have the Windows 10 or 11 installation media ready, plug it into your PC. While booting your PC, press the F2 key (or the DEL or F12 key, depending on what motherboard you have) to boot into BIOS. In the BIOS interface, look for and set the boot priority or first boot to the USB device (or DVD if your Windows 10 or 11 installation media is a DVD). Press F10 to save the settings and restart your PC again.
Your PC should then boot into the Windows 10 or 11 setup. While you are at the “Windows 10 or 11 setup” screen, press Shift + F10 keys to open up a command prompt session. From there, you can run the System File Check tool by executing the “sfc /scannow” command in the command prompt.
How to run “SFC /scannow” in Safe Mode
In some cases, you may want to run the SFC /scannow command in Windows 10 or 11 safe mode instead. Here’s how to force reboot your PC into “safe mode with command prompt”:
- In the start menu, while holding the Shift key, click on “Restart”.
- Windows will then boot into the Windows Recovery Environment screen.
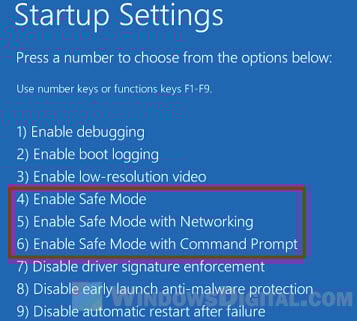
- In the Windows RE screen, select “Troubleshoot” > “Advanced options” > “Startup Settings“, and then click “Restart“.
- On the next restart, you will see a screen with several “startup settings”. Press the “6” key to boot Windows 10 or 11 into “Safe mode with command prompt“.
Once you are in safe mode with command prompt, you should then be able to enter and run the “sfc /scannow” command to attempt to fix whatever is corrupted or missing in the system files.