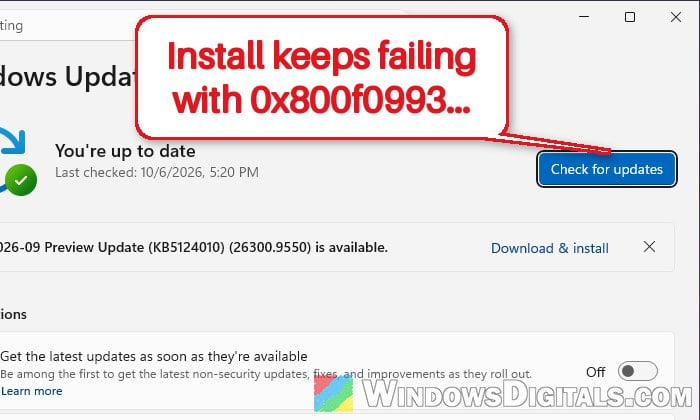
If an update in Windows Update downloads fine but then fails while installing with “Install error – 0x800f0993“, and it keeps coming back every time you click Retry, this guide will show you what the error usually means and how to get the update installed.
Also see: Windows 11 “Updates failed” with a “Retry” button
Page Contents
Why does 0x800f0993 happen?
Microsoft hasn’t published an explanation for 0x800f0993, and it isn’t in its list of common Windows Update errors. Answers on Microsoft Q&A and Reddit point to a damaged component store, the place where Windows keeps the files it needs to install updates. Some people get error 0x80073712 along with it, and that’s Windows’ own code for a damaged component store.
People have run into it with monthly security updates and with the 25H2 update. Some reports came from:
- PCs that missed updates.
- PCs that were upgraded from Windows 10.
Some users also noticed high CPU usage and battery drain while Windows kept retrying the update in the background.
Start with the quick repairs below. If they don’t help, go to the “Fix problems using Windows Update” option further down. It’s the fix most often recommended for this error, and it keeps your files and apps.
Repair the component store with DISM and SFC
You’ve probably seen DISM and SFC suggested a dozen times, but there’s a reason. DISM repairs the component store using clean copies from Windows Update, and SFC then repairs system files from that store. Microsoft recommends these two commands for similar component store errors. Some users say they didn’t fix 0x800f0993 on their own, but they only take a few minutes, so they’re worth trying first. Here’s how to run them:
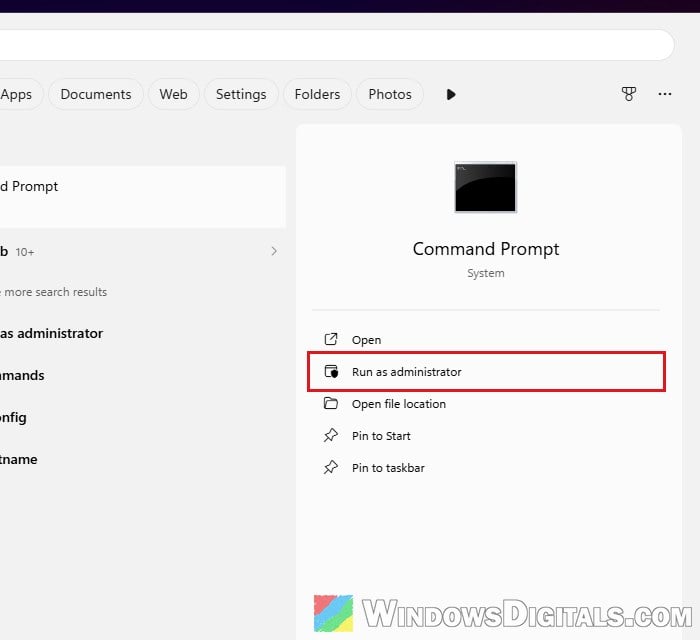
- Click Start, type “cmd“, and select Run as administrator for Command Prompt, then click Yes.
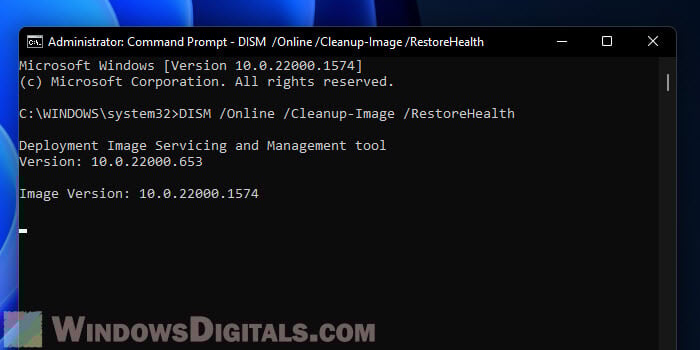
- Run the following command and wait for it to finish. It can sit at the same percentage for a while, so give it time:
Dism.exe /Online /Cleanup-Image /RestoreHealth
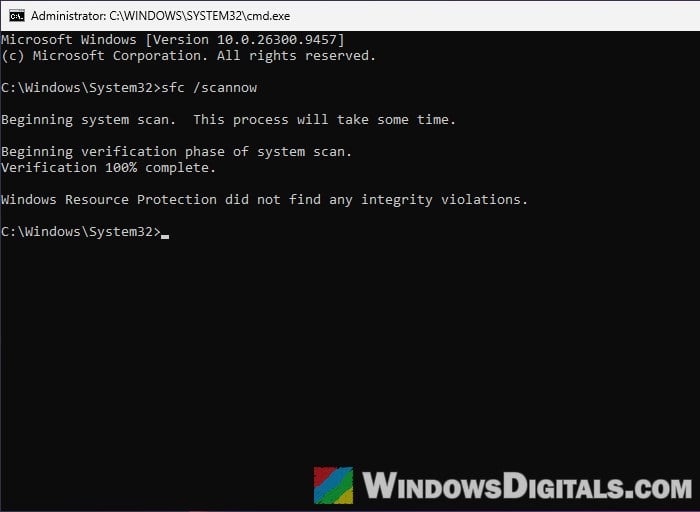
- Then run this one:
sfc /scannow
- Restart your PC.
After the restart, go to Settings > Windows Update, click Check for updates and try installing the update again.
Pro tip: Can I cancel “SFC /scannow” while it’s running?
Reset Windows Update components
If the update files Windows already downloaded are damaged, Windows Update can keep trying to install the same broken copy. Resetting its folders makes it download a fresh one. An Independent Advisor on Microsoft Q&A suggested this for 0x800f0993. Here’s how to do it:
- Open Command Prompt as administrator again, the same way as in the previous fix.
- Type the following commands one by one, and press Enter after each: The
/yanswers “yes” for you when Windows asks whether to also stop the services that depend on Cryptographic Services. Windows Update is stopped twice because it can start itself again while Cryptographic Services is being stopped. Messages like “is not started” or “has already been started” are fine.net stop bits net stop wuauserv net stop cryptsvc /y net stop wuauserv ren C:\Windows\SoftwareDistribution SoftwareDistribution.old ren C:\Windows\System32\catroot2 Catroot2.old net start bits net start wuauserv net start cryptsvc
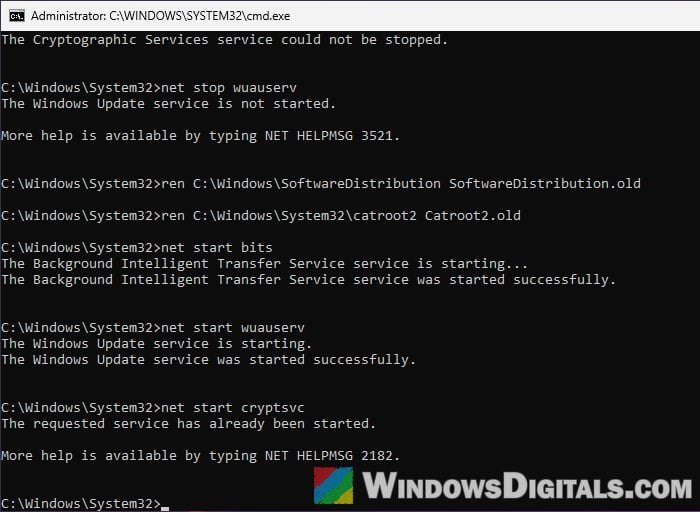
- If Cryptographic Services says it “could not be stopped”, carry on. When we ran this on Windows 11 26H2, both folders were still renamed without a problem.
- If renaming SoftwareDistribution says “Access is denied”, run
net stop wuauservonce more, then the samerencommand right after. - If renaming says “A duplicate file name exists”, you’ve done this before. Delete the old SoftwareDistribution.old or Catroot2.old folder first.
- Restart your PC and try the update again.
Linked issue: 0x80244011 Windows Update Error (How to Fix)
Use “Fix problems using Windows Update”
This is the fix most often recommended for this error. Windows 11 has a built-in option that reinstalls your current version of Windows through Windows Update. According to Microsoft, it keeps your apps, files and settings. A user on Reddit confirmed it got the update installed after SFC and DISM didn’t help, and it’s what helpers on Microsoft Q&A recommend for this error.
Please note that the option isn’t there on some work or school PCs managed by an organization, and it needs Windows 11 with the February 2024 optional update or a later update installed.
Before you start, unplug external devices you don’t need and turn off any third-party antivirus. Keep your PC plugged in and connected to the internet the whole time, then follow the steps below:
- Press Win + I and go to System > Recovery.
- Under “Fix problems using Windows Update“, click Reinstall now.
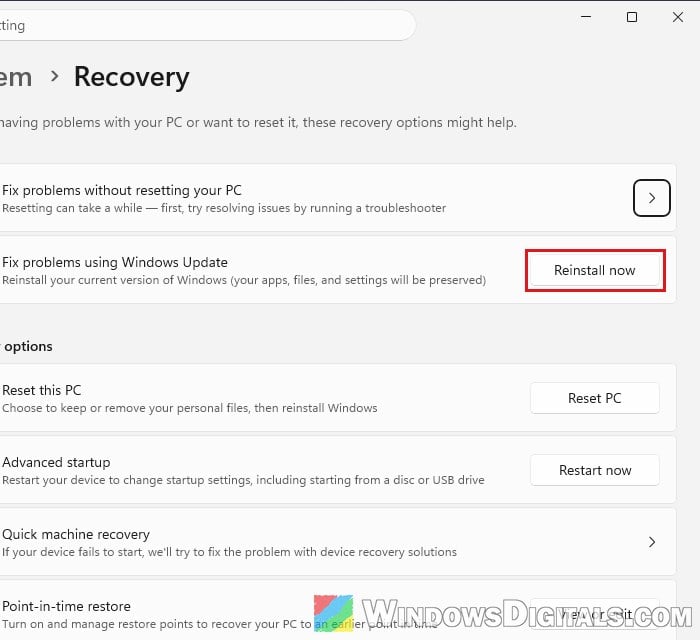
- Let Windows download and prepare the files. It can take a while, and your PC will restart to finish.
When it’s done, open Windows Update and try the update again.
Learn more: “Reinstall your current version of Windows” Message
Do an in-place upgrade with the Windows 11 ISO
If the option above isn’t available or fails too, an in-place upgrade does the same kind of repair with Microsoft’s own installation files instead of Windows Update. On Reddit, a user stuck with 0x800f0993 on an August security update did exactly this and confirmed the error was gone afterward.
Back up anything important first, just in case. Then follow these steps:
- Go to
https://www.microsoft.com/software-download/windows11. - Under “Download Windows 11 Disk Image (ISO) for x64 devices“, open the Select Download list and pick the Windows 11 ISO.
- Click Confirm.
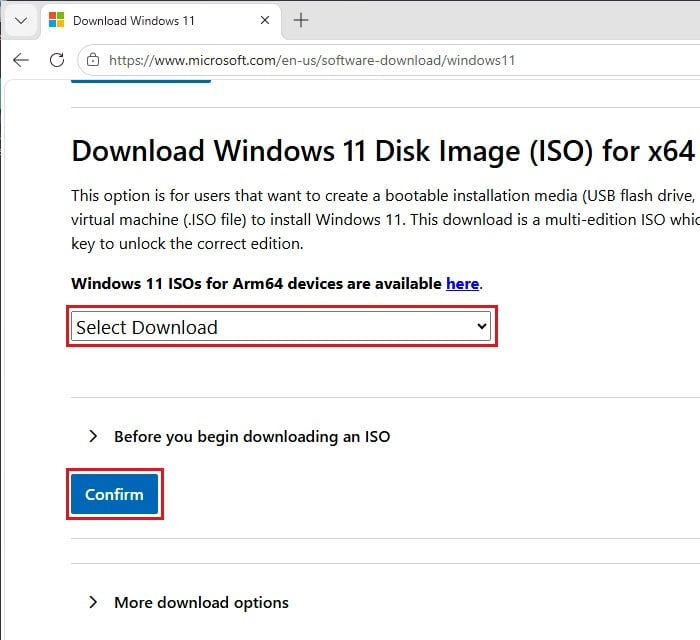
- Pick your language from the list that appears and follow the prompts to download the ISO.
- Double-click the downloaded ISO file to open it.
- Run setup.exe and follow the prompts.
- Make sure “Keep personal files and apps” is selected before you start the installation.
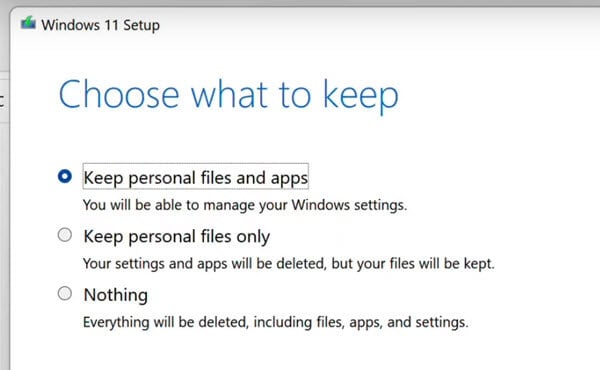
After the upgrade, check Windows Update again. The update that kept failing should now install, or no longer be needed.
Might be useful: In-place Upgrade of Windows 11 on Unsupported Hardware