If Windows Update downloads an update fine but then fails while installing it with “Install error – 0x800f0991” (or “We couldn’t install this update, but you can try again (0x800f0991)” for the 25H2 update), and clicking Retry only gets you the same error, there are still a few things you can do. Some people haven’t been able to install a single update for months because of it. This guide will show you what you can do to get Windows updating again.
Also see: Windows 11 “Updates failed” with a “Retry” button
Page Contents
What does error 0x800f0991 mean?
Microsoft hasn’t published an explanation for this error code, and there’s no official fix for it yet.
It shows up with the Windows 11 version 25H2 feature update and with the monthly security updates on 25H2. It also happens on brand-new PCs that still have the maker’s factory installation of Windows, so it’s not something you did. The most likely cause is damaged update or system files, which would explain why the same update fails no matter how often you retry.
You might have already tried sfc /scannow and DISM, since those are what most guides suggest first. For this error, they often don’t help on their own.
Linked issue: Windows Update “Install error – 0x800f0993” in Windows 11
Reset Windows Update components
Resetting the Windows Update components only takes a few minutes, so it’s worth trying first. It clears the update files Windows has already downloaded, so Windows Update downloads a fresh copy instead of trying the same one again. It has fixed 0x800f0991 for some people, but not for everyone.
Here’s how to do it:
- Click Start, type “cmd“, and select Run as administrator for Command Prompt, then click Yes.
- Type the following commands one by one, and press Enter after each:
net stop usosvc
net stop wuauserv
net stop bits
ren C:\Windows\SoftwareDistribution SoftwareDistribution.old
net stop cryptsvc /y
ren C:\Windows\System32\catroot2 Catroot2.old
net start cryptsvc
net start bits
net start wuauserv
net start usosvc
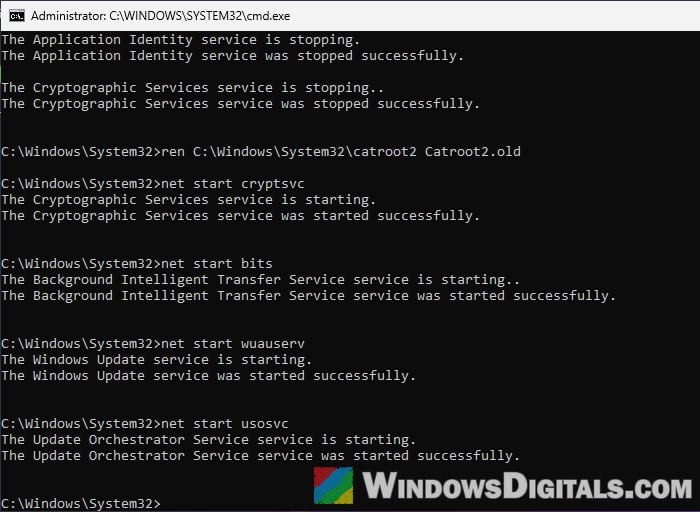
- The first line stops the Update Orchestrator, which otherwise starts Windows Update again in the background and keeps the folder locked.
- Messages like “is not started” or “has already been started” are fine.
- If a
rencommand says “Access is denied“, a service started again before the rename. Run thenet stopcommands above it once more, then therencommand. - If it says “A duplicate file name exists“, you’ve done this before. Delete the old SoftwareDistribution.old or Catroot2.old folder first and run it again.
- Restart your PC and try the update again.
Use “Fix problems using Windows Update”
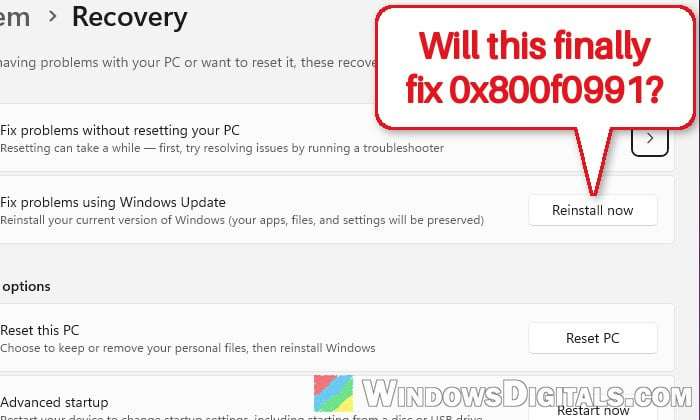
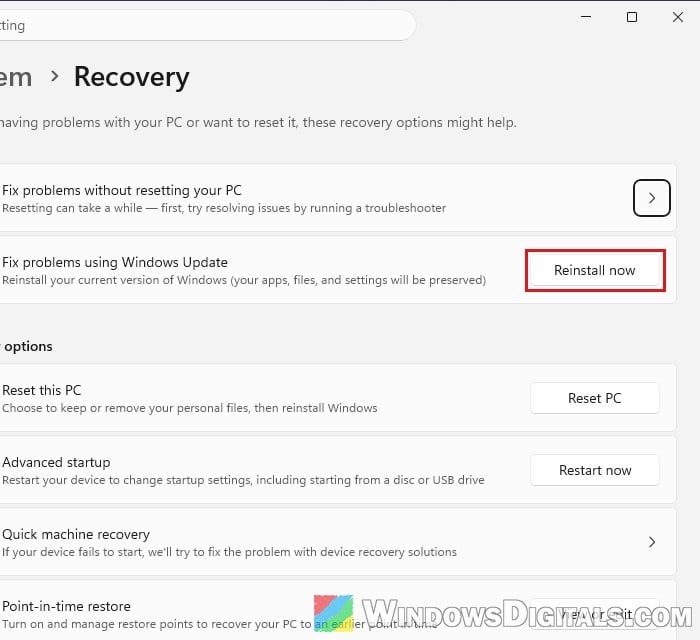
If the update still fails, this is the fix that has worked for the most people with 0x800f0991. Windows 11 has a built-in option that reinstalls your current version of Windows through Windows Update, which repairs system files along the way. According to Microsoft, it keeps your apps, files and settings.
It can take around an hour, mostly spent installing, and the screen may go black for a few minutes at some point. Leave it alone until it’s done. Keep your PC plugged in and connected to the internet the whole time.
Follow the steps below:
- Press Win + I and go to System > Recovery.
- Under “Fix problems using Windows Update“, click Reinstall now.
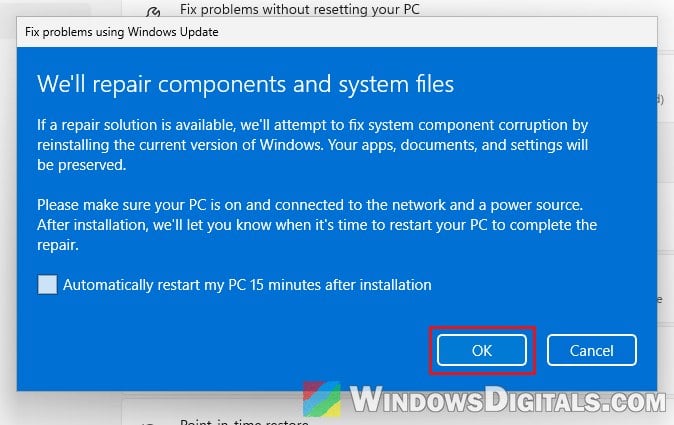
- Check “Automatically restart my PC 15 minutes after installation” if you want Windows to restart by itself, then click OK.
- Let Windows download and install the files. If you didn’t let it restart by itself, restart your PC when it’s ready.
When it’s done, open Windows Update and check for updates again. The update that kept failing should now install.
Learn more: “Reinstall your current version of Windows” Message
What if the option isn’t there?
Microsoft says “Fix problems using Windows Update” isn’t available on PCs managed by a work or school organization, and on PCs where Windows Update policies are set (for example, a policy that holds the PC on a certain Windows version or delays updates). It also needs Windows 11 with the February 2024 optional update or a later update installed. If you can’t use it, the in-place upgrade below does the same kind of repair.
Do an in-place upgrade with the Windows 11 ISO
An in-place upgrade reinstalls Windows from Microsoft’s own installation files instead of through Windows Update, while keeping your files and apps. Back up anything important first, just in case.
Before you start, unplug external devices you don’t need and turn off any third-party antivirus. Then follow these steps:
- Go to
https://www.microsoft.com/software-download/windows11. - Under “Download Windows 11 Disk Image (ISO) for x64 devices“, open the Select Download list and pick the Windows 11 ISO.
- Click Confirm.
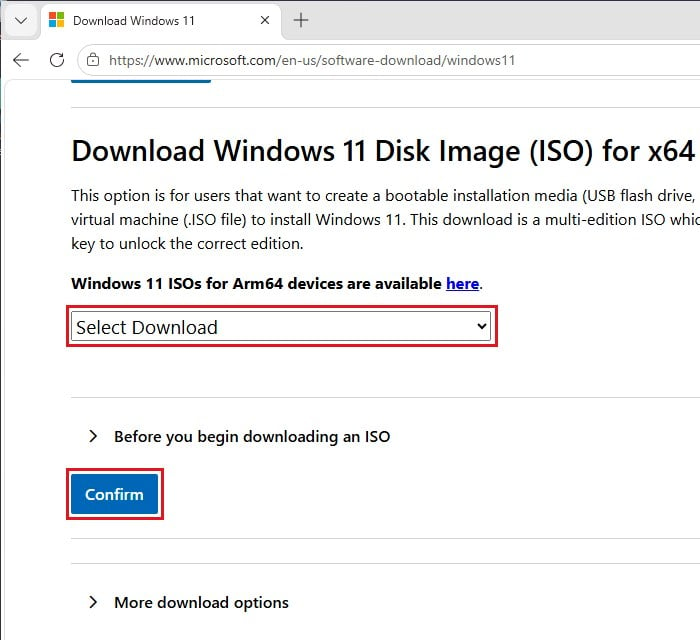
- Pick the same language your Windows is in, and follow the prompts to download the ISO.
- Double-click the downloaded ISO file to open it.
- Run setup.exe and follow the prompts.
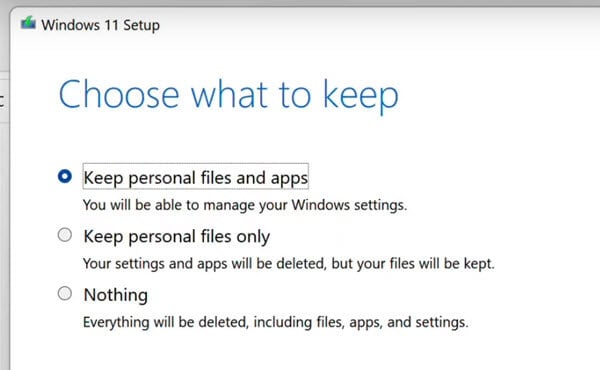
- Make sure “Keep personal files and apps” is selected before you start the installation.
After the upgrade, check Windows Update again. The update that kept failing should now install, or no longer be needed.
Might be useful: In-place Upgrade of Windows 11 on Unsupported Hardware
Reset your PC as a last resort
If even the in-place upgrade doesn’t get updates going, resetting Windows is what’s left. On some PCs, only a reset or a clean install makes this error go away. Back up your files first, since a reset can remove your apps, and depending on what you choose, your files too.