If your Windows Hello PIN and fingerprint have disappeared from the sign-in screen and Windows only lets you in with your password, or the PIN keeps going back to “Set up” in Settings no matter how many times you create one, it usually means Windows can no longer use the PIN it had saved. This guide will explain why it happens and how to get your PIN and fingerprint sign-in working again.
Also see: Windows 11 PIN Settings Ask for a Work or School Account on a Personal PC
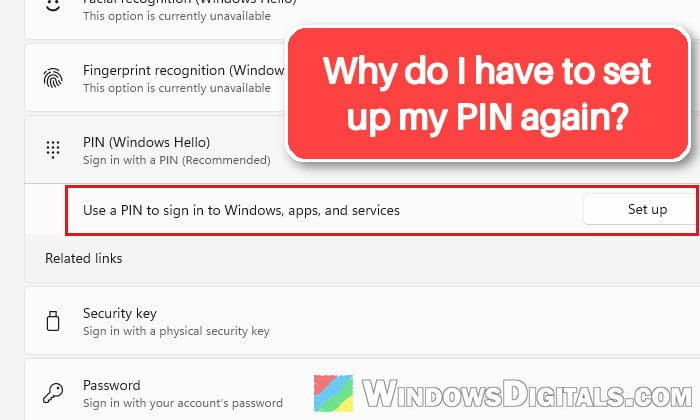
Why do the PIN and fingerprint options disappear?
Windows Hello keeps the keys behind your PIN on the PC itself, so anything that changes the PC’s security setup can leave the saved PIN unusable. When that happens, Windows quietly drops the PIN and only offers the password. Sometimes the lock screen also says “Something happened and your PIN isn’t available. Click to set up your PIN again.”
Some common reasons for this are:
- A change to the PC’s security settings, such as turning Secure Boot off and on again, a BIOS update, a TPM reset or a hardware change.
- A Windows update or upgrade, which is what most people with this problem say happened right before it.
- Damaged Windows Hello data on the PC, which stops a new PIN from being saved even when the setup looks like it finished.
Fingerprint sign-in depends on the PIN. Windows itself warns that face and fingerprint recognition stop working without it, so get the PIN working before anything else.
Fingerprint gone only after a restart?
If the PIN still works and the fingerprint only goes missing when you restart, that’s not a fault. Windows can ask for your PIN once after a restart, with a message like “Your PIN is required after a device restart“. Once you’ve entered the PIN, the fingerprint works as usual until the next restart.
Related problem: “The dictionary attack mitigation is triggered” Windows Hello PIN Error
Sign in with your password and set up the PIN again
Setting up the PIN again from inside Windows is sometimes enough. You’ll need your password.
- On the sign-in screen, click “Sign-in options“, select the key icon, and sign in with your password.
- Press Win + I to open Settings, then go to Accounts > Sign-in options.
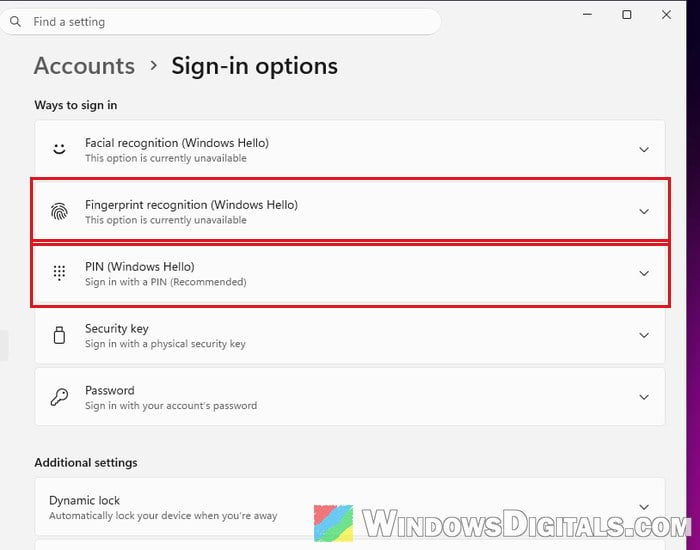
- Click “PIN (Windows Hello)” and then click “Set up“.
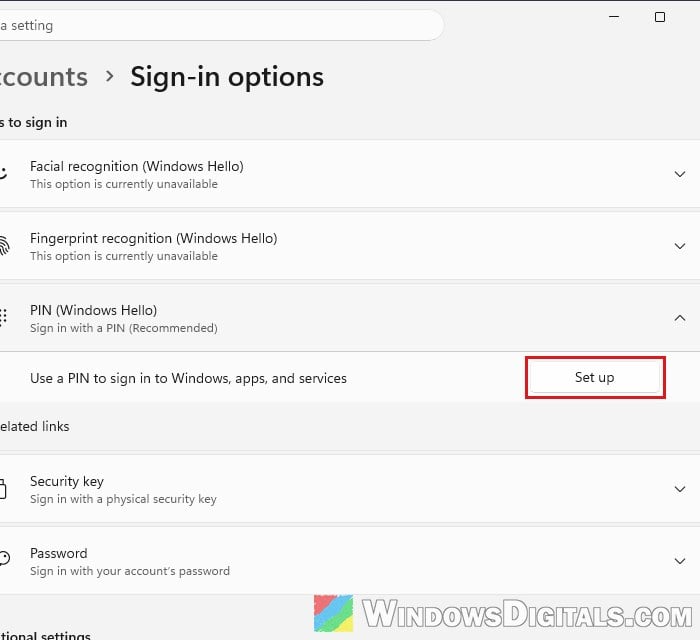
- Enter your password when asked, then type your new PIN twice and click “OK“.
To check that it worked, press Win + L and sign in with the new PIN. If the setup fails, restart and try once more, which is the first thing Microsoft suggests for PIN setup errors.
Remove the PIN completely, restart, and add it again
If Settings still shows “Change PIN” and “Remove” under the PIN, but the PIN doesn’t work at the sign-in screen, remove the old PIN first. Just changing it isn’t enough. If you only see “Set up” there, skip to the next sections.
Here’s how to do it:
- Go to Settings > Accounts > Sign-in options again.
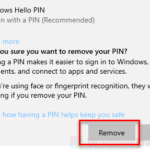
- Click “PIN (Windows Hello)” and then click “Remove“.
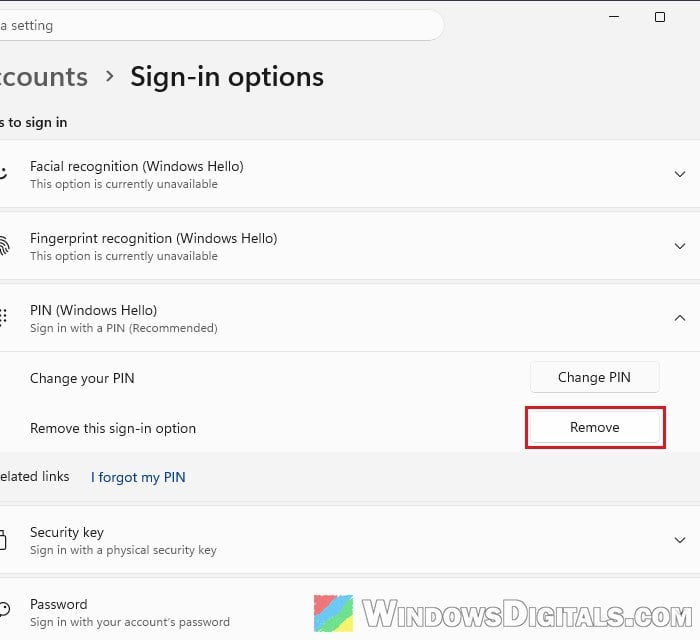
- Click “Remove” again to confirm, then enter your account password.
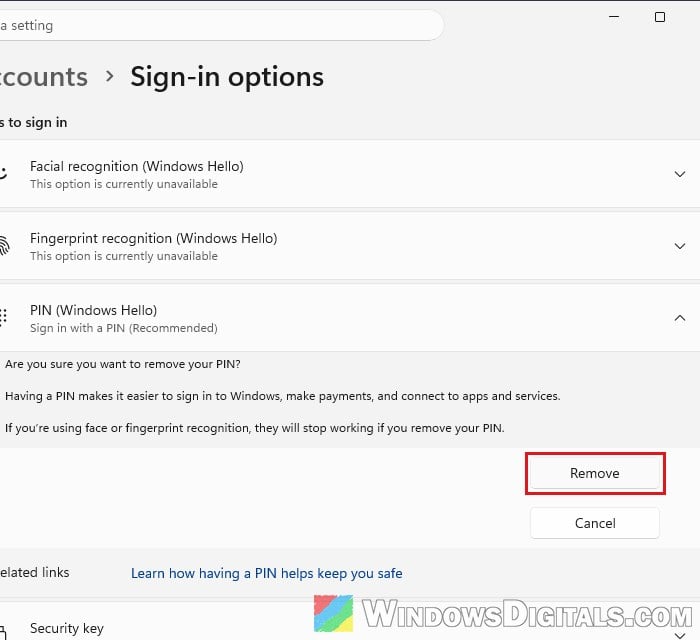
- Restart your PC and sign in with your password.
- Go back to Sign-in options, click “PIN (Windows Hello)” and set up a new PIN.
Once the new PIN works, open “Fingerprint recognition (Windows Hello)” in the same list. If fingerprint sign-in was set up before, remove it there first, then click “Set up” and scan your finger again.
Linked issue: MSConfig “Something happened and your PIN isn’t available”
Turn Secure Boot back on if you changed it
If the PIN and fingerprint disappeared after you turned off Secure Boot in the BIOS (often with BitLocker asking for its recovery key on the next start), that change is very likely why.
The simplest fix is to undo it. Have your BitLocker recovery key ready first, since changing Secure Boot can make BitLocker ask for it again. Restart your PC, enter the BIOS with the key shown at startup, set “Secure Boot” back to “Enabled“, then save and exit.
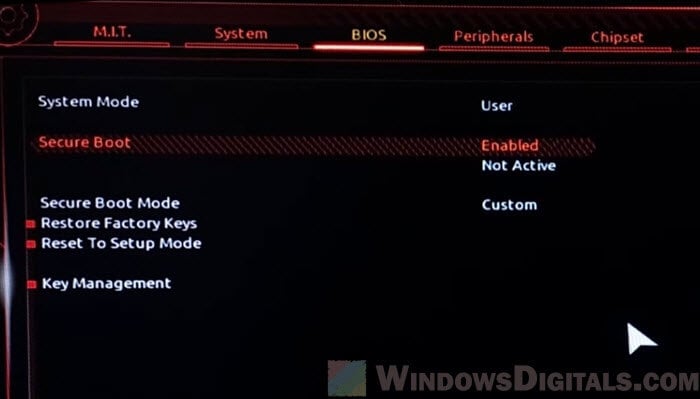
After Windows starts, sign in with your password and set up the PIN again as shown above. If Secure Boot is already back on and the PIN still won’t come back, clear the Windows Hello data as shown in the last section.
Pro tip: Can’t find TPM 2.0 and Secure Boot options in BIOS
Check that the TPM is ready
Windows Hello usually relies on the PC’s TPM (Trusted Platform Module), a security chip. If the TPM isn’t set up, PIN setup can fail.
To check it, follow the steps below:
- Press Win + R, type “tpm.msc” and press Enter.
- Under “Status“, check that it says “The TPM is ready for use.“
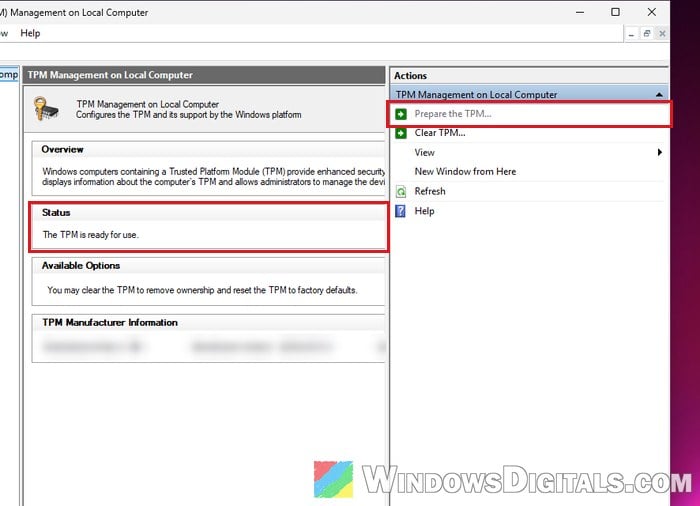
- If it says the TPM isn’t ready and the “Actions” pane on the right offers “Prepare the TPM“, click it and follow the prompts. According to Microsoft, this is the fix when PIN setup fails because the TPM isn’t set up.
Once the TPM shows as ready, go back to Sign-in options and set up the PIN again.
Reinstall the fingerprint reader driver
If the PIN works again but the fingerprint still can’t be set up, or “Fingerprint recognition (Windows Hello)” says “This option is currently unavailable“, the fingerprint reader’s driver may be the problem. Removing it lets Windows install it again from scratch.
- Right-click the Start button and select “Device Manager“.
- Expand “Biometric devices“, right-click your fingerprint reader and select “Uninstall device“.

- Check the “Attempt to remove the driver for this device” box if it’s there, then click “Uninstall“.
- Restart your PC. Windows usually reinstalls the driver by itself. If it doesn’t, download the fingerprint driver for your model from your laptop maker’s support page.
- Go to Sign-in options and set up “Fingerprint recognition (Windows Hello)” again.
Might be useful: Windows 11 Hello Fingerprint This option is currently unavailable
Clear the Windows Hello data (Ngc folder) as a last resort
Windows keeps the Windows Hello data for every account on the PC in a protected folder called Ngc. When that data is damaged, a new PIN keeps failing to save. Emptying the folder makes Windows start over, and several users on Reddit got their PIN back this way, some of them after a Secure Boot change.
Be warned: This removes the PIN, fingerprint and face sign-in for every account on the PC, and everyone will have to set them up again. Only do it if you know your account password and can sign in with it, and use an account with administrator rights. Clearing this folder can lock you out if something else is wrong with sign-in, so create a system restore point first. If you’re not sure what you’re doing, it’s better to get someone to help you instead.
The folder belongs to the system, so you first need to take ownership of it:
- Search for “cmd” in the Start menu, right-click “Command Prompt” and select “Run as administrator“.
- Type the following commands one by one, and press Enter after each:
takeown /f C:\Windows\ServiceProfiles\LocalService\AppData\Local\Microsoft\Ngc /r /d y
icacls C:\Windows\ServiceProfiles\LocalService\AppData\Local\Microsoft\Ngc /grant administrators:F /t
The first command makes you the owner of the folder, and the second gives administrators full access to it.
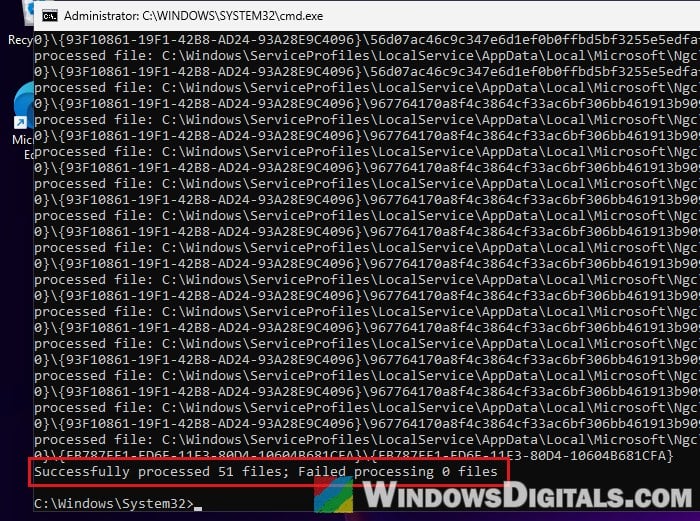
- Press Win + R, paste the following path and press Enter:
C:\Windows\ServiceProfiles\LocalService\AppData\Local\Microsoft\Ngc
- Press Ctrl + A to select everything inside the folder, click the “Delete” (trash can) icon in the toolbar, and click “Yes” to delete it permanently. Delete only what’s inside, not the Ngc folder itself.
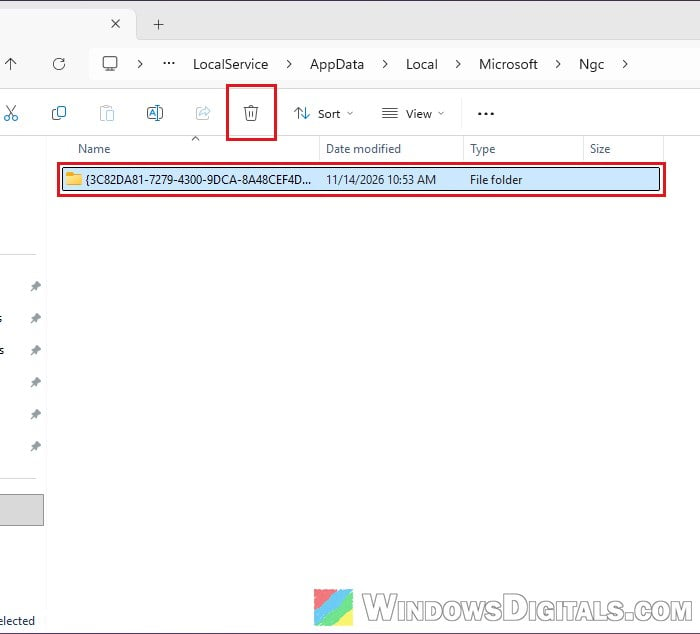
- Restart your PC, sign in with your password, and set up your PIN and fingerprint again in Settings > Accounts > Sign-in options.