When you try to set up your Windows 11 system to skip the login screen and log in automatically, you might run into a snag where the “Users must enter a user name and password to use this computer” checkbox isn’t showing up in the user accounts window (netplwiz). This can be annoying if you like your computer to boot up and log in by itself without typing in your username and password every time.
In this guide, we’ll look into why this happens and how to get that checkbox back, so you don’t have to touch your computer at all when booting and logging into Windows 11.
Page Contents
What’s the issue?
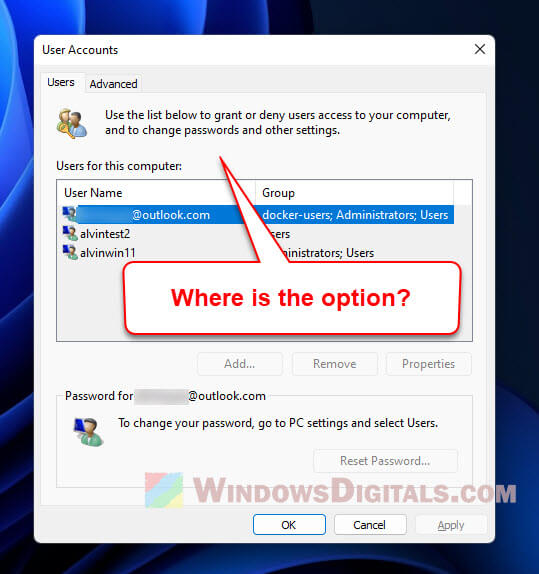
The main problem here is that the “Users must enter a username and password” checkbox is missing from the netplwiz window on Windows 11. This little box is what lets you turn on or off the need to log in manually.
Not having this checkbox makes it tricky to set up your PC to log in by itself, which can be a bit of a hassle if you’re looking to get into your computer faster without typing in your password or PIN every time.
Also see: How to Auto Login Windows 11 Without Password or PIN
How to get the “Users must enter a user name and password to use this computer” option back in Windows 11
There are two main ways to solve the problem of the missing checkbox in the user accounts window.
Switch off “Only allow Windows Hello Sign-in”
One reason the “Users must enter a user name and password” checkbox might be missing is because of the “Only allow Windows Hello Sign-in” feature in Windows 11. This feature ups your system’s security by making you sign in with Windows Hello, which uses stuff like face or fingerprint recognition. When it’s on, old-school password sign-ins are turned off, and that’s why the checkbox disappears.
Useful tip: Create a local admin account without password in Windows 11/10
To switch off the “Only allow Windows Hello Sign-in” feature and bring back the missing checkbox, do this:
- Hit Win + i to open the Windows 11 Settings app.
- Go to Accounts > Sign-in options.
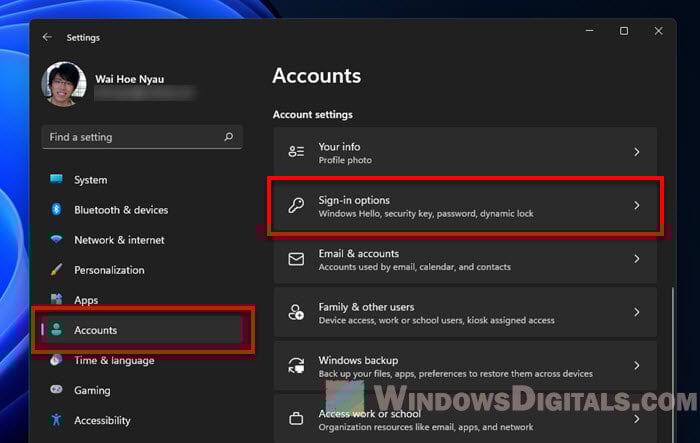
- Find the “For improved security, only allow Windows Hello Sign-in for Microsoft accounts on this device (Recommended)” option and turn it off.

Turning this off lets you use passwords and PINs again, which makes the “Users must enter a username and password” checkbox show up once more in the netplwiz window.
Explore more: How to Login Windows 11 Without Microsoft Account
Fix “DevicePasswordLessBuildVersion” with Registry Editor
Another way to bring back the checkbox is by either turning off or deleting the “DevicePasswordLessBuildVersion” value in the Windows Registry. Here’s how:
-
- Press Win + R to pop open the Run dialog box.
- Type regedit and hit Enter to launch the Registry Editor.

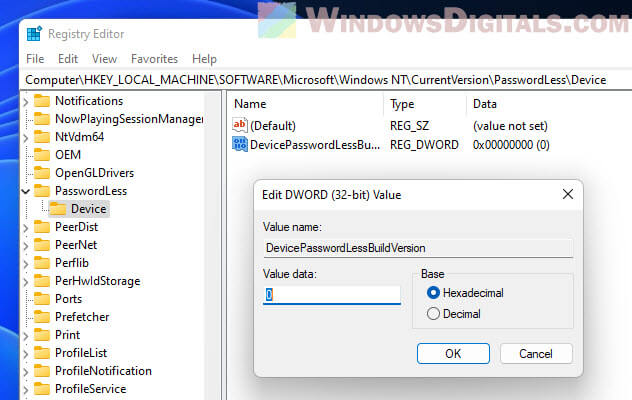
- Head over to this path: HKEY_LOCAL_MACHINE\SOFTWARE\Microsoft\Windows NT\CurrentVersion\PasswordLess\Device.
- Look for the DevicePasswordLessBuildVersion DWORD value on the right side.
- Right-click on it, and pick “Modify” to change its value to 0, or hit “Delete” to get rid of it.
Related resource: How to Remove PIN Login From Windows 10/11 Startup
What if the registry value is not there in the PasswordLess folder?
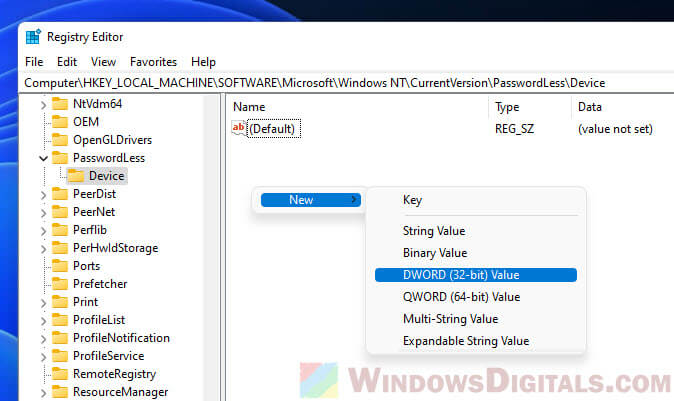
Sometimes, the “DevicePasswordLessBuildVersion” value might not be in the PasswordLess folder, and you still can’t see the “Users must enter a username and password” option even after turning off the “Only allow Windows Hello Sign-in” feature. If that happens, try making a new DWORD (32-bit) Value right there, name it “DevicePasswordLessBuildVersion”, set its value to 0, and check if that fixes it.
Try Autologon instead
If these steps don’t do the trick, there’s always Microsoft Sysinternals’ Autologon tool as a plan B. Autologon tweaks Windows’ built-in auto-login feature, letting you set up your computer to log in automatically without needing a username and password every time it boots up or restarts.
To get started with Autologon, do this:
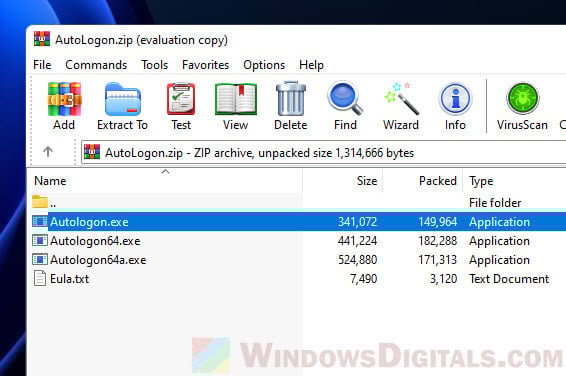
- Grab Autologon from the Microsoft Sysinternals website.
- Unzip the downloaded file and run the Autologon.exe file.
- Fill in your username, domain (if you have one), and password in the Autologon window.
- Click “Enable” to turn on automatic login for your Windows 11 PC.
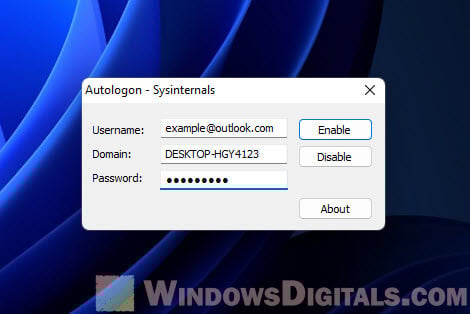
After setting up Autologon, your PC will log you in by itself every time you turn it on or reboot, no need to type in your username and password.
Some final notes
The missing “Users must enter a username and password to use this computer” checkbox in Windows 11 can be a pain if you’re looking to log in automatically without having to touch your PC at all. You should now be able to sort it out by either turning off “Only allow Windows Hello Sign-in” or changing the “DevicePasswordLessBuildVersion” registry value (be sure to make a backup of your registry before doing that). These steps should make the checkbox reappear in the netplwiz user accounts window. If not, the Autologon tool is another way to set up auto-login on your Windows 11 PC.