In Windows 11 or 10, you can share a folder with other computers or devices connected to the same network using the Windows file sharing feature. In this guide, you will learn how to share a folder in Windows 11/10 in a local network without password.
A shared folder in Windows 11 or 10 can be viewed and accessed by any device – Android, iPhone (with a file explorer app), Mac or other Windows PC (Windows 7, 8 or 10), that have access to the same local network.
Also see: How to Update Network Drive Login Credentials in Windows 11
Previously in Windows prior to Windows 10 version 1803, users can share folders using the Homegroup feature. However, the Homegroup feature has been removed since the 1803 update.
There are 3 major steps to correctly share a folder in Windows 11 / 10 in a local network without username and password requirement.
- Turn on network discovery and file sharing in Windows 11/10 so that your PC (and shared folders) can be visible to other devices in the same network.
- Configure a folder to be a shared folder.
- Turn off password protected sharing so that username and password are not required when a user access to the shared folder from another device.
For step 1, read one of the following:
- Windows 11: Turn On Network Discovery and File Sharing
- How to Turn On Network Discovery and File Sharing in Windows 10
For step 2 and 3, use the instructions below in this page.
Step 2: How to share a folder in Windows 11 / 10
To set up a folder as a shared folder, follow the steps below.
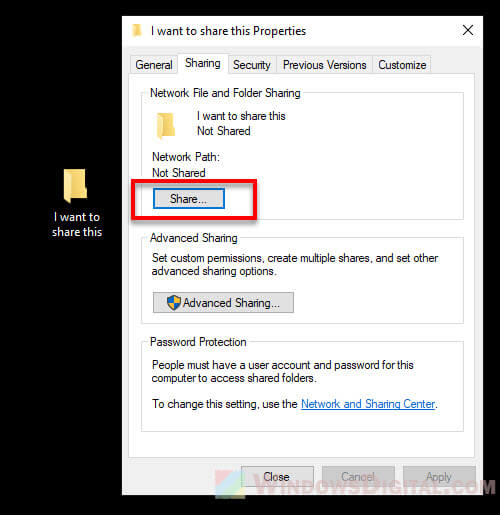
- Right-click on the folder you want to share, then select Properties.
- In the Properties window, click on the “Sharing” tab.
- Click on the “Share” button under “Network File and Folder Sharing”.
- When prompted to “choose people to share with”, click on the drop down menu and select Everyone. If you only want to share the folder with a specific user account, select the user account you want to share with or “Create a new user” instead.
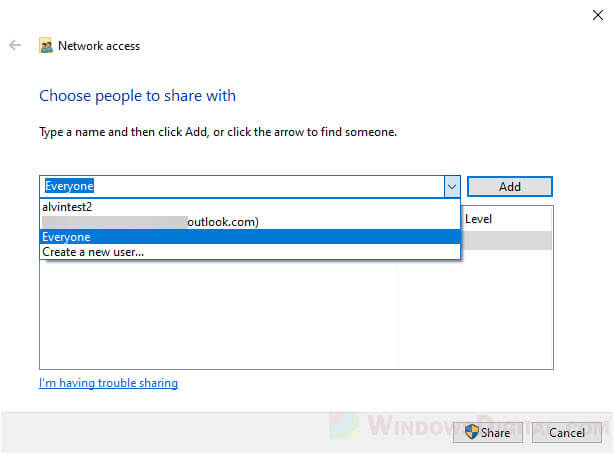
- Click on “Add” to add the selected user.
- Once added, you can change the permission level to “Read” or “Read and Write“. When Read only is selected, the user cannot make changes or delete any files in the folder.
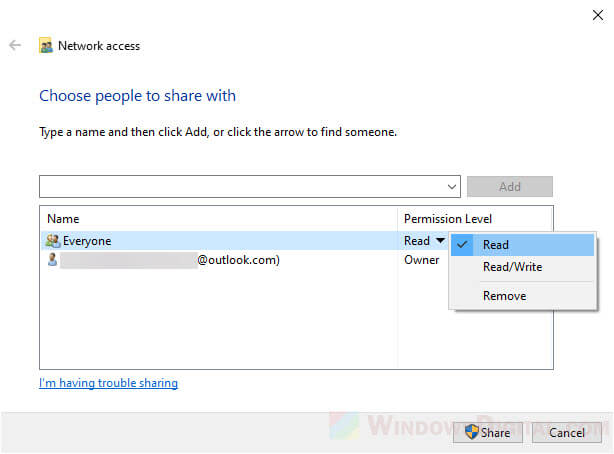
- Finally, click “Share” to complete the sharing setup.
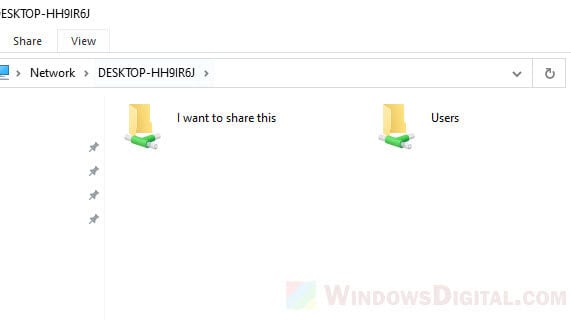
You can now view the shared folder from another Windows PC (in the Network folder) or other devices in the same local network.
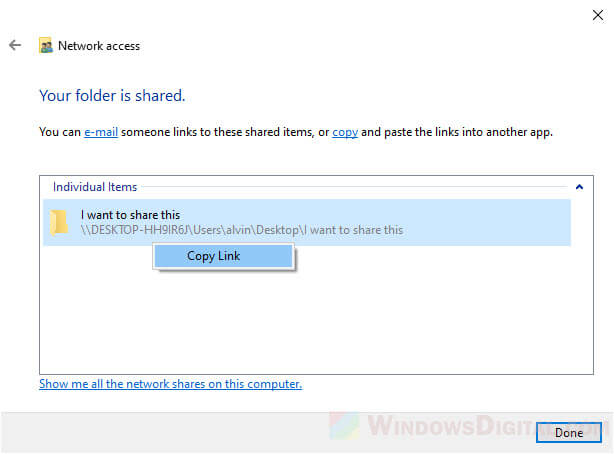
Optionally, you can copy the link of the shared folder path and paste the link onto the file explorer on another Windows computer to quickly access to the shared folder.
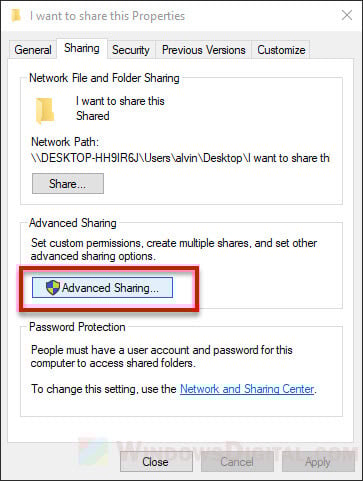
If the basic sharing doesn’t work, try Advanced Sharing instead:
Though both sharing methods are basically the same, if the basic sharing doesn’t work, you can try to use the advanced sharing instead. Here’s how.
Follow the step 1 and 2 above. In the “Sharing” tab, instead of clicking the “Share” button, click on “Advanced Sharing“.
Check the “Share this folder” checkbox.
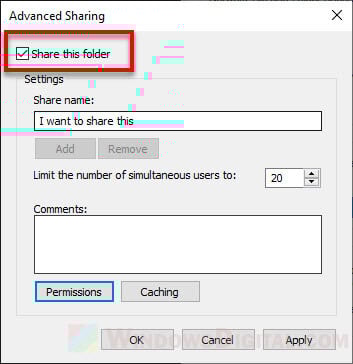
To add or remove users and to configure the users’ permissions, click on the “Permissions” button.
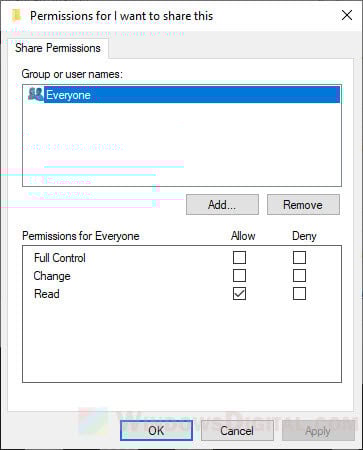
If you want to share the folder with only a specific user, remove “Everyone” and click Add to add the user account you want to share with.
To configure permissions – Full Control, Change (the ability to modify and delete), or Read (read only), click on the user account, then click Allow for any permission you want to grant to the user account.
Step 3: Share folder in Windows 11/10 without password
To remove the need to enter a username and password when a user access the shared folder, you need to turn off the password protected sharing option. Here’s how.
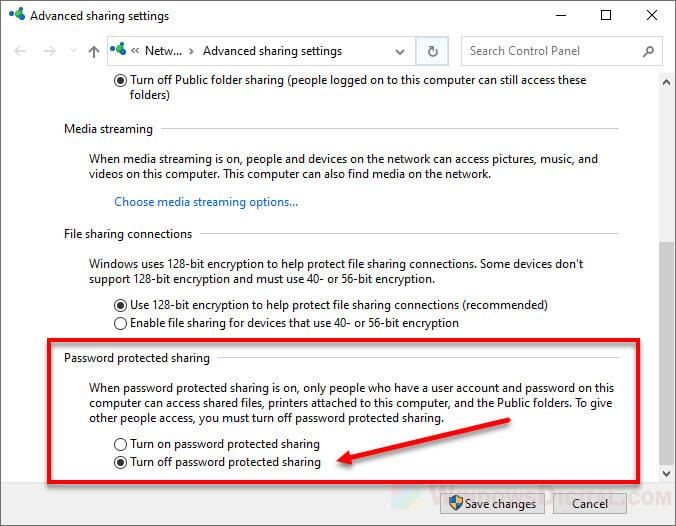
On Windows search bar, search for and open Control Panel. Navigate to Network and Internet > Network and Sharing Center > Advanced sharing settings. Alternatively, you can directly search for and open “Advanced sharing settings” from the search bar.
In the Advanced sharing settings window, expand All Networks. Under Password protected sharing, click on the “Turn off password protected sharing” radio button.
You should now be able to access the shared folder from another PC or device without the need to enter a username or password.
You may still need to provide the username and password of the user account when you access the shared folder from an Android or iOS device.