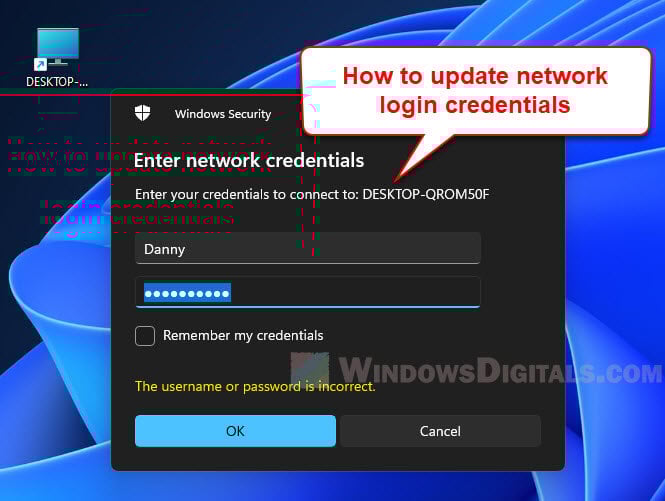
When you access a mapped network drive or shared folder in Windows 11, if password protected sharing is enabled on the network computer that shares the drive or folder, you will need to enter the required login credentials in order to access the network location. The username and password you’ve successfully entered the first time will be remembered and saved by Windows so that when you access the same network location again, the login credentials will be automatically filled in for quick login.
If the login credentials have changed, you may want to update the login credentials for the network location so that it doesn’t keep auto-filling the old username and password that are no longer correct. This guide will show you how to update or remove login credentials for mapped network drive in Windows 11.
Page Contents
Windows 11: Change mapped network drive login credentials
All login credentials you’ve ever used are saved in a place called Credential Manager in Windows 11. Credential Manager is a Control Panel feature that manages login credentials you’ve used.
The username and password you’ve successfully used for a mapped network drive or folder will be saved in the Credential Manager. To update the login credentials for a network location in Windows 11, you can do so via the Credential Manager which can be found in the Control Panel.
Also see: How to Forget Samba (SMB) Network Credentials in Windows 11/10
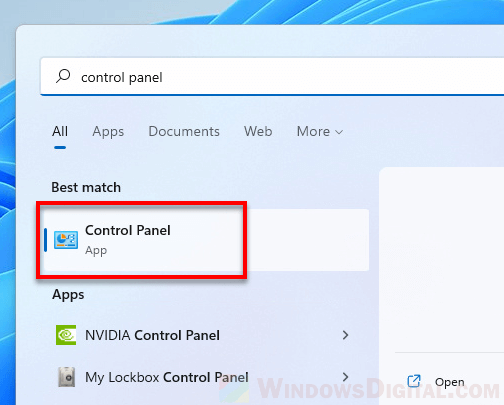
- Search for and open “Control Panel” via the Start menu.
- In the Control Panel window, select “All Control Panel Items” (if it is not already opened).
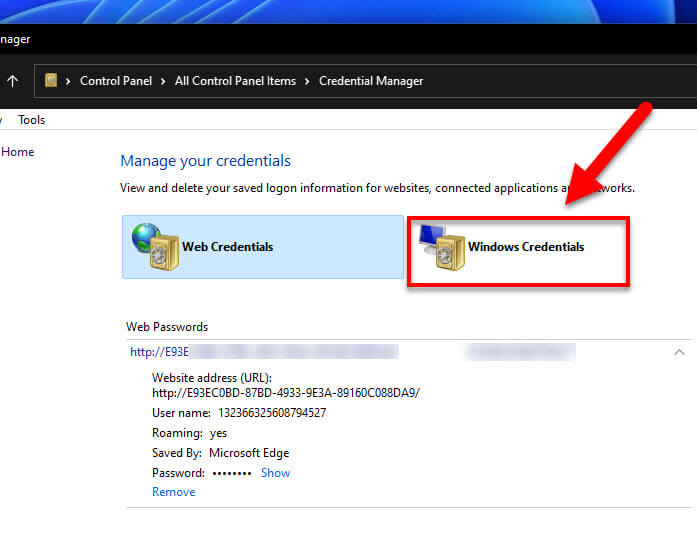
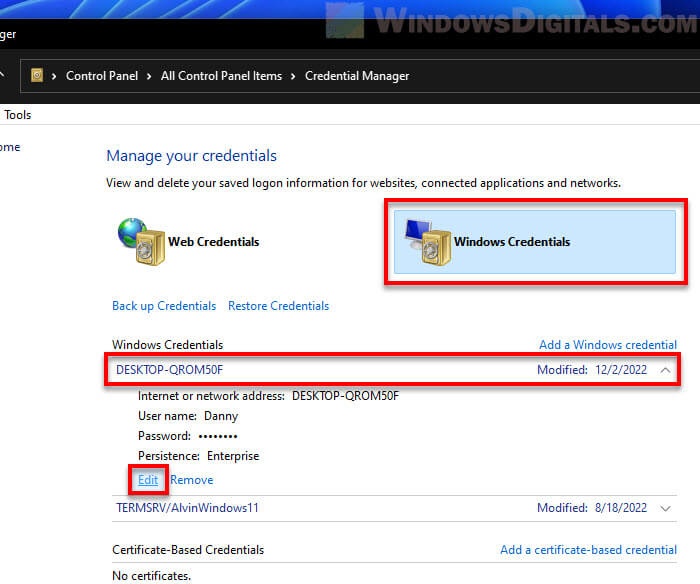
- Under “Adjust your computer’s settings”, click “Credential Manager” to open it.

- Under “Manager your credentials”, you will see two credential’s categories – Web Credentials and Windows Credentials. Web Credentials store your web passwords whereas Windows Credentials store your other logins such as network drives and folders credentials. In this case, select Windows Credentials.
- Next, you will see all saved network drive login credentials under Windows Credentials. Click the network location name that you would like to change to expand it, and then click Edit.
- Enter the new user name and password to update the login credentials for the selected mapped network drive or folder.
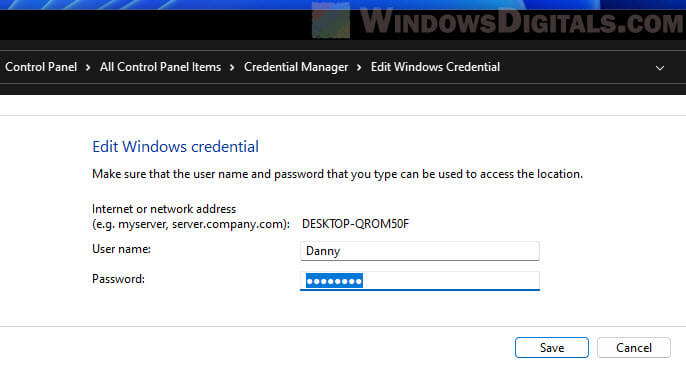
- When you’re done, click Save to save the changes.
- That’s it! The next time you access the network location, the login credentials form will be automatically filled with the updated username and password.
Pro tip: How to Share Folder in Windows 11 Without Password
Remove network login credentials in Windows 11
If you find it tiring to update a massive number of saved network drive login credentials, you can remove them instead to reset it. Once removed, the next time you access the network drive or folder, you will be prompted for a new username and password (the login field will be empty because no credentials have been saved yet).
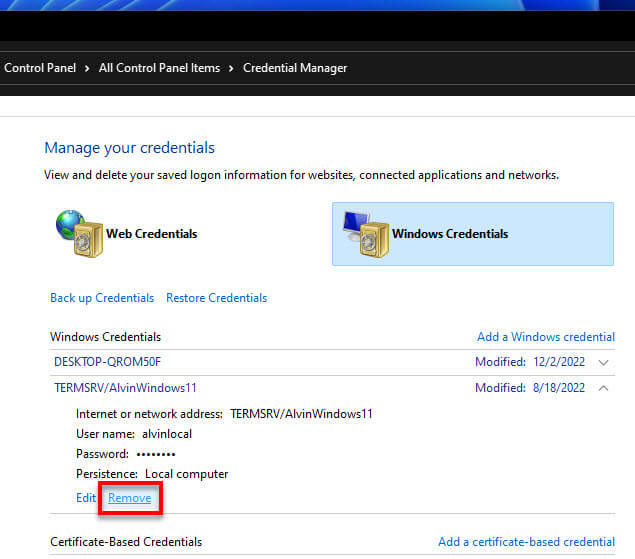
To remove a network drive login credentials in Windows 11, follow step 1 to 4 in the instruction above to open the Windows Credentials settings. Next, select the network location whose login credentials you want to remove to expand it, and then click Remove to make Windows forget the credentials.
Related resource: How to Auto Login Windows 11 Without Password or PIN
Suggestion: Turn on/off password protected sharing
If you would like to completely eliminate the need for users to enter a user name and password to access the shared network location, you can turn off “password protected sharing” on the computer that shares the network drive or folder.
You can change the password protected sharing setting via Control Panel > All Control Panel Items > Network and Sharing Center > Advanced sharing settings. From there, click “All Networks” to view more settings. Then, select “Turn off password protected sharing” should you want to turn it off.
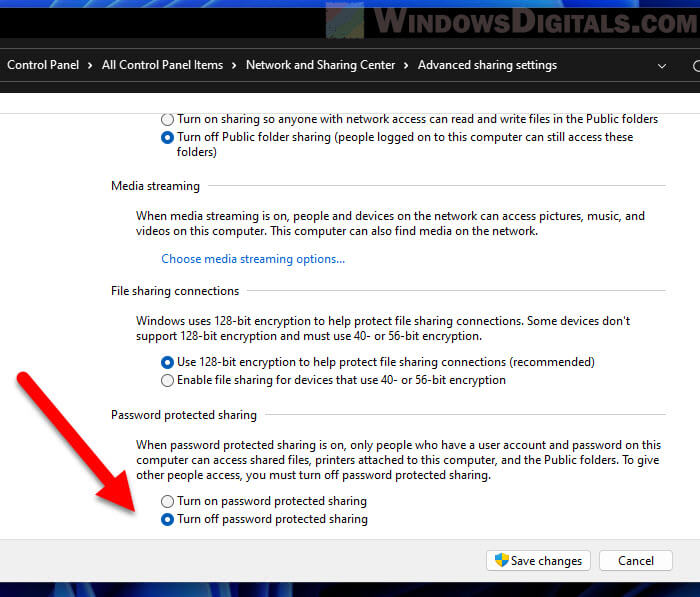
If you turn off the password protected sharing on the computer that shares the network drive, when a user accesses the network drive from another computer, Windows will not prompt for login credentials and the user can access the shared folder directly.