In order to share files and folders on a Windows 11 PC with other computers or devices in a same network, you need to first turn on the “network discovery and file sharing” option in Windows 11. This short guide will show you how to enable the network discovery and file sharing setting for any network profile in Windows 11.
This guide covers only the method to turn on the network discovery and file sharing options. If you have already turned on the settings and want to learn how to share folders in Windows 11, go to: How to Share Folder in Windows 11 Local Network Without Password.
How to turn on Network Discovery and File Sharing in Windows 11
Network Discovery and File Sharing are two different settings which can be turned on or off individually. If you want to share files or printers from a Windows 11 computer, you need to first turn on both “network discovery” and “file and printer sharing” on that particular PC. Here’s how to do so.
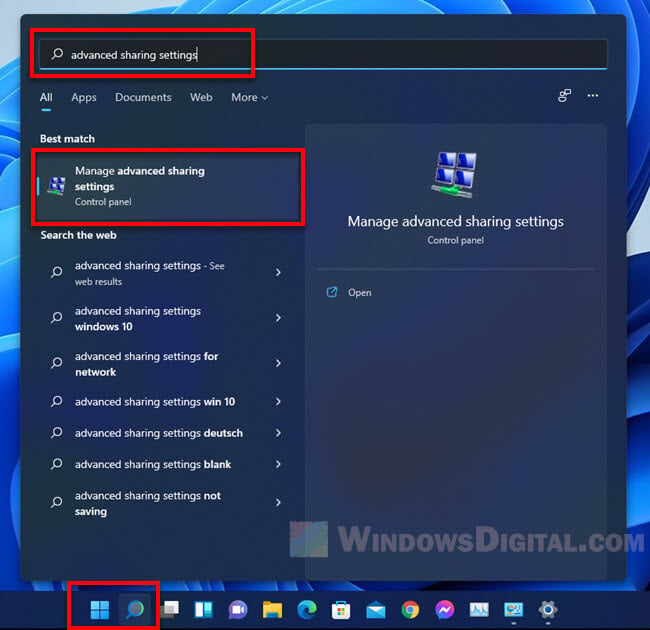
- In Windows 11, click on the Start menu or Search on the taskbar.
- Then, search for and open “Advanced sharing settings“.
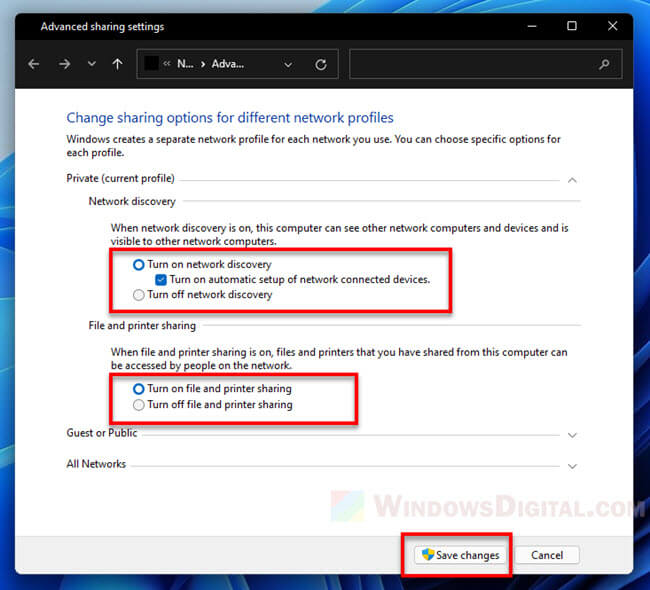
- From here, you can turn on or off the network discovery and file sharing options for different network profiles.
- We recommend to turn on the sharing options only for Private network profile, and then change your local network to Private if it’s not already set to Private. Read more about this below.
- We recommend to turn on the sharing options only for Private network profile, and then change your local network to Private if it’s not already set to Private. Read more about this below.
- Click on Save changes to save any changes made.
Since Windows 11, the advanced sharing settings can only be accessed through the old Control Panel. Both Control Panel and the advanced sharing settings can be quickly accessed by simply searching them using the Start menu or Search app in Windows 11. There is currently no way to access to the advanced sharing settings via the new Settings interface in Windows 11.
If there is no result for “advanced sharing settings” when you search for it in the Start menu, search for and open “Control Panel” instead. Then, navigate to Control Panel > Network and Internet > Network and Sharing Center > Advanced sharing settings.
What are Network Discovery and File Sharing?
Turning on the “network discovery” setting will allow the computer to see other computers and devices in the same network. It also allow the computer to be visible to other computers in the same network.
On the other hand, turning on “file and printer sharing” setting will allow other computers or devices to access to the files, folders or printers you have shared from this particular computer.
Which network profile should I turn on the settings for?
To answer the question, first you have to know the basic difference between a public and a private network.
Private networks are trusted networks such as your home network or work network. Public networks, on the other hand, are networks anyone can access, for example, WiFi networks found in a cafe, airport, shopping center, etc.
In most cases, turning on network discovery and file sharing for Public network is not recommended as it might put your PC at risk on a network anyone can connect to.
If you want to share files or printers only in trusted home or work networks, you should turn on the sharing options for Private network only.
Though Windows would usually be able to tell what network profile a network should be and automatically set it for you, you can also manually change the network profile of a network to be either Private or Public.
How to change a network from Public to Private in Windows 11
After turning on the network discovery and file sharing options for private network, the next step is to make sure the network you are connected to, assuming it is a network you trust, is set as a private network.
To change the network profile of a connected network in Windows 11, follow the steps below.

First, right-click on the network icon from the taskbar corner in Windows 11, then select Network and Internet settings.
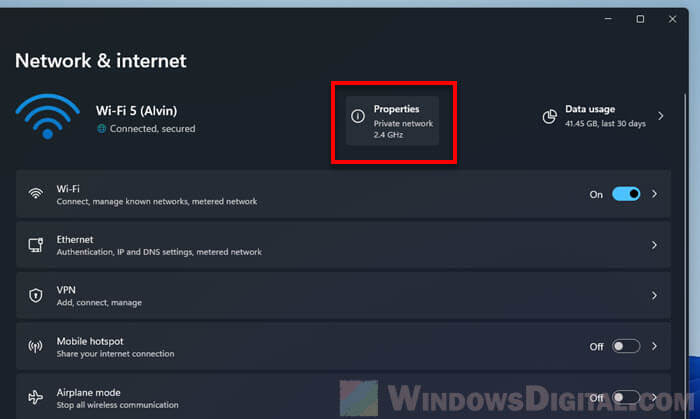
Beside the network you’re connected to, click on Properties.
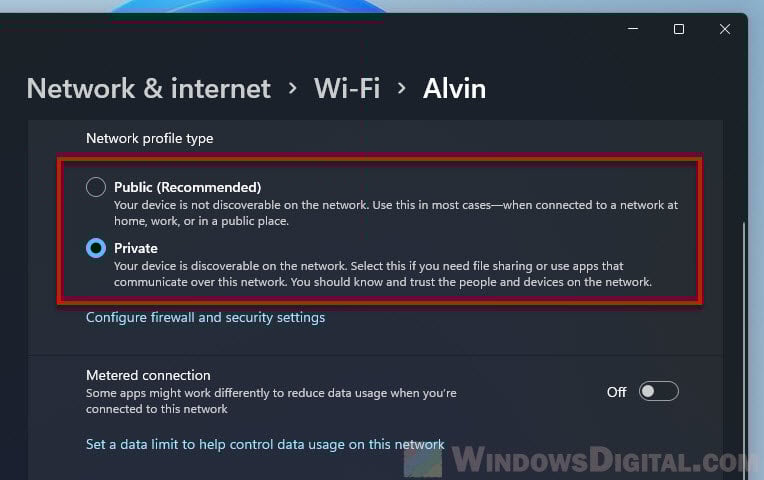
Next, under “Network profile type”, select Private to change the network to Private.