Network discovery is a setting in Windows 10 that, when turned on, allows your computer to find and see other computers or devices in the same network, and at the same time, allows other computers and devices in the same network to see your computer.
The network discovery and file sharing are two different settings, but they work together to achieve the same goal. If network discovery is off, file sharing wouldn’t work even if it’s turned on. Both network discovery and file sharing has to be turned on in order for the file and printer sharing to work properly.
If you keep getting errors such as “Network discovery and file sharing are turned off, Network computers and devices are not visible” or similar network sharing issue, you can try to manually turn on or off Network discovery and file sharing settings in Windows 10.
Page Contents
Turn On Network Discovery and File Sharing
To manually turn on or off Network Discovery and File sharing for different network profiles, follow the steps below.
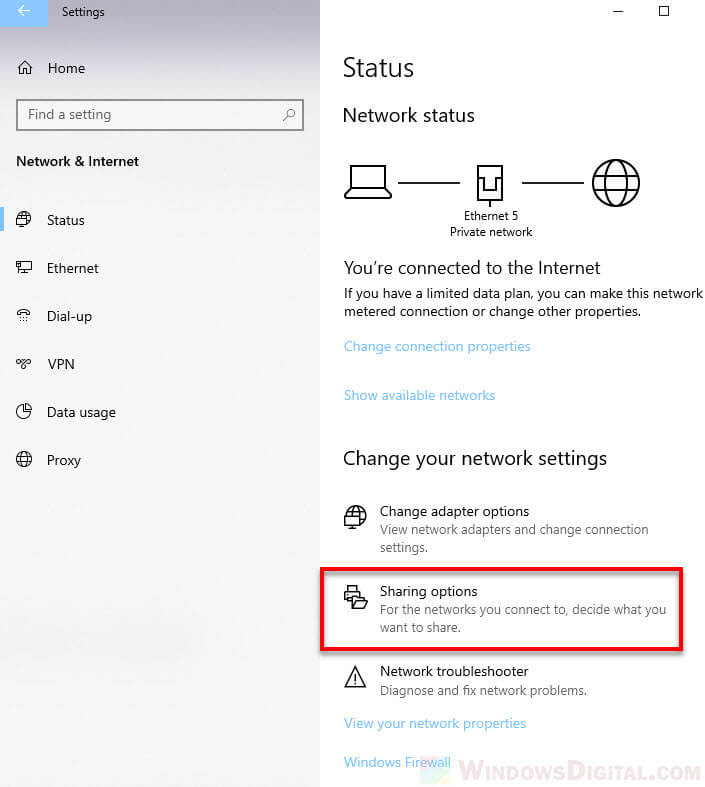
- Using the Windows 10 search bar, search for and open Settings.
- Next, select Network & Internet.
- Under “Change your network settings”, click on Sharing options.
- In the “Advanced sharing settings” window, there will be two network profiles you can choose from – “Private” or “Guest or Public“. Both have the “network discovery” and “file and printer sharing” options.
- To turn on network discovery for a network profile, under “Network discovery”, click on “Turn on network discovery” radio button and enable “Turn on automatic setup of network connected devices“.
- To turn on file sharing for a profile, under “File and printer sharing”, click on “Turn on file and printer sharing“.
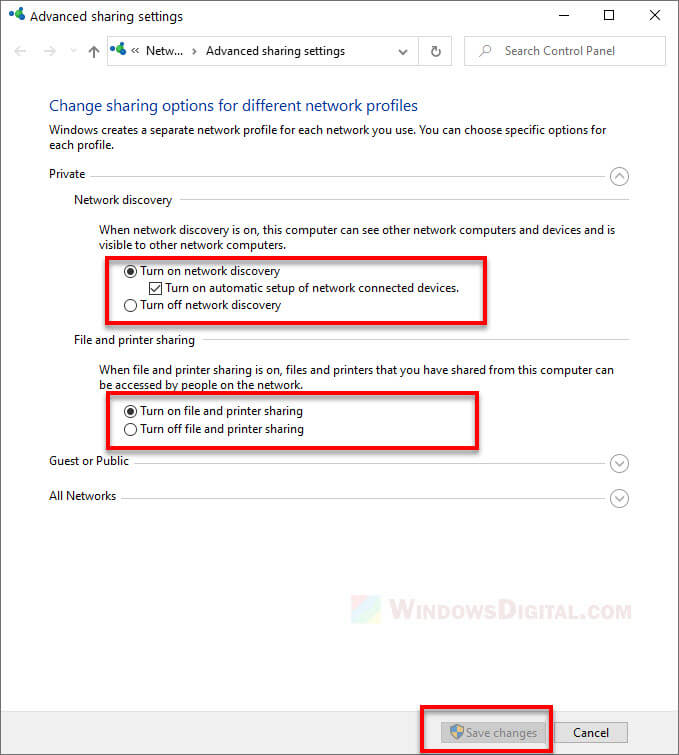
- Click on Save changes to save your settings.
Should I turn on network discovery for “Public” network profile?
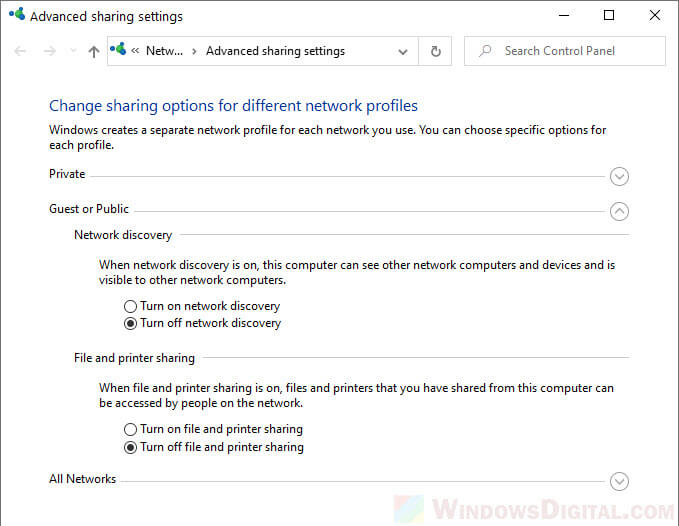
Note: We don’t recommend turning on network discovery or file sharing for “Guest or Public” network profile as this can be a security risk whenever you’re connected to a public network such as those in a cafe, airport, supermarket, public offices, etc.
If you have issues with file sharing and was told to turn on network discovery for your network, you can try to change the network you’re currently connected to from Public to Private network profile instead, provided you trust the network. This is a better solution than turning on the network discovery and file sharing settings for all public network profiles as that would also mean you allow discovery of your computer in all other public networks.
The network discovery and file sharing settings for “Guest or Public” network profile are both disabled by default in Windows 10. It makes sense because you wouldn’t want just anybody to be able to see your computer and have access to your files when you’re in a public network (especially if you have a laptop computer that often connects to public WiFi) where hundreds or thousands of other devices connected to at the same time.
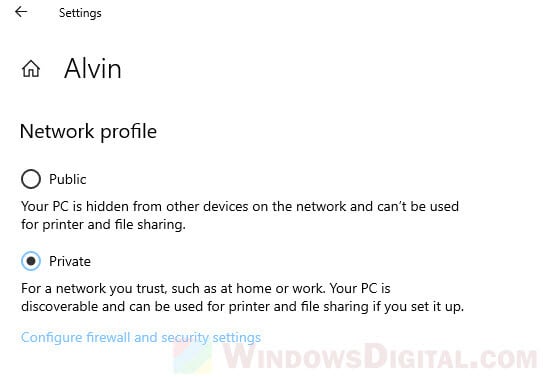
How to change your network profile from Public to Private or vice versa in Windows 10
When you connect to a new network for the first time, Windows will usually ask you if that network should be categorized as private or public network. You should only set a network as private network if you trust the network.
If you don’t know what network profile the network your computer is currently connected to is set as, follow the steps below to check or change a network from public to private profile or vice versa in Windows 10.
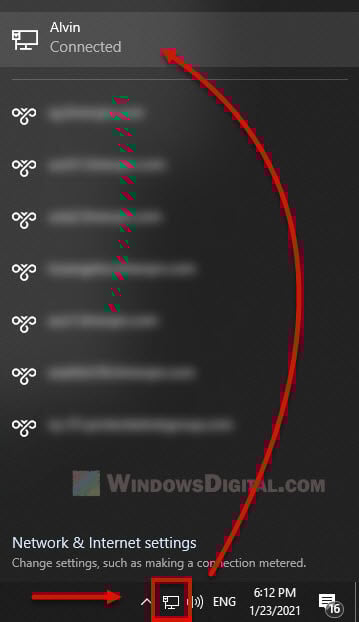
First, click on the network icon in the notification area, then select your currently connected network.
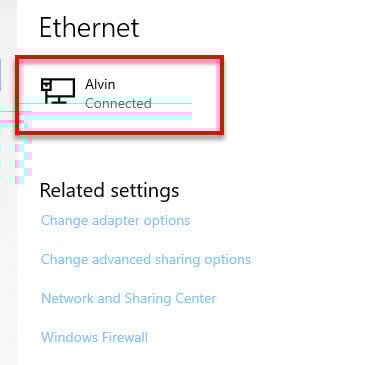
In the network setting window, click on the network again under “Ethernet”.
On the next screen, under “Network profile”, you can select between Public or Private profile for the network your PC is currently connected to.