If your Windows 11 or 10 laptop or PC keeps stopping at the blue BitLocker recovery screen every time it starts (or after every update), even though you typed the correct recovery key the last time, it usually means something in your PC’s startup setup has changed and BitLocker hasn’t been told that it’s okay. This guide will show you how to find out what changed and how to make BitLocker stop asking for the key.
Also see: Windows 11: Recovery “Your PC needs to be repaired”
Page Contents
Why does BitLocker keep asking for the recovery key?
When your drive is encrypted with BitLocker (or device encryption, its simpler version on Windows 11 Home), the key that opens it is kept in your PC’s security chip, the TPM. At every startup, the TPM checks the firmware, Secure Boot and boot files, and only hands over the key if everything looks the same as when it was locked. If something is different, Windows asks you for the recovery key instead.
According to Microsoft, some of the common things that trigger this are:
- A BIOS or UEFI firmware update
- Secure Boot turned off or its settings changed
- The TPM being turned off, cleared or failing its self-test
- A USB drive or other bootable media left plugged in, or docking and undocking a laptop
- A changed boot order, or changes to the boot files
- A new motherboard
Typing the recovery key only gets you past the screen this one time. Until the cause is gone, or BitLocker is told that the new setup is fine, it keeps asking. On laptops, it can also come down to a BIOS that keeps losing its settings, for example when the battery is weak or after a BIOS reset.
Linked issue: BIOS Keeps Resetting & Fans at Max Speed on Boot
Where to find your recovery key
Open https://aka.ms/myrecoverykey on another device and sign in with the Microsoft account you use on the PC. For a work or school laptop, use https://aka.ms/aadrecoverykey or ask your IT department. It may also be on a printout or a USB drive.
Only the key whose ID starts with the same 8 digits as the recovery key ID on the blue screen works. Microsoft can’t recover a lost key, so keep a copy somewhere safe.
Check what the recovery screen says first
On Windows 11 version 24H2 and later, the recovery screen can tell you why BitLocker locked the drive. Press the Alt key on the blue screen to open the Additional recovery information screen, which shows an error code. Here’s what the main ones mean:
- E_FVE_PCR_MISMATCH: your PC’s configuration changed, for example a bootable USB drive is plugged in or a firmware update was installed. Remove any USB drives and restart.
- E_FVE_SECUREBOOT_DISABLED: Secure Boot has been turned off. Turning it back on in the BIOS and restarting might fix it.
- E_FVE_SECUREBOOT_CHANGED: the Secure Boot settings changed, for example after a BIOS reset.
- E_FVE_TPM_… codes: the TPM is turned off, missing or not working.
Once you know the code, jump to the section below that matches it.
Related problem: Secure Boot “Failed Signature Verification” After Resetting Keys
Press Esc on the recovery screen, then enter the key
Some people got rid of the repeating prompt by pressing Esc on the recovery screen and typing the key on the screen that opens next. It’s not clear why this helps, and it doesn’t work for everyone, but it takes only seconds.
Unplug USB drives and docks, then restart
It’s an easy one to miss: a USB flash drive, an external drive or a docking station connected at startup can be enough to change what the TPM sees. Unplug everything you don’t need (keep the keyboard, and the charger for a laptop), then restart.
It’s also worth checking the boot order in the BIOS. Windows Boot Manager (or the drive Windows is on) should be at the top. If the recovery screen doesn’t show up this time, plug your devices back in one at a time to find the one that triggers it.
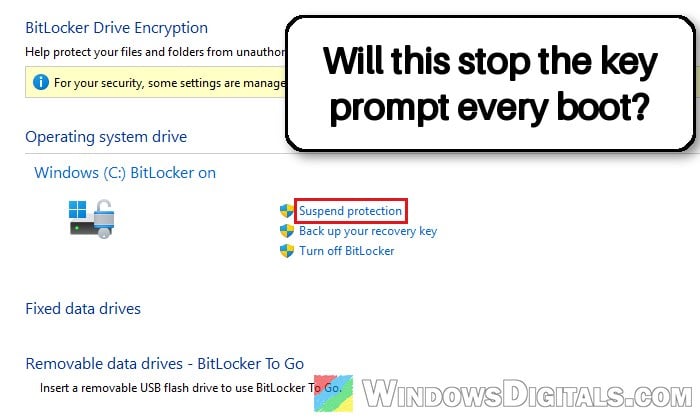
Suspend and resume BitLocker protection
This is the main fix when the screen keeps coming back after you’ve sorted out the cause, or when nothing obvious changed. Suspending BitLocker and then turning it back on makes it lock the key to your PC’s current setup, so the TPM stops treating it as a change. Your drive stays encrypted the whole time.
Using Control Panel (Windows 11 or 10 Pro)
- Search for “Manage BitLocker” in the Start menu and open it.
- Under your Windows drive (C:), click Suspend protection.
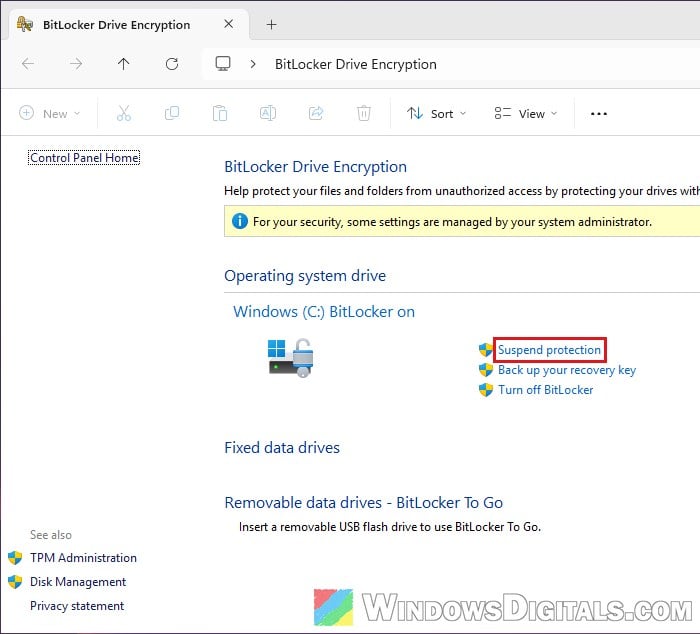
- Restart your PC.
- Open Manage BitLocker again. If it doesn’t say BitLocker is on already, click Resume protection.
Using commands (without the Control Panel page)
On Windows 11 Home, clicking BitLocker in Control Panel only offers to upgrade to Pro. The commands below should work there as well:
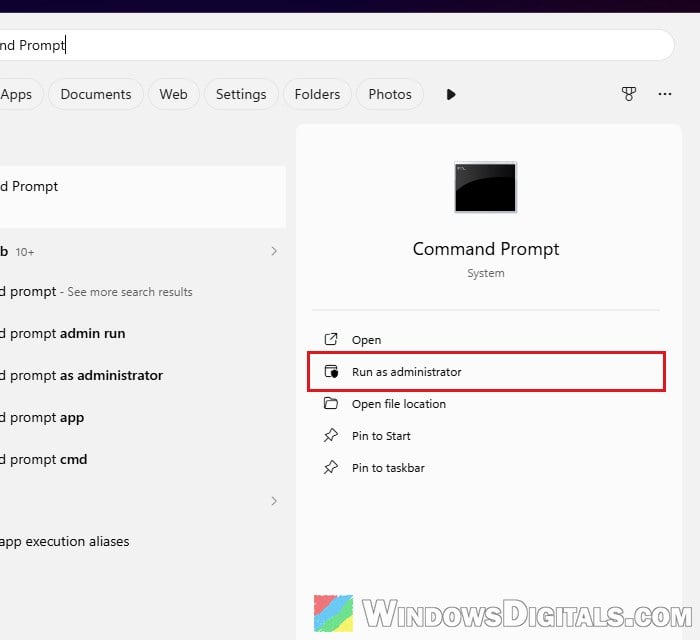
- Search for “Command Prompt” in the Start menu and click Run as administrator.
- Type the following command and press Enter to suspend BitLocker on the C: drive:
manage-bde -protectors -disable C:
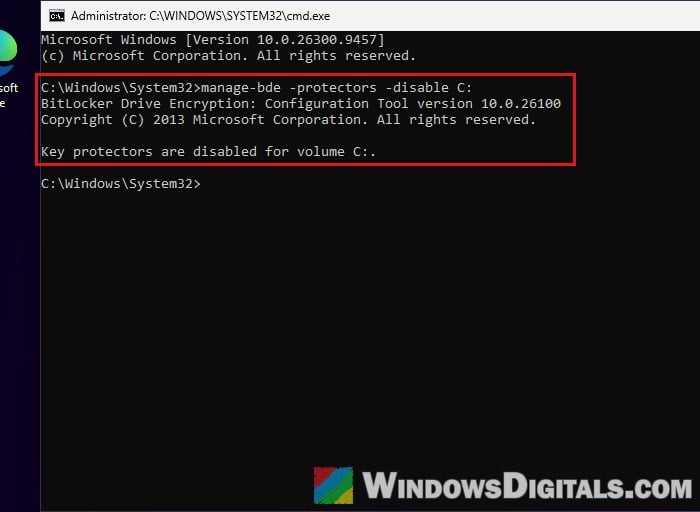
- Restart your PC.
- Open Command Prompt as administrator again and turn protection back on:
manage-bde -protectors -enable C:
- To check, run the following command and make sure Protection Status says Protection On:
manage-bde -status C:
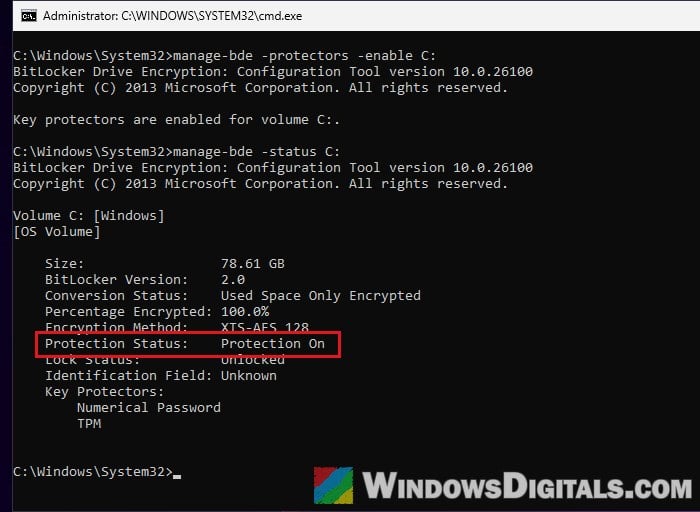
According to Microsoft, a suspended drive normally turns protection back on by itself after one restart, so the last step may only confirm it’s already on. Restart once more and see if the recovery screen still shows up.
Check the TPM and Secure Boot in the BIOS
If the error code pointed to the TPM or Secure Boot, or your BIOS settings were reset, make sure both are turned on again. To see the TPM’s status from Windows, press Win + R, type tpm.msc and press Enter. It should say “The TPM is ready for use“.
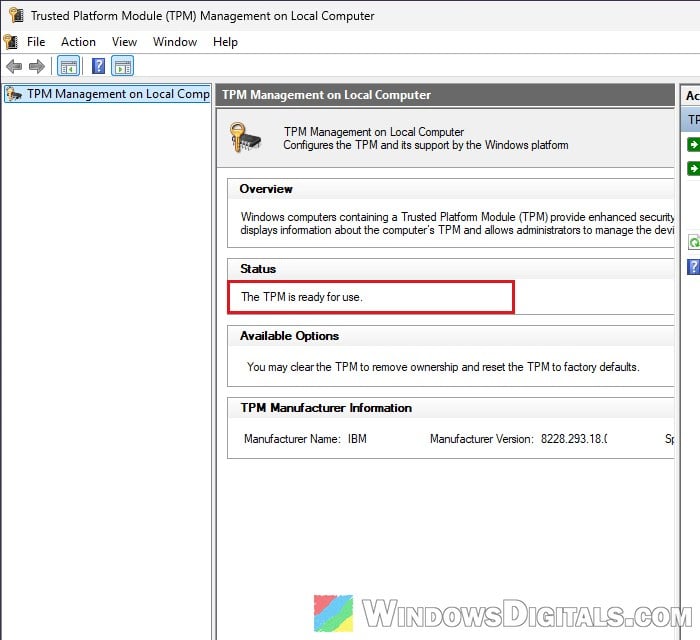
If it doesn’t, or if Secure Boot is off, restart into the BIOS, turn the TPM and Secure Boot back on, and set the boot mode back to what it was before (on most Windows 11 PCs that’s UEFI, not Legacy or CSM). Menu names vary by brand, so see where to find the TPM 2.0 and Secure Boot options in BIOS if you can’t spot them. After that, suspend and resume BitLocker as shown above.
Learn more: TPM 2.0 Enabled in BIOS but Not Showing in Device Manager
Update the BIOS (suspend BitLocker first)
It’s a long shot, but if nothing above worked, a newer BIOS from your laptop or motherboard maker is worth trying. Get it only from their support page.
Be warned: A BIOS update can brick your motherboard if it’s interrupted, so keep a laptop plugged in and don’t turn the PC off during the update. Since firmware updates trigger BitLocker recovery, suspend BitLocker first (as shown above) and resume it afterwards. If you’re not sure what you’re doing, it’s better to get someone to help you instead.
Turn off BitLocker or device encryption as a last resort
If nothing else works, you can turn the encryption off completely. Microsoft doesn’t recommend this as a troubleshooting step. Without encryption, anyone who gets hold of your laptop can read your files. But it does stop the recovery screen for good.
- Windows 11 Home: go to Settings > Privacy & security > Device encryption and turn it Off.
- Windows 11 or 10 Pro: open Manage BitLocker and click Turn off BitLocker, or run this in an admin Command Prompt:
manage-bde -off C:
Decrypting the drive can take an hour or more, so let it finish before you restart. You can turn encryption back on later if you want.