When we talk about password protecting, locking or encrypting files and folders in Windows 11 or Windows 10, we have little choices other than relying on third party encryption software. Creating a batch script with the password in a plain text file to protect a folder (suggested by surprisingly great amount of articles elsewhere) certainly isn’t a good way to do it due to extremely weak security.
To securely password protect and encrypt a folder, you can use compression software such as WinRAR or WinZip. Beside using third party software, there are also a few built-in encryption tools in Windows 11/10 such as EFS and BitLocker that you can use to encrypt your files, folders or an entire disk drive.
This tutorial will show you 4 different methods in how to protect, lock or encrypt files, folders or an entire drive in Windows 11/10, with or without password. Choose one that suits your needs.
Also see: How to Lock an App with a Password in Windows 11
Page Contents
Lock a folder with password using WinRAR
The easiest solution to protect your files is by password protecting it with compression software such as WinRAR or WinZip. The downside of this method is that you will have to decompress the file whenever you want to access it.
We will use WinRAR in this tutorial. Follow the steps below to use WinRAR to put password protect files or folders (optionally, with encryption) in Windows 10/11.
- Download and install WinRAR from www.win-rar.com.
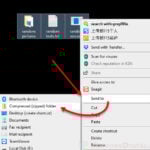
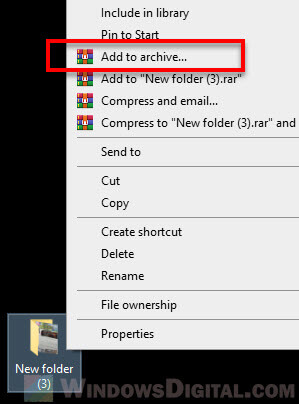
- Right-click one or multiple folders that you want to compress, and select “Add to archive“.
Windows 10

Windows 11
- In the “Archive name and parameters” pop up window, go to General tab and click on the “Set password” button.
- Enter your desired password twice (one for confirmation).
- Optionally, enable “Encrypt file names” if you would also like to also encrypt your folders (*learn what this option does below).
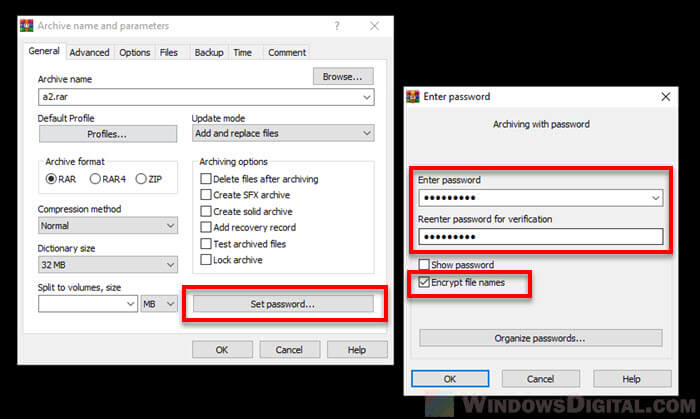
- Finally, click OK to confirm the compression.
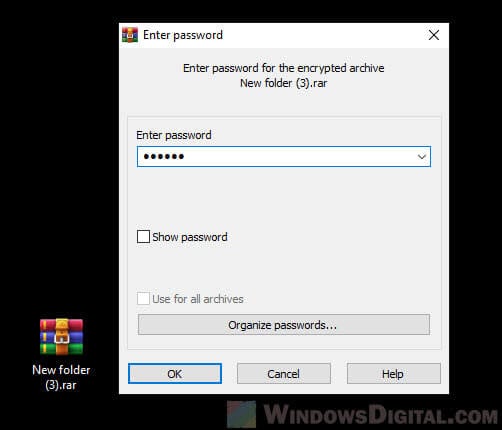
To decompress and unlock the folder, simply double-click on the RAR file, enter the password you’ve set earlier, and then click OK to unlock it. Once you are able to view the files and folders inside the RAR file, you can extract any or all of them to anywhere you want.
Notes:
If you set “Encrypt file names” option, WinRAR will encrypt not only file data, but all other sensitive archive areas like file names, sizes, attributes, comments and other blocks. It provides a higher security level. If you want to prevent third parties from drawing conclusions about you or the content based on the meta files, you may enable this function. Without a password it is impossible to view even the list of files in the archive encrypted with this option.

WinRAR has a 40-days trial which you can use for free. However, the free trial seems to last forever even after the 40-days trial. After the trial ends, it will start prompting the “buy” window encouraging you to support and buy the software for some extra premium features. You can easily dismiss the window and continue using its free features which is more than enough for casual users. Of course, if you like the software, feel free to buy it to support the developer.
Read: How to Restrict User Access to a Folder or Drive in Windows 11
Password protect a folder or drive without software
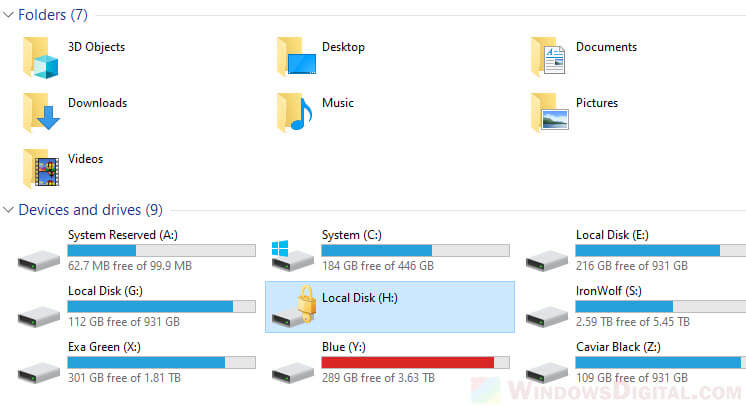
If you want to password protect and lock a disk drive in Windows 11/10 without using any software, you can use the Windows built-in drive encryption tool called BitLocker. It allows you to encrypt an entire disk drive and put a password on it for when you want to unlock it.
If you want to encrypt only certain files or folders, you can use the Windows EFS (Encrypted File System) feature to encrypt multiple files or folders so that no other user accounts or other PC can access to it. Both the BitLocker and EFS features are only available in Windows 10/11 Pro.
Related: How to Lock Drive in Windows 11 Without BitLocker
Use Windows BitLocker
To password protect and lock a disk drive in Windows 11/10 using BitLocker, follow the steps below.
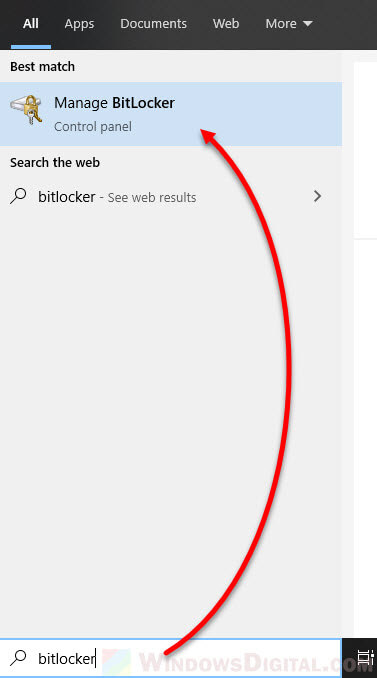
- Search for and open BitLocker via the Start menu search.
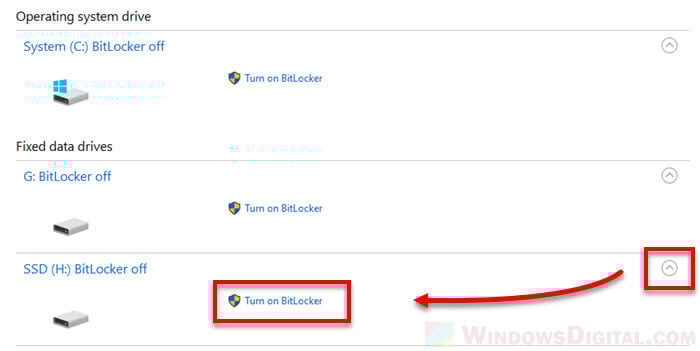
- Select a drive you want to encrypt and click on the expand down arrow button at the right of the drive. Then, click on “Turn on BitLocker” next to the drive.
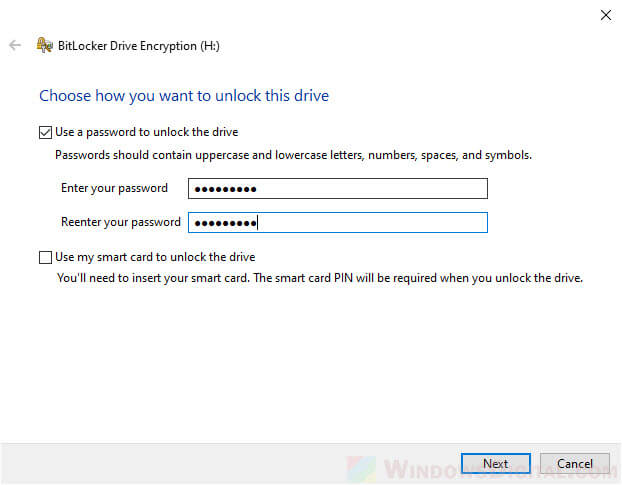
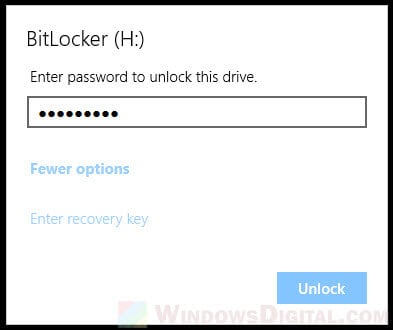
- To add a password, enable “Use a password to unlock the drive” checkbox and enter your desired password.
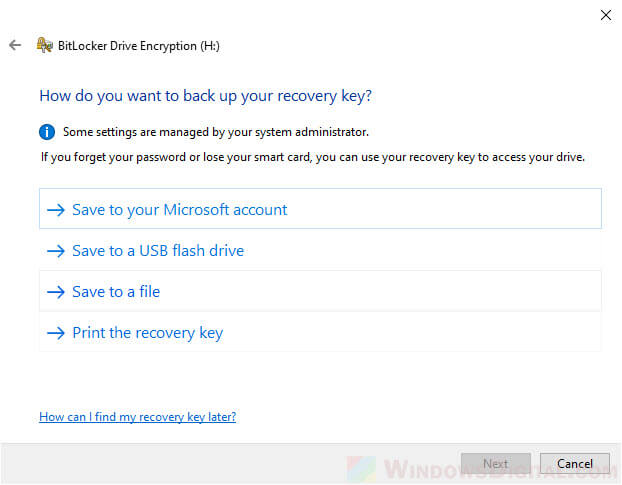
- When you’re prompted for “How do you want to backup your recovery key”, select any option that suits you. This recovery key will be the backup key in case you lose your password.
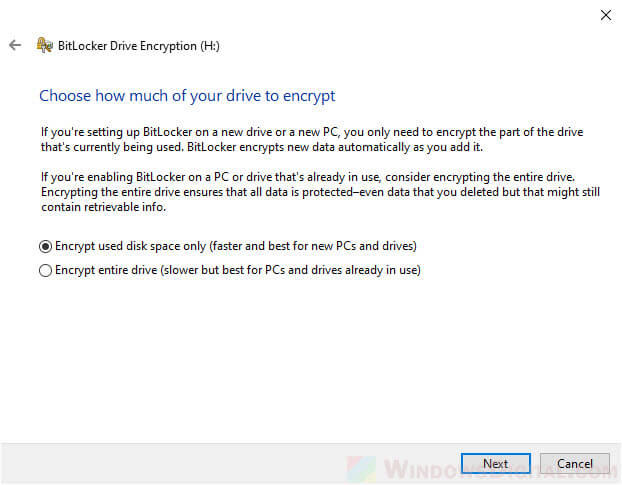
- On the next screen about “Choose how much of your drive to encrypt”, select an option that best describes the situation of your drive – Encrypt used disk space only (faster and best for new computers and drives) or Encrypt entire drive (slower but best for computers and drives already in use).
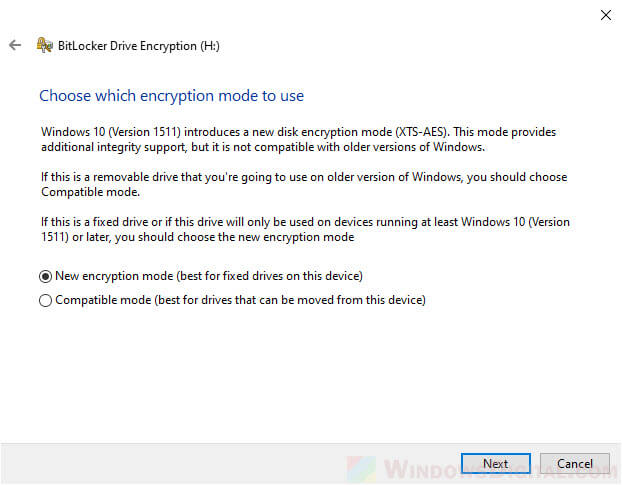
- When prompted for “Which encryption mode to use”, select “New encryption mode” if the drive will only be used on devices running Windows 10 version 1511 or later, or select “Compatible mode” if you’re going to use the drive on older version of Windows.
- Finally, click on “Start encrypting” to begin the encryption. It may take some time depending on the size of the files and folders on the drive.
- Once BitLocker has finished encrypting the drive, restart your PC.
The encrypted drive will remained unlocked if you don’t restart your PC after the encryption is completed. You need to restart your PC to have it locked. When you start up your PC, the drive should be locked. To unlock the drive, double click on it and enter the password you’ve set earlier.
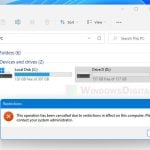
Note: The encrypted drive will be locked upon every shutdown and restart. It can only be unlocked by users with administrator rights. Additionally, once the drive is unlocked, it remains unlocked throughout the session for all user accounts until you restart your computer. So, it’s best to restart your PC (instead of signing out) if you want to switch to another user account that should not have access to the locked drive.
Always make sure you have a backup of the encryption key in case you lose your password or your Microsoft account. Files cannot be decrypted without the encryption key.
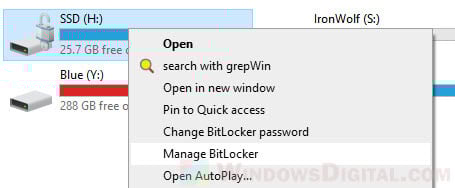
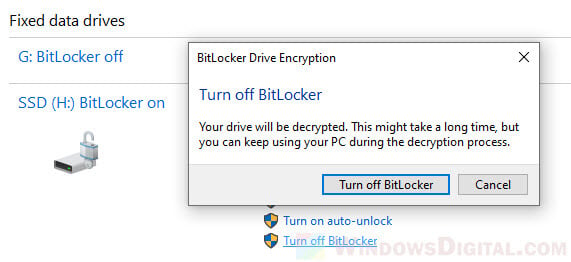
To turn off BitLocker of a particular drive, first, unlock it with password in This PC. Then, right-click on the drive and select “Manage BitLocker”.
In BitLocker window, select “Turn off BitLocker” next to the locked drive.
Use Windows EFS (Encrypted File System)
Encrypting a file or folder using EFS will prevent other user accounts or other computers to have access to it. The feature doesn’t have password unlocking method. User account that does not have the encryption key will simply not be able to open the file.
To encrypt a file or folder in Windows using EFS, follow the steps below.
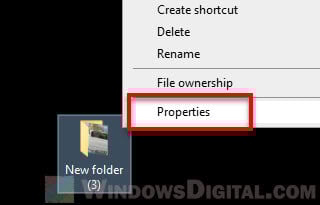
- Right-click a file or folder you want to encrypt, then select Properties.
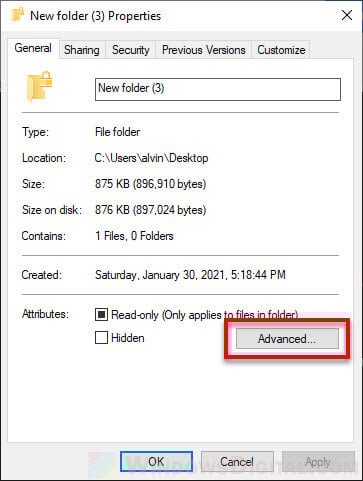
- In the General tab, click on Advanced.
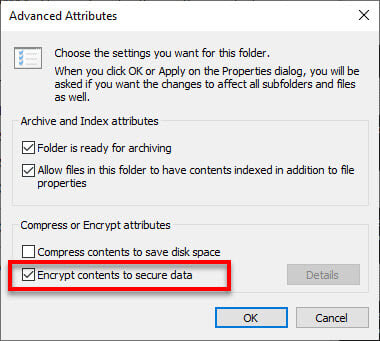
- In the Advanced Attributes window, under Compress or Encrypt attributes section, enable the “Encrypt contents to secure data” checkbox. Then, click on OK.
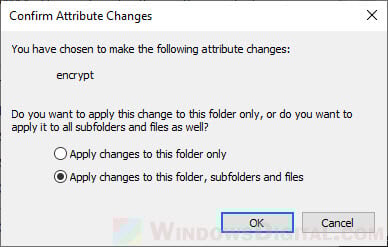
- In the next prompt, select “Apply changes to this folder, subfolders and files” if you want to encrypt everything inside the folder.
- Click OK to start the encryption process.
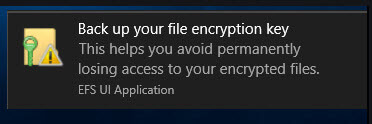
- Back up a copy of the file encryption key on the next pop up. If there is no pop up whatsoever, find it in the notification area at the bottom right side of your Windows desktop screen. If you lose your Windows user account, the encryption key backup is your only way to decrypt the files.
Once applied, you can now try to sign into another user account and open the files. If this is done right, the encrypted files or folders will have a lock icon on the thumbnail and will not be accessible. It should show “It appears that you don’t have permission to view this file. Check the permissions and try again” error if an user account has no access to the encrypted file.

Note: EFS encryption key is bound to your user account. It means that if a file is encrypted by your administrator account, other user accounts on the same PC will not have access to it. Additionally, if you move your hard drive to another computer, it will remained inaccessible without your account’s decryption key.
However, EFS encrypted files and folders will be automatically decrypted when you move it to a Fat32 or exFAT drive, or send it via email or other types of sharing. This is because when a software or program such as Outlook needs to have access to the encrypted files, Windows will decrypt the files first before sending the files to Outlook.
Also, compressed files or folders (such as zip or rar files) cannot be encrypted by EFS. To encrypt such files, you need to extract them first.
Protect files using OneDrive Personal Vault
Alternatively, you can try to use Microsoft’s OneDrive Personal Vault to protect your folders. The Personal Vault is a protected storage in OneDrive that you can only access with strong authentication methods such as fingerprint, face, PIN, or via a code from Microsoft Authenticator app or SMS.
OneDrive Personal Vault is free to use with limited storage and number of folders. If you need more storage, you need to sign up for one of its paid plans.
Lastly, we would like to point out that no matter what kind of encryption or password protection services you use, there will always be a risk that it might get breached. If your data is extremely personal and valuable, consider hiring an expert in encryption solution.