If Windows Update suddenly lists “NVIDIA Display Driver Update (32.0.16.1088)” on your Windows 11 PC even though you already installed a newer NVIDIA driver yourself, installing it could actually put you on an older driver than the one you have now. This guide will show you how to check whether the update is really older, how to hide or block it, and how to get your newer driver back if Windows already installed it.
Also see: How to Update Graphics Driver in Windows 11
Page Contents
Why is Windows Update offering an older NVIDIA driver?
Users on Reddit and ElevenForum started reporting this update in early October 2026, mostly after moving to Windows 11 26H2. Windows Update may still try to install 32.0.16.1088 even if you already have NVIDIA’s newer 617.42 driver (released on 6 October) from the NVIDIA App. It also sits on the main Windows Update page instead of under Optional updates.
Microsoft has actually admitted that this kind of thing happens. In a May 2026 post for hardware makers, it said that people who manage their own display drivers get unwanted downgrades through Windows Update. A very possible reason is that Windows Update matches graphics drivers to hardware quite loosely, so an older driver published through Windows Update can end up as the “highest-ranked” match for your card even when you have a newer one from NVIDIA, AMD or Intel. Microsoft’s fix for this is rolling out through late 2026 and early 2027, so it can still happen until then.
Related concern: AMD Software Warning: Graphics Driver Replaced?
Check your current NVIDIA driver version first
The NVIDIA App shows short version numbers like 617.42, while Windows Update shows the longer Windows-style number (32.0.16.1088). To compare them properly, look at the long number in Device Manager:
- Press Win + X and select Device Manager.
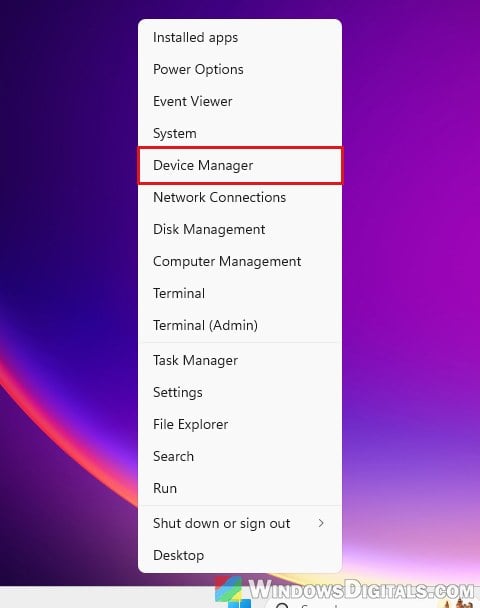
- Expand Display adapters, right-click your NVIDIA graphics card and select Properties.
- Open the Driver tab and look at Driver Version and Driver Date.
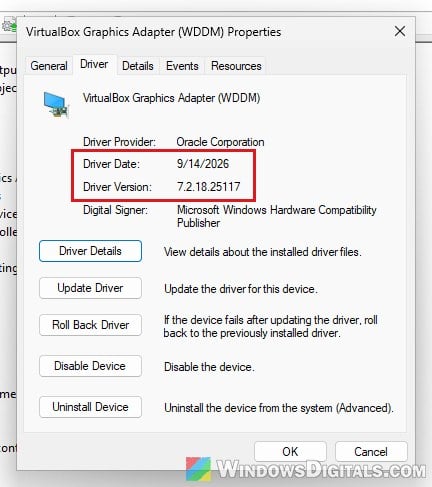
If your Driver Version is higher than 32.0.16.1088, the driver Windows Update is offering is older than what you already have, and you don’t need it.
Might be useful: How to See What Drivers Are Installed in Windows 11
Hide the update with Microsoft’s “Show or hide updates” tool
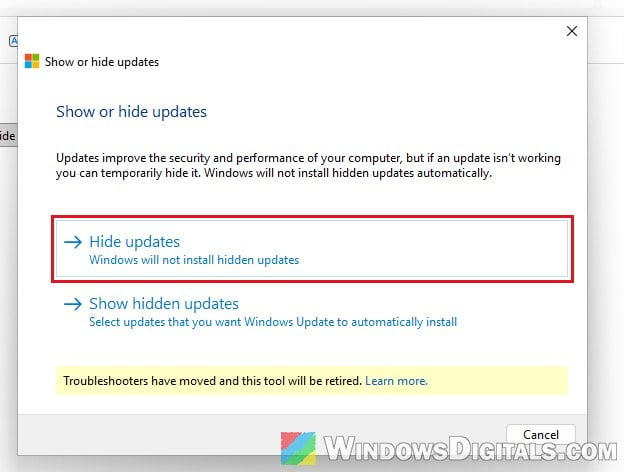
The quickest fix is to hide that one update, and it doesn’t need Group Policy. Microsoft’s old wushowhide troubleshooter lets you hide a single update from Windows Update. It shows a note that the tool “will be retired”, but it still opens and works on Windows 11 26H2. Once you hide the NVIDIA update with it, the update should disappear from Windows Update right away. It doesn’t work for everyone, though, so if the update keeps coming back, try one of the Group Policy methods below.
Here’s how to do it:
- Download the tool from Microsoft at
https://download.microsoft.com/download/f/2/2/f22d5fdb-59cd-4275-8c95-1be17bf70b21/wushowhide.diagcab. - Double-click wushowhide.diagcab to open it, then click Next.
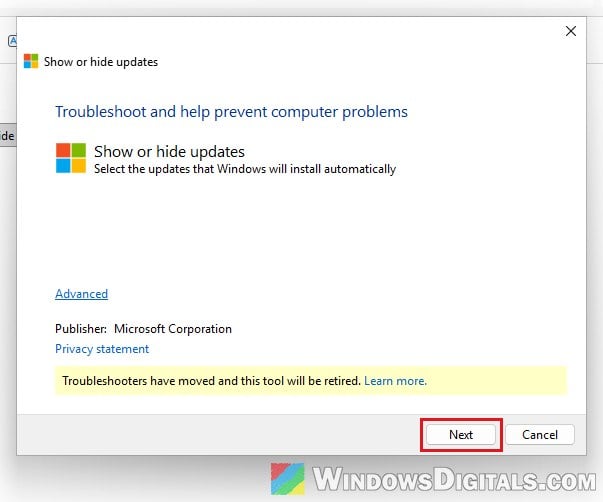
- Wait for it to check for updates, then click Hide updates.
- Tick “NVIDIA Display Driver Update (32.0.16.1088)” in the list and click Next.
- Close the tool once it’s done.
Go back to Settings > Windows Update and check again. If the update is still listed, try the pause trick in the next section. Keep in mind that hiding only works for that exact version. If Windows Update later offers another NVIDIA driver, you’ll need to hide that one too. The offer can also go away by itself after a while.
If the tool won’t run because troubleshooting is blocked on your PC, see:
Linked issue: Troubleshooting has been disabled by Group Policy Windows 11
Pause updates, then resume, to refresh the list
Sometimes the update stays on the page even after you’ve hidden or blocked it, probably because Windows Update hasn’t refreshed its list yet. Pausing and resuming updates can make the NVIDIA driver disappear:
- Open Settings > Windows Update.
- Next to Pause updates, click Pick a date and choose any date, for example tomorrow.
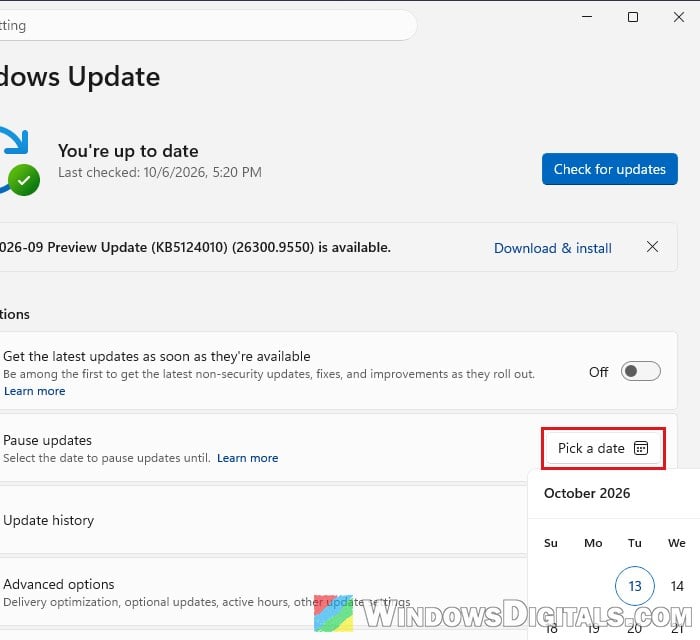
- Click Resume updates at the top of the page.
Windows Update will check for updates again, and the NVIDIA update should no longer be listed.
Stop Windows Update from installing drivers (Pro edition)
If you’d rather manage all your drivers yourself, you can tell Windows Update not to include drivers at all. Microsoft documents this policy for Windows 11 Pro, Enterprise and Education, so Home users should stick with the hide tool above.
Please note that this stops driver updates for all your hardware, not just the NVIDIA card. You’ll then need to update drivers for your other hardware yourself, from the manufacturer’s website. To set it up, follow the steps below:
- Press Win + R, type “gpedit.msc” and press Enter.
- In Local Group Policy Editor, go to Computer Configuration > Administrative Templates > Windows Components > Windows Update > Manage updates offered from Windows Update.
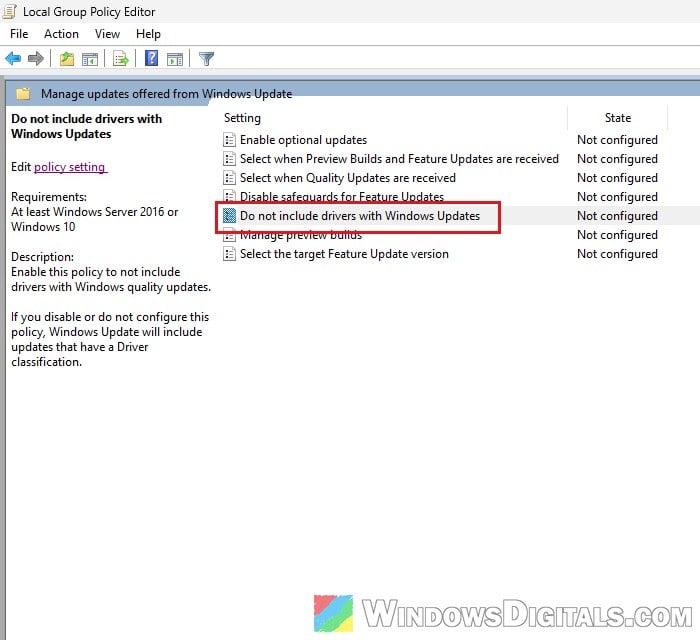
- Double-click “Do not include drivers with Windows Updates“.
- Select Enabled, then click Apply and OK.
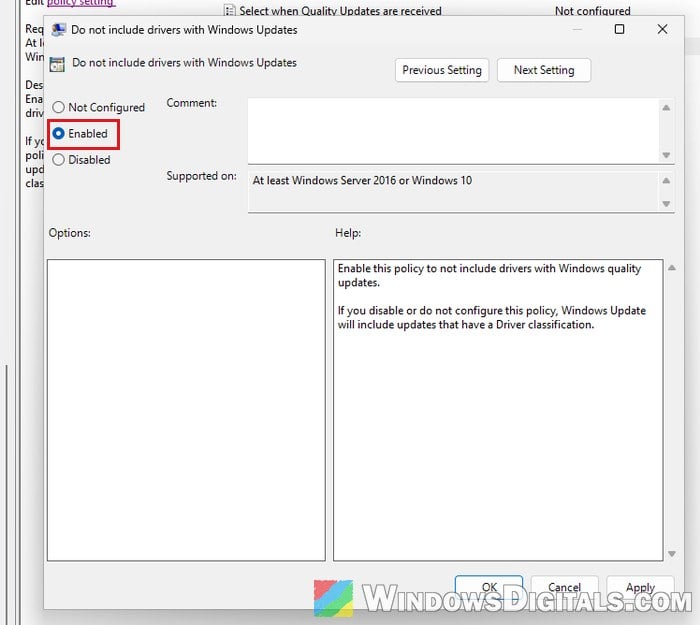
If the update is still listed, use the pause trick above. To allow driver updates again later, set the same policy back to Not Configured.
Block driver installs for your graphics card only (advanced)
A more targeted way is to block new drivers only for your NVIDIA card. It uses a Group Policy that stops Windows from installing drivers for a hardware ID, so it also needs Pro edition.
The catch is that it blocks every driver install for your card, including the ones you download from NVIDIA yourself. So you should install the latest NVIDIA driver first, and when you want to update it again later, turn this policy off, install the new driver, then turn it back on. If you’re not sure what you’re doing, stick with the hide tool above instead.
Here’s what you should do:
- Install the latest driver for your card from the NVIDIA App or NVIDIA’s website.
- Open Command Prompt as administrator and run the following command to list the hardware IDs of your display adapters:
pnputil /enum-devices /class Display /ids
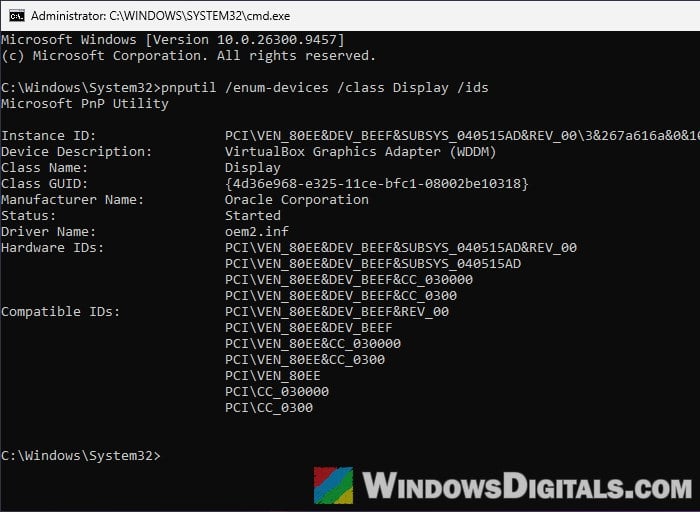
- Under your NVIDIA card, look at the lines next to Hardware IDs and copy the one that starts with
PCI\VEN_10DE&DEV_and ends with theSUBSYS_part, without&REV_at the end. - Open Local Group Policy Editor again (type “gpedit.msc” in Run) and go to Computer Configuration > Administrative Templates > System > Device Installation > Device Installation Restrictions.
- Double-click “Prevent installation of devices that match any of these device IDs” and select Enabled.
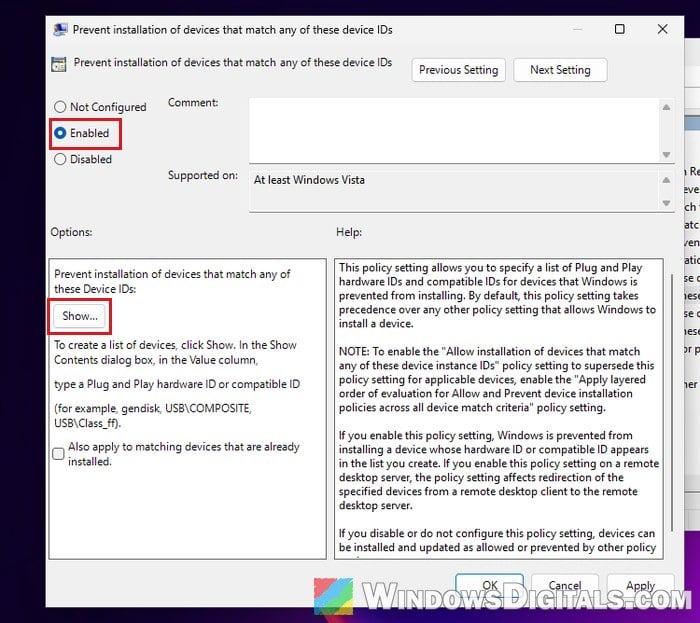
- Click Show…, paste the hardware ID into the list, and click OK.
- Leave “Also apply to matching devices that are already installed” unticked. You only want to stop new installs, not touch the driver your card is using now.
- Click Apply and OK.
After that, Windows Update shouldn’t be able to install the NVIDIA driver it’s offering. Use the pause trick if the entry still shows.
If Windows already installed the older driver
If Windows Update got to it first, roll it back in Device Manager:
- Open Device Manager, expand Display adapters, right-click your NVIDIA card and select Properties.
- Open the Driver tab and click Roll Back Driver.
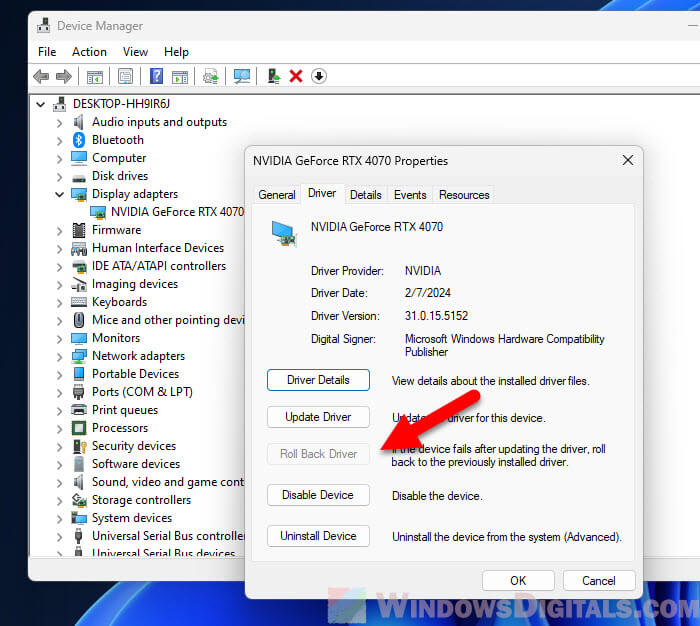
- Follow the prompts to confirm the rollback.
If Roll Back Driver is grayed out, just reinstall the driver you want from the NVIDIA App or NVIDIA’s website. Either way, hide or block the update afterwards, or Windows Update may install 32.0.16.1088 again.
Related guide: How to Uninstall Drivers in Windows 11