If you’re trying to download the Windows 11 ISO in English International (the UK English version) but it’s missing from the language list on Microsoft’s download page, the ISO is still there, just not on the UK version of the page. This guide will show you where to get it and how to check if English International is the one you actually need.
Also see: How to Burn Windows 11 ISO to USB
Page Contents
Where did English International go?
Microsoft hasn’t said why, but it’s missing from the UK version of the Windows 11 download page (the one with en-gb in the address). When we checked in October 2026, the “Select the product language” list there went straight from “English (United States)” to “Estonian“, with no English International in between.
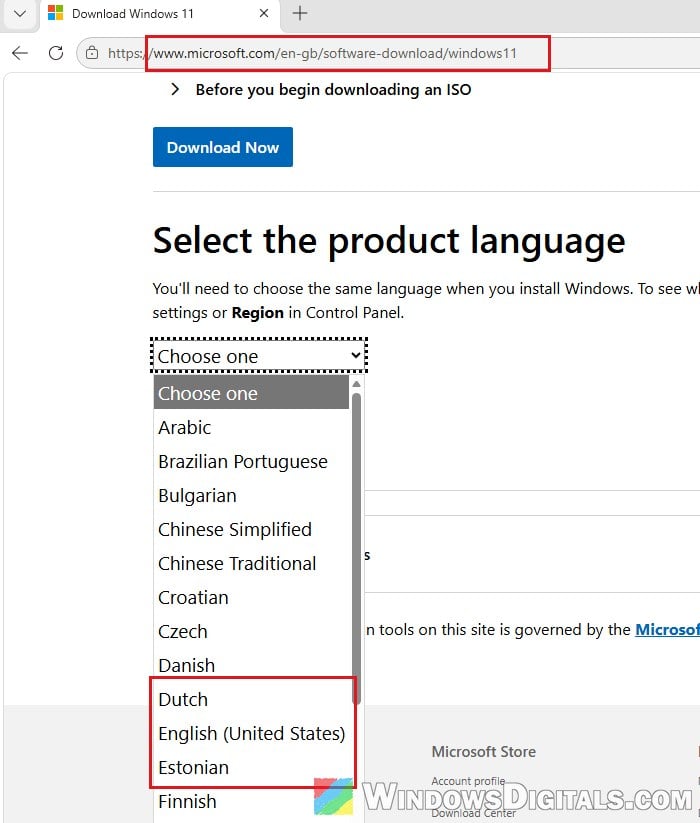
One ElevenForum member pointed it out on September 30 in a thread about getting the 26H2 update, and Neowin reported it on October 6. The US version of the same page (en-us) still lists English International, so that’s where you can get it for now.
English or English International, which one do you need?
Before you download anything, make sure English International is the right one for you. English International is the British English version of Windows 11, meant for people in the UK and other countries that use British English. The regular English (United States) version is meant for the US.
This matters most if you want to repair or upgrade Windows in place, meaning you run the ISO’s setup from inside Windows and keep your files and apps. Microsoft’s download page itself says you need to choose the same language when you install Windows. Several users on Microsoft Q&A and ElevenForum also found that Setup won’t let them keep their apps when the ISO’s language doesn’t match. Mixing up English and English International is the usual reason.
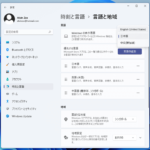
The language that counts is the one Windows was installed with, which isn’t always the same as the display language you see in Settings. You can check it with a quick DISM command. Here’s how:
- Click Start, type “cmd“, right-click Command Prompt and select Run as administrator.
- Type the following command and press Enter:
dism /online /get-intl
- Look at the line that says “Default system UI language“.
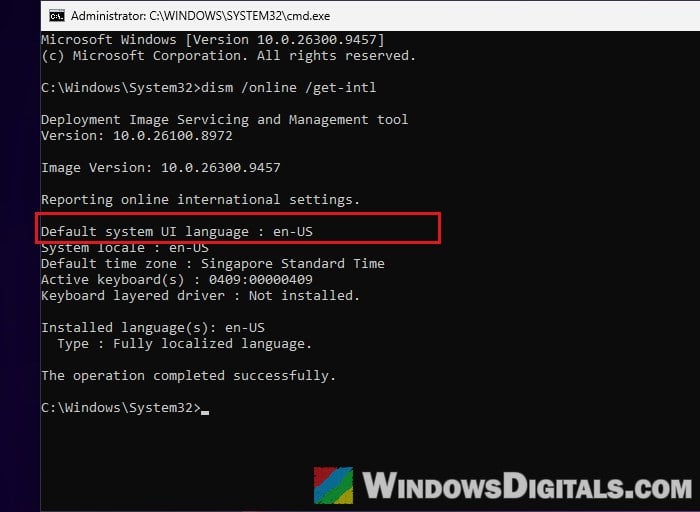
If it says en-GB, you need the English International ISO, which Microsoft labels English (United Kingdom) on the download. If it says en-US, download English (United States) instead, which the UK page still offers.
Might be useful: In-place Upgrade of Windows 11 on Unsupported Hardware
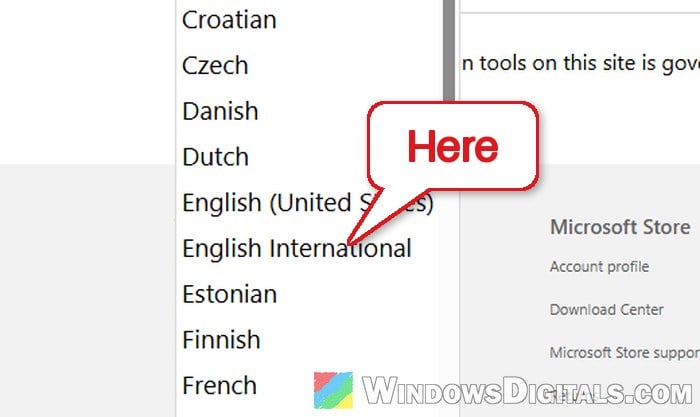
How to download the English International ISO from the US page
On ElevenForum, another member suggested the US page to the person who reported the problem, and they confirmed it worked. We tried it too and got the download link. Here’s how to do it:
- Open your browser and go to
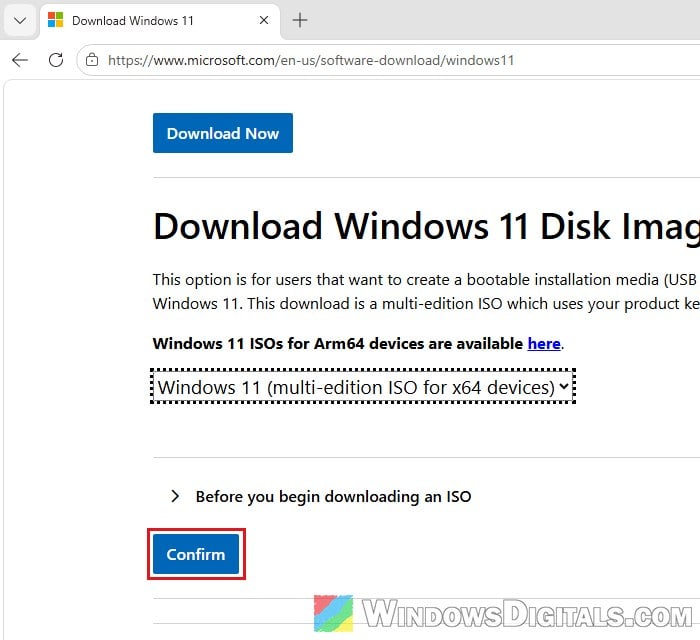
https://www.microsoft.com/en-us/software-download/windows11. Make sure the address hasen-usin it. - Scroll down to “Download Windows 11 Disk Image (ISO) for x64 devices“.
- Select “Windows 11 (multi-edition ISO for x64 devices)” from the dropdown and click Confirm.
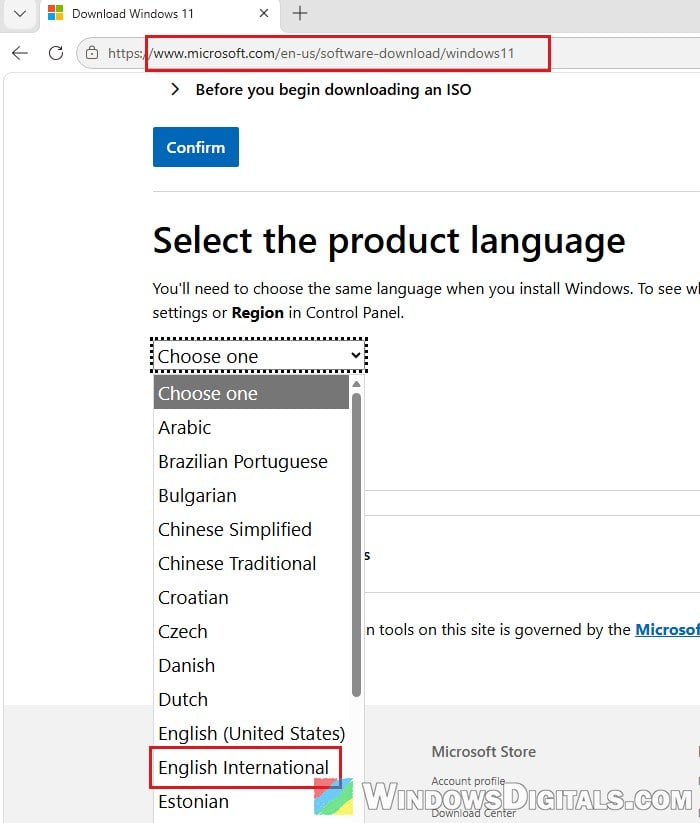
- Under “Select the product language“, select “English International” and click Confirm.
- Check that the heading says “Download – Windows 11 Client” followed by the build number and “English (United Kingdom)“, then click 64-bit Download.
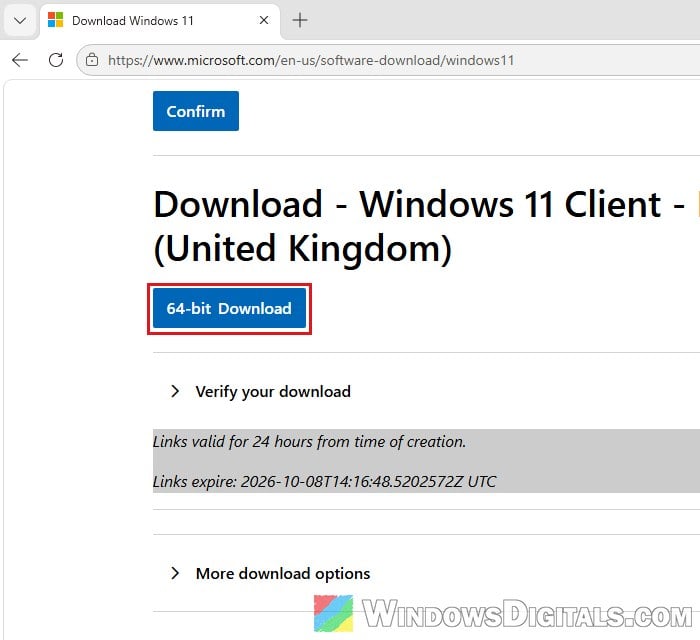
When we tried it, the page offered build 26300.9457, which is Windows 11 26H2.
Note: The page says the download link is only valid for 24 hours. If it expires before you use it, go through the steps again to get a new one.
Once the download finishes, you can use the ISO to make a bootable USB for a clean install, or repair your current Windows with it as shown below.
Related guide: “Reinstall your current version of Windows” Message
Use the ISO to repair Windows without losing your files
If you need the ISO for an in-place repair (reinstalling Windows over itself while keeping your files and apps), the ISO has to be in the same language as your current Windows, as explained above. Microsoft also says the edition you reinstall must match your license. Here’s how to do it:
- Go to the folder where you downloaded the ISO file, right-click it and select Mount. This creates a virtual disc. Double-click it to see its files.
- If you don’t see Mount, ISO files are probably set to open with another program. Right-click the ISO, select Properties, click Change… next to “Opens with:” on the General tab, select Windows Explorer and click Apply. Then right-click the ISO again and select Mount.
- Double-click setup.exe to start Windows 11 setup.
- Click Change what to keep, then select “Keep personal files and apps“.
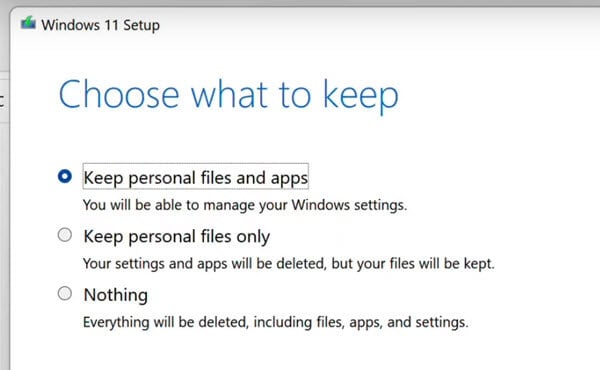
- Follow the rest of the prompts to finish the repair.
If “Keep personal files and apps” is grayed out, the ISO’s language most likely doesn’t match your Windows. Go back to the DISM check above and download the ISO in the matching language.