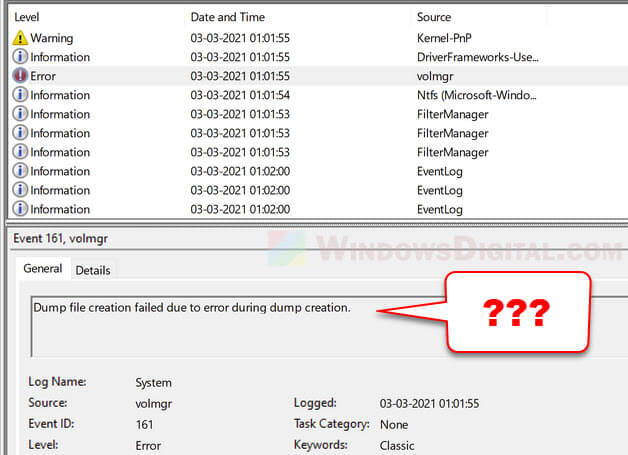
When you encounter a crash or BSOD (Blue screen of Death), the best way to find out what’s wrong is to read the dump file created during the crash. However, in some cases, when you look at the Event Viewer, the crash event may display the “Event 161, volmgr” error with a description that says “Dump file creation failed due to error during dump creation“, which basically means that Windows failed to create the dump file.
This guide will show you what causes the dump file creation to fail in Windows 11 and how to deal with the BSOD crashes when there is no dump file.
See also: Windows 11 Dump File Location
Page Contents
Why are dump files failed to be created in Windows 11?
If Windows 11 fails to create any dump file in the event of a crash or blue screen error, it may be due to one of the following reasons.
Incorrect “write debugging information” setting
Check if you have the correct write debugging setting and make sure you have enabled the dump file creation in Windows 11.
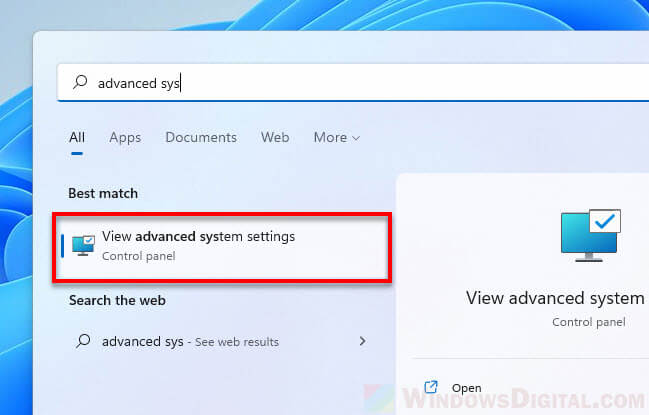
- Search for “View advanced system settings” via Start menu and open it.
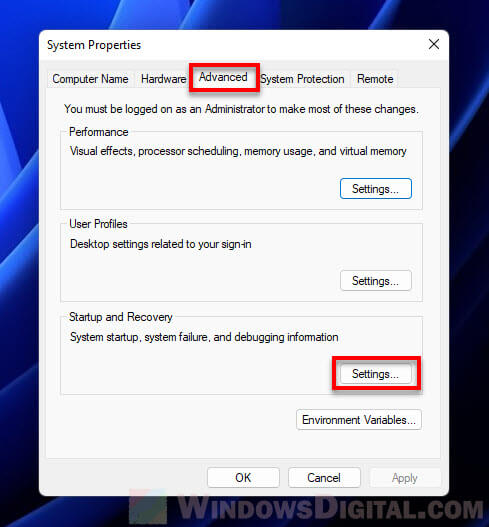
- Next, select the Advanced tab.
- Under Startup and Recovery, click Settings.
- Under System Failure, check that you have the following options enabled.
- “Write an event to the system log” should be enabled.
- Under “Write debugging information”, either “Kernel memory dump” or “Automatic memory dump” should be selected. If you choose “None”, Windows will not generate any dump files in any crash event.
- The “Dump file” field shows the location of the dump file.
- “Disable automatic deletion of memory dumps when disk space is slow” should also be enabled if your disk space is rather low.
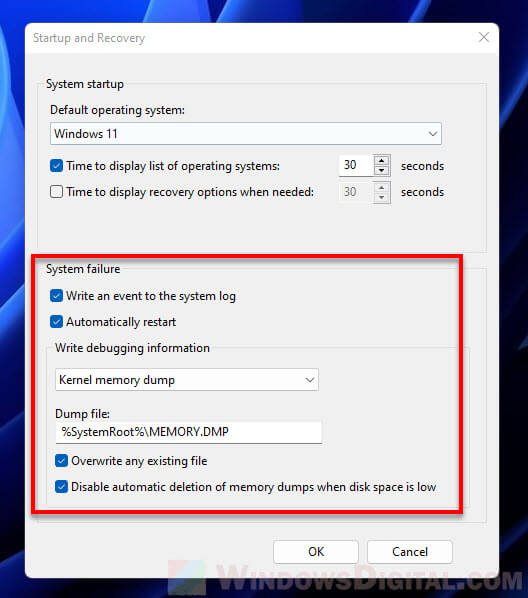
- Click OK to save any changes. Restart your computer for the changes to take effect.
Remove any software that automatically deletes temporary files
Check if you have any cleaning tool that is set to automatically clear the temporary files on every startup. Since dump files are part of temporary files, if there is any software that clears the temp files automatically on startup, the dump and minidump files will get deleted as well.
Configure or uninstall any third party cleaning app such as CCleaner, etc. that may have the authority to clear the temporary files. Check if you have any other software or program that may have the permissions to manage the temporary files of your PC. Try to disable or uninstall those programs as well.
Once you’ve uninstalled any app that you suspect to be the culprit of the issue, try reproducing the blue screen error and see if the dump file can be created after that.
Check the page file settings
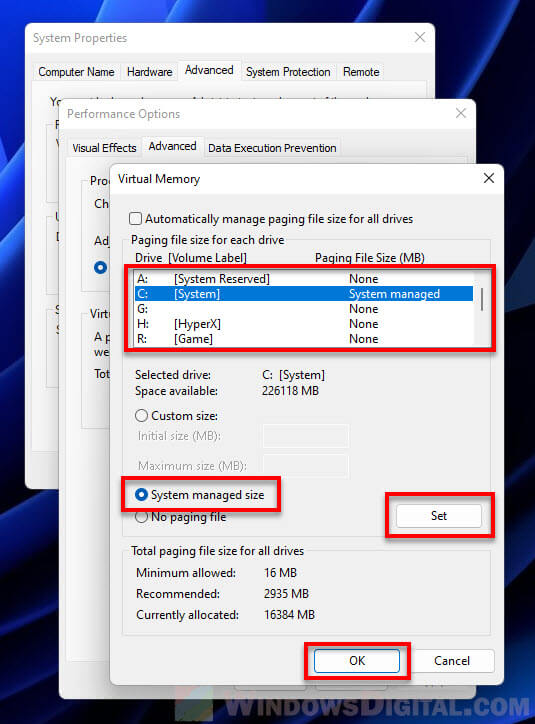
Try setting the page file on the same drive as your OS and preferably select the “System managed” option to allow Windows to automatically allocate the paging file size on the drive.
To configure the page file settings in Windows 11, follow step 1 and 2 in the instruction above to open the “Advanced system settings” window. In the Advanced tab, click Settings under Performance.

Next, in the Performance Options window, select Advanced tab and click Change under Virtual memory.
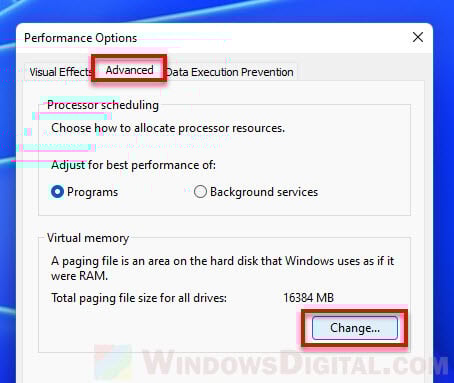
In the Drive section, select your system drive (usually C: drive) and then select “System managed size“. Click Set and then click OK to save the changes. You need to reboot your computer for any changes to take effect.
Related: How to Delete Pagefile.sys in Windows 11
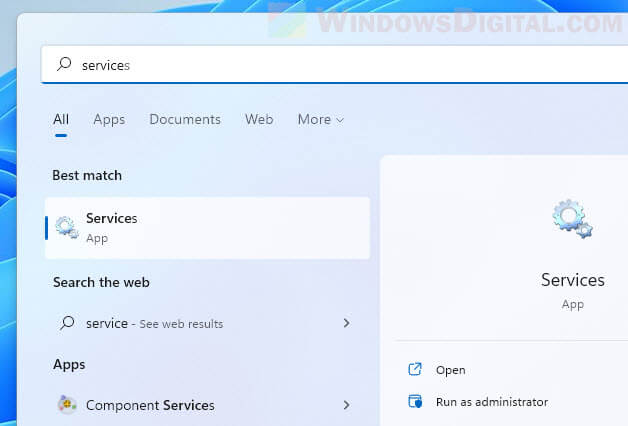
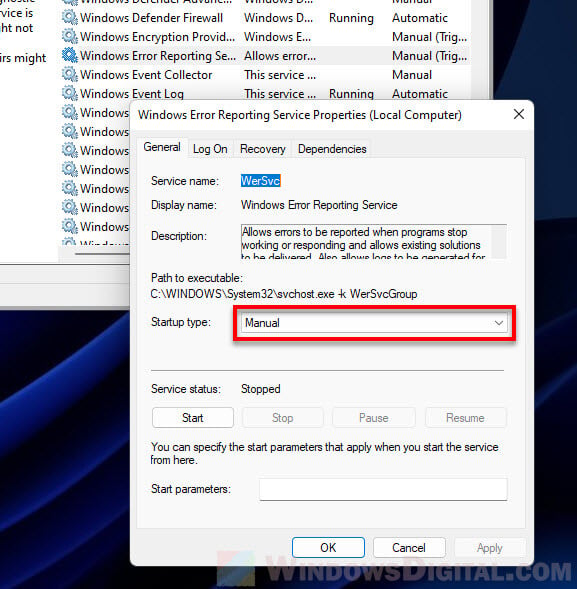
Check Windows Error Reporting Service
Check that the Windows Error Reporting Service is set as Manual in the Services app. To check the service, search for and open “Services” via Start.
Then, in the Services window, look for a service called “Windows Error Reporting Service” on the right pane. Double-click it and make sure the Startup type is set to Manual.
Try a manual crash dump
If you are unsure if Windows can properly create dump file in the event of a BSOD or crash, you can try forcing a system crash using the keyboard.
After that, check the event viewer again and see if the most recent crash event is still showing the “dump file creation failed due to error during dump creation” error. If the dump file is successfully created, it should show something else (details about the crash event).
Hardware failure
HDD and RAM (or any other hardware) failure could also cause the dump file creation to fail when BSOD occurs in Windows. If your computer or device is still under warranty, you should consider sending it back to the manufacturer for repair.
How to fix “dump file creation failed due to error during dump creation” BSOD crashes
Each blue screen error has a different cause and just about anything (both software and hardware) could cause a blue screen error in Windows. There is no exact and guarantee fix to all blue screen errors in general. However, common blue screen errors can still be solved by popular solutions that have proven to worked in many cases.
While the best way to troubleshoot a blue screen error is by reading the dump file to find out the culprit of the problem, if Windows fail to generate any dump file or minidump, you can try the following solutions instead to fix your BSOD error in Windows 11.
Some of the most common BSOD error entries
Below is a list of guides we’ve written in the past about how to fix some of the most common blue screen errors in Windows 11 and 10.
- How to Fix Blue Screen With Sad Face on Windows 10 or 11 PC
- Fix: Stop Code Kernel_Data_Inpage_Error BSOD in Windows 11 or 10
- System Thread Exception Not Handled Windows 10 BSOD
- Driver IRQL_NOT_LESS_OR_EQUAL BSOD in Windows 10
- Whea Uncorrectable Blue Screen Error in Windows 10/11
You can also use the search form via the “Search a problem” button at the top right of this page to search for the STOP code you receive from the BSOD event.
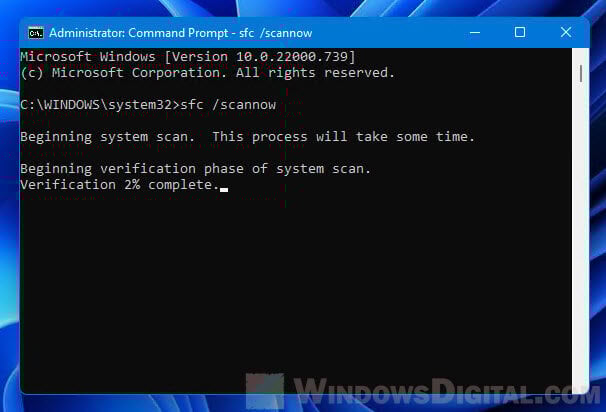
Run system repair commands
There are a series of commands you can use to scan your computer for problems and automatically fix any issues as they are found. These command lines are highly effective in solving system related issues in Windows.
Run each of the following command lines in an elevated command prompt (run as administrator).
sfc /scannow
Dism /Online /Cleanup-Image /RestoreHealth
chkdsk c: /f
For more information about what each of these commands does and how to run them on startup, read: How to Startup Repair Windows 11 using Command Prompt.
System restore or reset Windows 11
If you run out of options, you may want to try to system restore Windows 11 to a previous date (only possible if at least one system restore point was created earlier, either automatically or manually), reset Windows 11 to factory default or reinstall it.