If Windows Update keeps failing with “Install error – 0x80070306” when installing the October 2026 security update KB5127648, or any other cumulative update, and trying again only gives you the same error, the problem is usually on your PC and not with the update itself. This guide will show you what the error means and how to fix it.
Also see: Windows 11 “Updates failed” with a “Retry” button
Page Contents
What does error 0x80070306 mean?
The code itself is pretty vague. According to Microsoft’s list of system error codes, the “306” part means “One or more errors occurred while processing the request“. In other words, something went wrong while Windows was installing the update, but it won’t tell you what.
KB5127648 is the October 13, 2026 security update for Windows 11 versions 26H2, 25H2 and 24H2. Microsoft doesn’t list 0x80070306 as one of its known issues, and the same error has also shown up with earlier monthly updates. So the problem is most likely damaged system files or a broken update installation on your PC.
Linked issue: Windows Update “Install error – 0x800f0993” in Windows 11
Use “Fix problems using Windows Update”
This is the fix that has worked for the most people with 0x80070306. Windows 11 has a built-in option that reinstalls your current version of Windows (a repair install) through Windows Update, which replaces damaged system files along the way. According to Microsoft, it keeps your apps, files and settings.
It can take a few hours on some PCs, so leave it alone until it’s done, and keep your PC plugged in and connected to the internet the whole time.
Here’s how to do it:
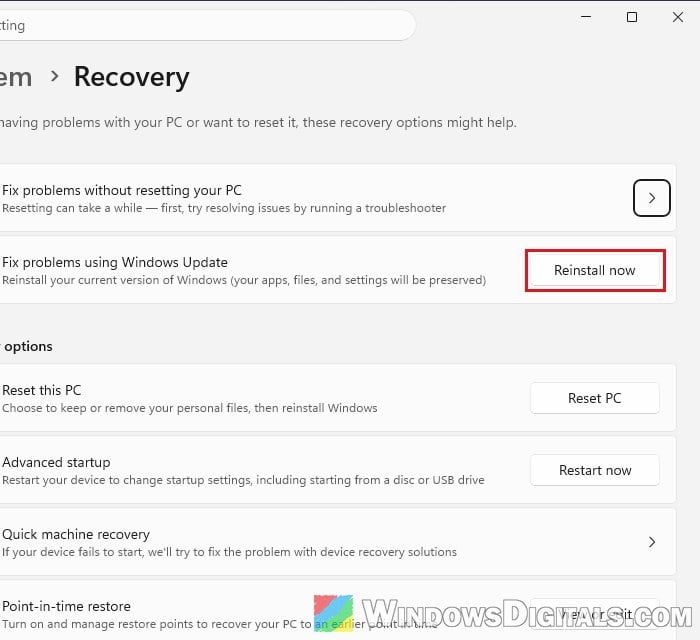
- Press Win + I and go to System > Recovery.
- Under “Fix problems using Windows Update“, click Reinstall now.
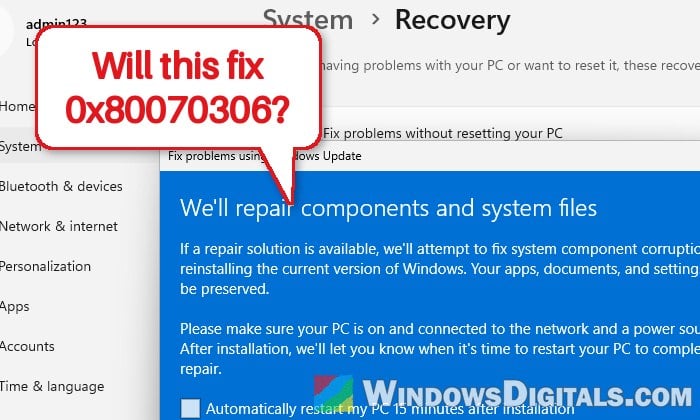
- Check “Automatically restart my PC 15 minutes after installation” if you want Windows to restart by itself, then click OK.
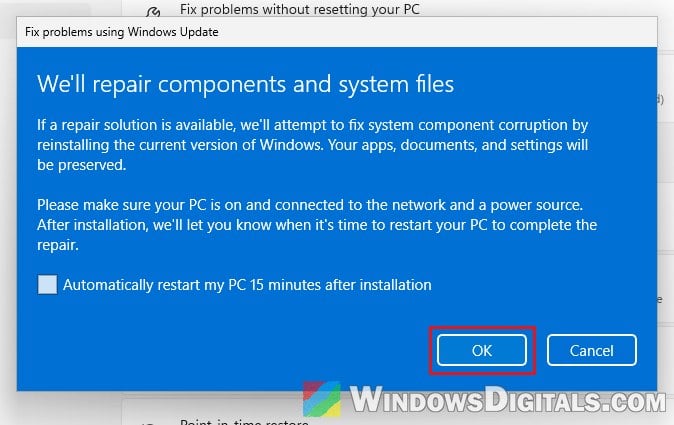
- Let Windows download and install the files. If you didn’t let it restart by itself, restart your PC when it’s ready.
- Go to Settings > Windows Update, click Check for updates and install KB5127648 again.
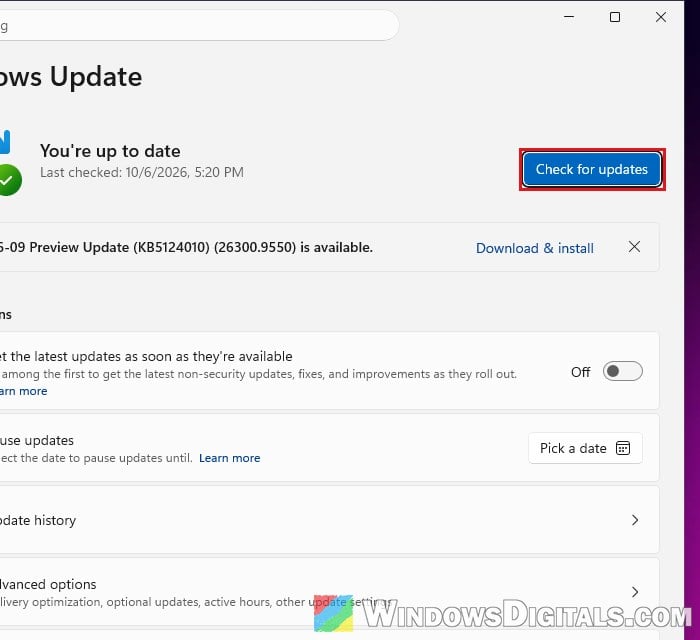
This time, KB5127648 should install without the error.
Learn more: “Reinstall your current version of Windows” Message
What if the option isn’t there?
Microsoft says “Fix problems using Windows Update” isn’t shown on PCs managed by a work or school organization, and on PCs where certain Windows Update policies are set. It also needs Windows 11 with the February 2024 optional update or a later update installed. If you can’t use it, the in-place upgrade at the end of this guide does the same kind of repair.
Turn .NET Framework off and back on
If the repair install isn’t an option right now, this quicker fix has also worked for some people with 0x80070306. The idea is to turn the .NET Framework features off, restart, and turn them back on, so Windows sets them up again before the update tries to install.
While .NET Framework is turned off, apps that need it may not open, so turn it back on right after the restart. Follow the steps below:
- Press Win + R, type “optionalfeatures” and press Enter to open Windows Features.
- Look at the two .NET Framework entries, .NET Framework 3.5 (includes .NET 2.0 and 3.0) and .NET Framework 4.8 Advanced Services. Clear the check box of each one that’s checked or filled in, then click OK.
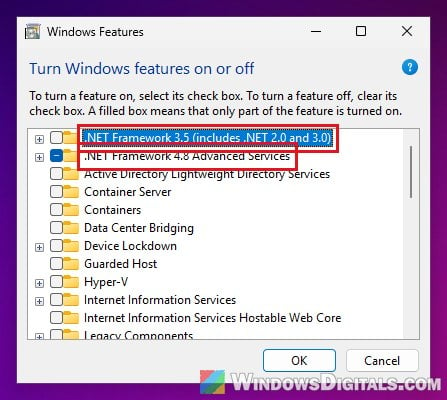
- Restart your PC.
- Open Windows Features again, check the same entries you cleared, click OK, and restart once more.
- Try installing the update again.
If KB5127648 installs this time, you’re done. If not, move on to the next fix.
Might be useful: How to Check .NET Framework Version in Windows 11
Repair system files with DISM and SFC
You’ve probably seen these two commands in every Windows Update guide. They don’t fix this error as often as the repair install above, but they usually don’t take long and they’re safe to run. DISM repairs the files Windows uses to install updates, and SFC then checks and fixes the system files themselves.
Here’s how to run them:
- Click Start, type “cmd“, and select Run as administrator for Command Prompt, then click Yes.
- Type the following command and press Enter:
DISM.exe /Online /Cleanup-Image /RestoreHealth
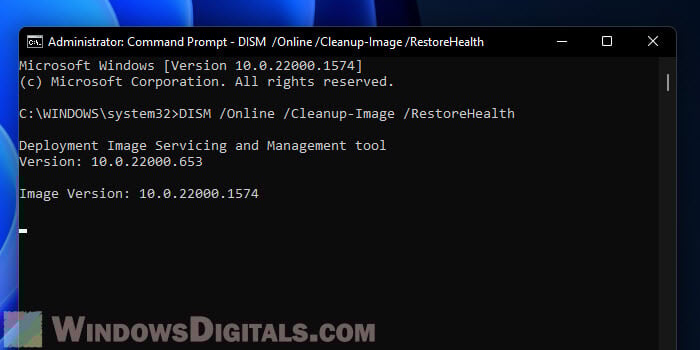
- When it’s done, type the following command and press Enter:
sfc /scannow
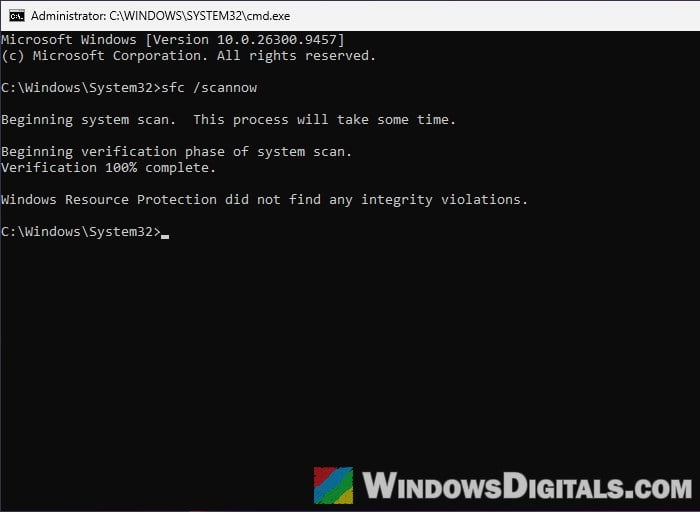
- Restart your PC, then try installing KB5127648 again and see if it goes through this time.
Pro tip: Can I cancel “SFC /scannow” while it’s running?
Install KB5127648 manually from the Microsoft Update Catalog
Instead of letting Windows Update install the update, you can download it yourself from Microsoft and install it by hand. It’s a big download (about 5 GB for 26H2 and 25H2), and since it uses the same installer, it can fail the same way. Still, it’s worth a try if the repair install isn’t available on your PC.
Please note that KB5127648 needs a second file to be installed first. According to Microsoft, you need to download all the files listed for the update into the same folder and install the one named windows11.0-kb5043080 before windows11.0-kb5127648.
Here’s what you should do:
- Go to
https://www.catalog.update.microsoft.com/and search for “KB5127648“. If the page stays blank, refresh it. - Find the line for your version of Windows 11, such as “2026-10 Cumulative Update for Windows 11, version 26H2 for x64-based Systems (KB5127648) (26300.9711)“.
- Pick x64 for most PCs, and arm64 only for ARM-based laptops.
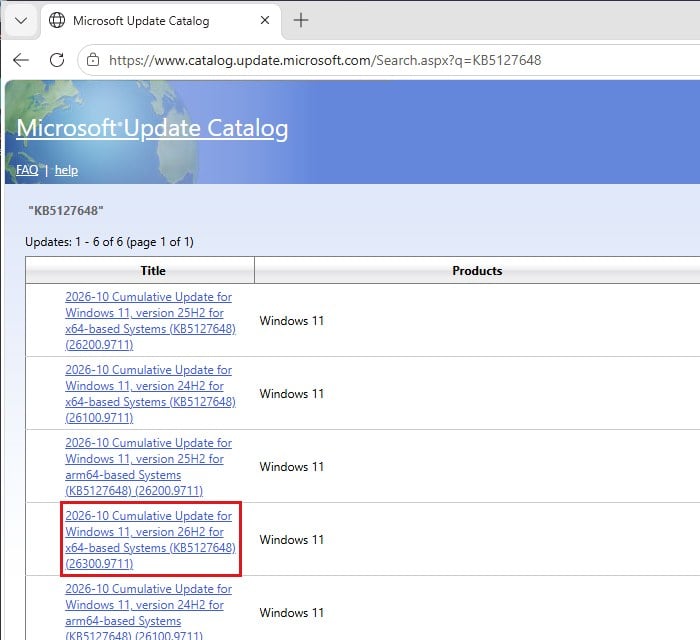
- Click Download on that line.
- The window that opens lists the .msu files for the update (for 26H2 x64, one for kb5127648 and one for kb5043080). Click each one to download it, and save them all into the same folder.
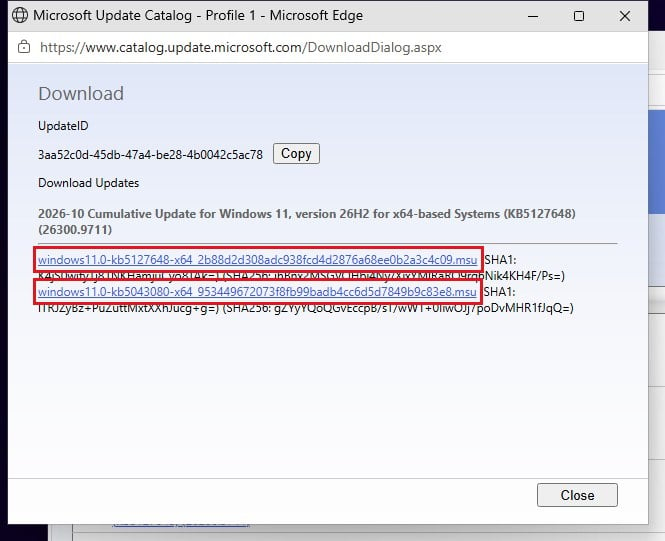
- Double-click the windows11.0-kb5043080 file first and let it install, then do the same with the windows11.0-kb5127648 file.
If you prefer, you can also install them together from an administrator Command Prompt with DISM. Put the files in a folder such as C:\packages, then run the following command once, with the real name of the kb5127648 file. According to Microsoft, DISM looks through that folder and installs the kb5043080 file by itself:
DISM /Online /Add-Package /PackagePath:c:\packages\<file name>.msu
Either way, restart your PC when it’s finished, then go to Settings > Windows Update and check for updates to see if KB5127648 is still offered.
Related problem: Windows 11 Update Keeps Failing With Error 0x800f0991
Do an in-place upgrade with the Windows 11 ISO
If nothing else works, an in-place upgrade reinstalls Windows from Microsoft’s own installation files instead of through Windows Update, while keeping your files and apps. It’s the same kind of repair as “Fix problems using Windows Update”, and it also works on PCs where that option isn’t available. Back up anything important first, just in case.
Then follow these steps:
- Go to
https://www.microsoft.com/software-download/windows11. - Under “Download Windows 11 Disk Image (ISO) for x64 devices“, open the Select Download list and pick the Windows 11 ISO.
- Click Confirm.
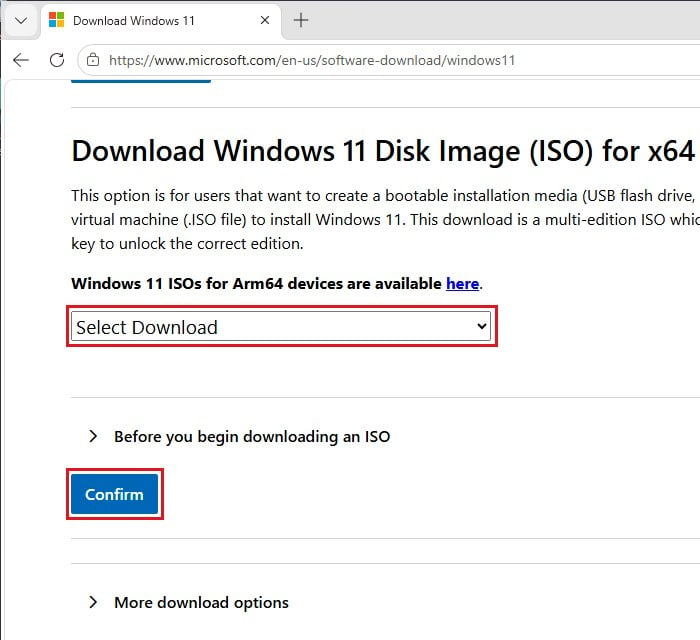
- Pick the same language your Windows is in, and follow the prompts to download the ISO.
- Double-click the downloaded ISO file to open it.
- Run setup.exe and follow the prompts.
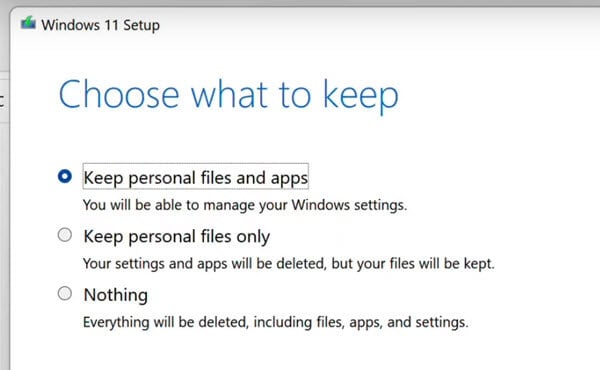
- Make sure “Keep personal files and apps” is selected before you start the installation.
When it’s done, go to Settings > Windows Update and check for updates again to install KB5127648.