Have you ever wanted to quickly change the size of the window you’re working on without dragging its corners? Or maybe change the size of the text, apps, and everything else on your screen? Windows 11 has different ways to manage your screen space, but usually, you need to click around a lot. This guide talks about how to use shortcut keys to resize windows effortlessly with a tool called Sizer. We’ll also look into whether you can use shortcut keys for adjusting screen scaling settings in Windows 11 or 10. Here’s a heads up: the answer might not be what you’re hoping for, but keep reading for all the details.
Also see: How to Make Everything Smaller or Bigger on Windows 11
Page Contents
Is there a keyboard shortcut to adjust scaling settings in Windows 11?
One big question about this topic is if you can actually use keyboard shortcuts to change scaling settings. For Windows 11 and even Windows 10, usually, the answer is an unfortunate no. There isn’t a direct shortcut in the OS that is able to change the “Scale and layout” settings, which affect how big or small text, apps, and other elements appear.
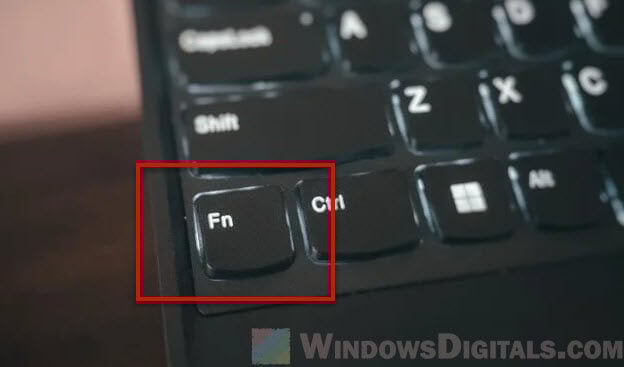
But some laptops and desktops do have this feature. Some brands do have their own shortcuts for screen settings, which might include scaling. If you’re using a branded laptop like a Dell, HP, ASUS or Acer, try to take a look at your device’s manual or check the manufacturer’s website to see if there is any relevant info about shortcut keys for scaling (usually involve the Fn key).
Well, to change these settings manually in Windows 11, you’ll need to do the following:
- Right-click on the desktop and choose Display settings.
- Head to the Scale and layout section.
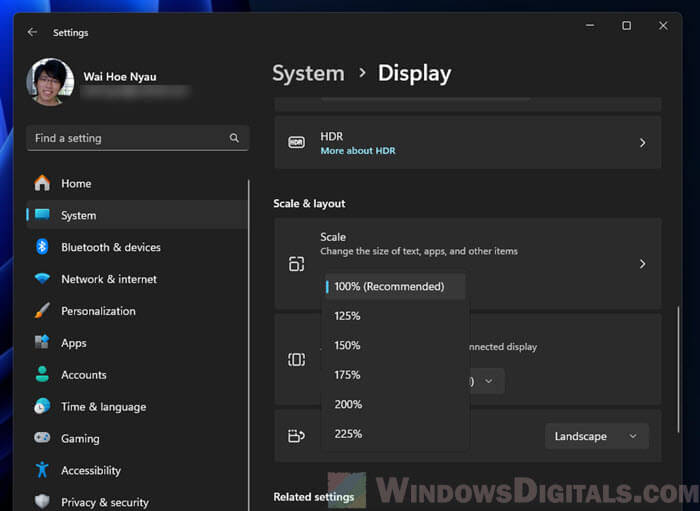
- You’ll see a dropdown menu under Change the size of text, apps, and other items. Pick the scaling percentage you want from this menu.
Useful guide: How to Zoom Out Desktop Screen on Windows 11
What is Sizer and what does it do?
Sizer is a third-party tool that allows you to manually change the size of each individual window (but it doesn’t really let you adjust the overall “Scale and layout” settings in Windows 11). If what you want to do is to resize specific windows rather than change the scale of text, apps, and other items, Sizer can probably help you out.
This tool is especially useful for web developers, designers, or anyone who often needs multiple windows at specific sizes for convenient viewing, testing, or other purposes. It fits right into the Windows context menu so you can quickly resize any window with just a right-click.
In the sections below, we’ll show you how to install and use Sizer, set up custom sizes, and create keyboard shortcuts for quick window changes.
Pro tip: How to Use Snap Layouts to Snap Apps in Windows 11
How to install and use Sizer in Windows 11
The following steps will show you where you can download the Sizer software, how to correctly install it so it can start up automatically, and some basic usage.
- You can download the installer from
https://www.softpedia.com/get/System/OS-Enhancements/Sizer.shtml, or look for it online to find other places to download it. Just make sure the source is trustworthy. - Find the file you downloaded and double-click on it to start setting it up.
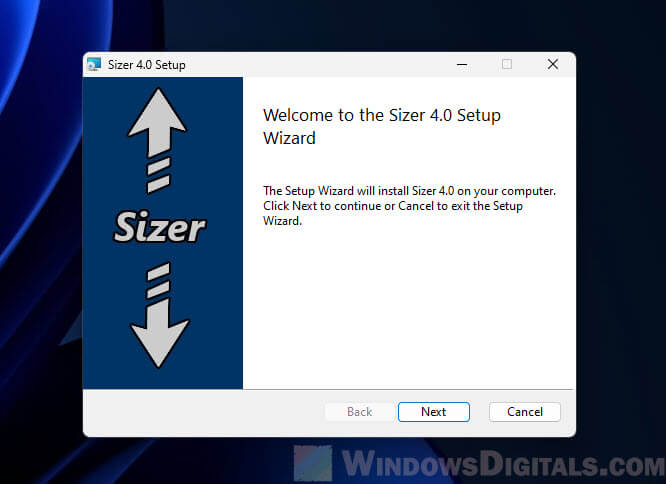
- Follow the steps the setup wizard shows you. When it’s done, Sizer usually adds an icon in the system tray.
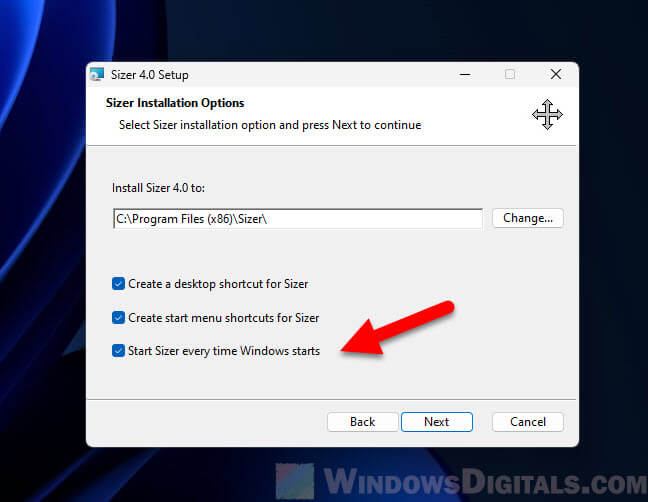
- If Sizer doesn’t start right after installing, look for the Sizer icon in the Start menu or system tray and click on it.
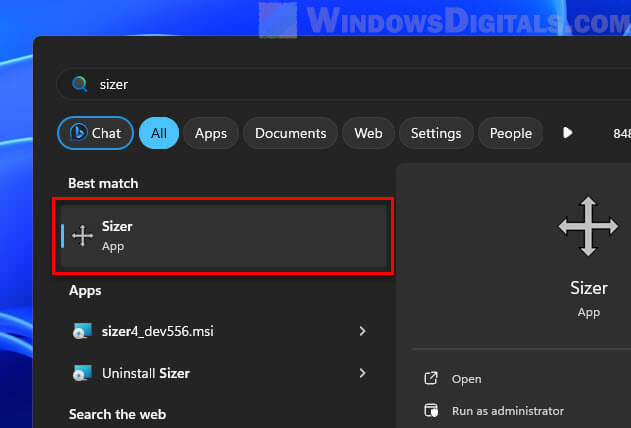
- Focus on the window you want to resize.
- Right-click on the window’s maximize/minimize handle (usually at the top right corner) to open Sizer’s context menu.
- Pick one of the sizes listed, and your window will change to that size right away.
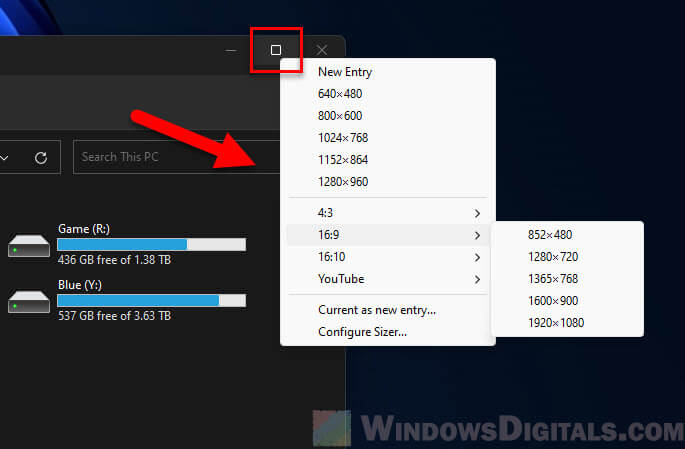
Just a few clicks and your window is the exact size you need. To assign shortcut keys for any predefined size, or to add a custom size, go to the next section.
Linked issue: Screen Size Smaller or Larger Than Monitor in Windows 10/11
Set up keyboard shortcuts to adjust window size
Below are how you can add custom sizes, set up keyboard shortcuts and other things you can do with Sizer.
Add custom sizes and setting keyboard shortcuts
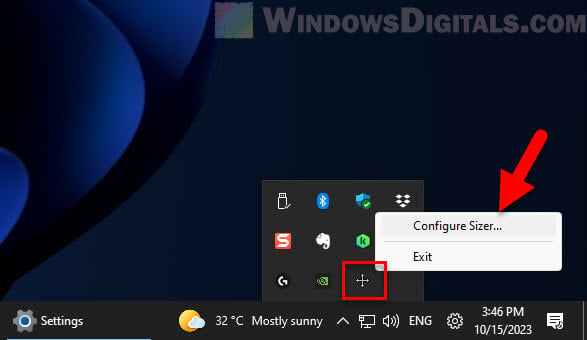
- Right-click on the Sizer icon in the system tray and choose Configure Sizer.
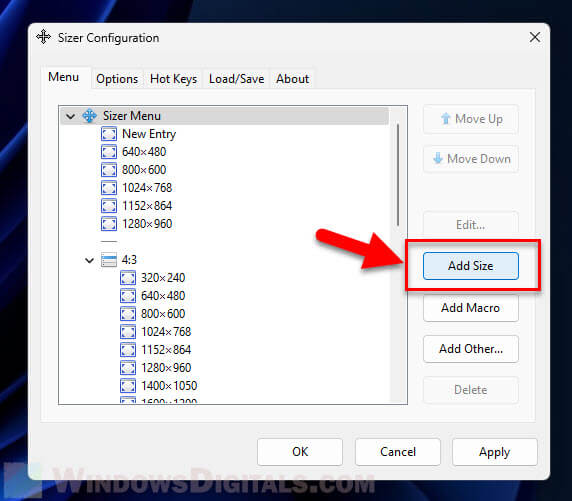
- In the settings window, click the Add Size button to create a new custom size.
- You’ll need to enter the width and height you want for the window, among other settings:
-
- Give your custom size a name that will show up in the menu.
- Type in the width and height you want, in pixels.
- Decide if you want the window to move when you resize it. If not, choose “Don’t Move”.
- Pick a reference point for resizing, like the active monitor.
- Choose the type of coordinates to use for positioning.
-
- Back in the Sizer Menu Entry window, you can pick shortcut keys for this size in the Shortcut key section. Choose the key combination you want to use. This can include Shift, Ctrl, Win, and Alt keys.
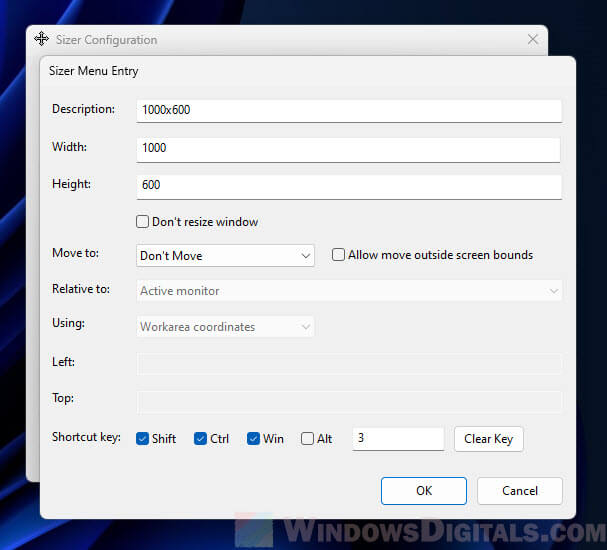
- Click OK to save your new custom size. It will now show up in the menu whenever you want to change the size of a window.
Related resource: Windows 11 Screen Resolution Greyed Out, What to do?
Assign keyboard shortcuts for existing sizes
- Pick the size you want to have a shortcut for.
- Click the Edit button to open the Sizer Menu Entry window.
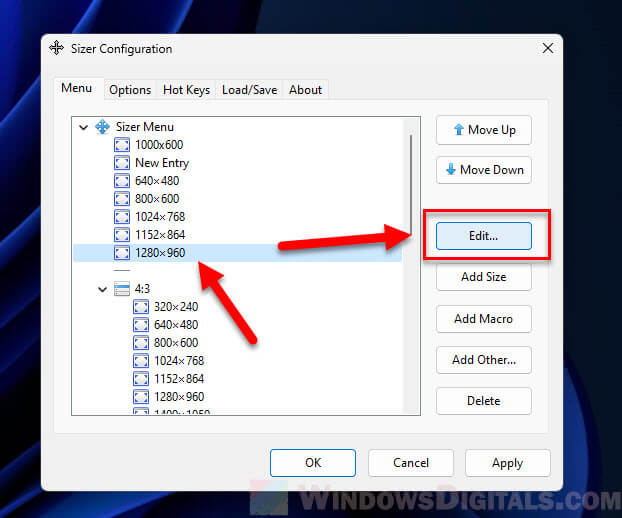
- In the Shortcut key section, pick the keys you want to use as a shortcut for this size. This can include Shift, Ctrl, Win, and Alt keys.
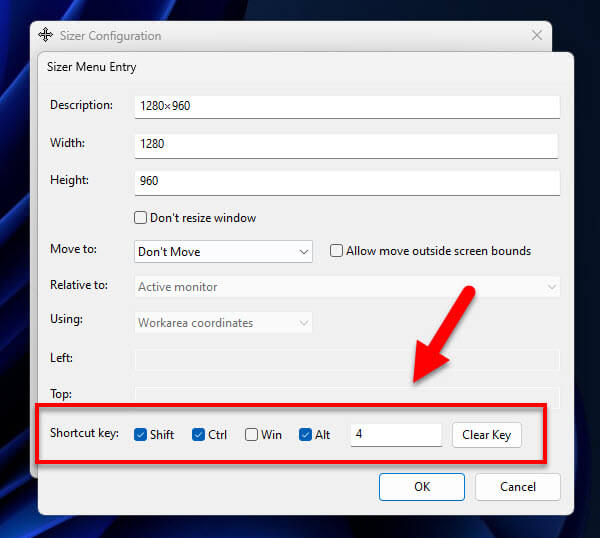
- Click OK to save the shortcut.
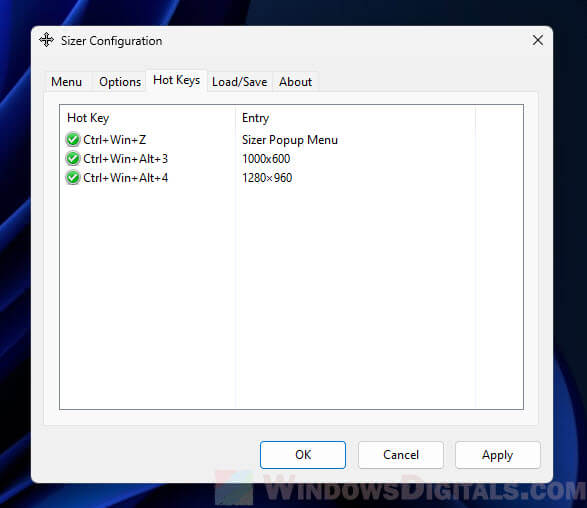
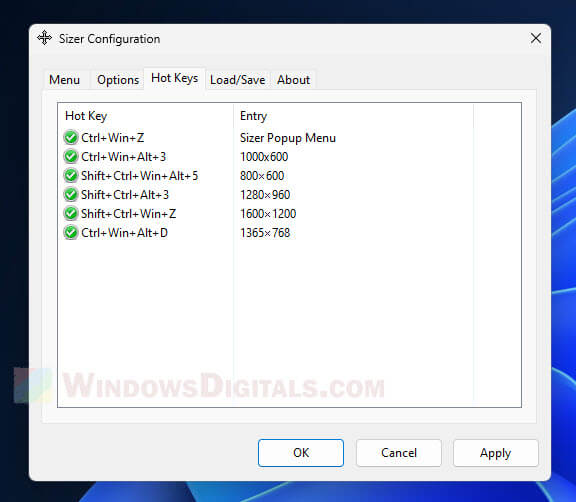
In the Sizer Configuration window, go to the Hot Keys tab. Here, you’ll see all the hotkeys you’ve set up, along with their sizes.
