If you’ve found an extension in Microsoft Edge that has no Remove button, a greyed-out switch, and a note saying “Managed by your organization” even though it’s your own home PC and you’ve never had a work or school account on it, the extension was most likely forced into Edge through a policy called ExtensionInstallForcelist. This guide will show you how to find out where it came from and how to remove it for good.
Also see: “Some settings are managed by your organization” Windows 11/10
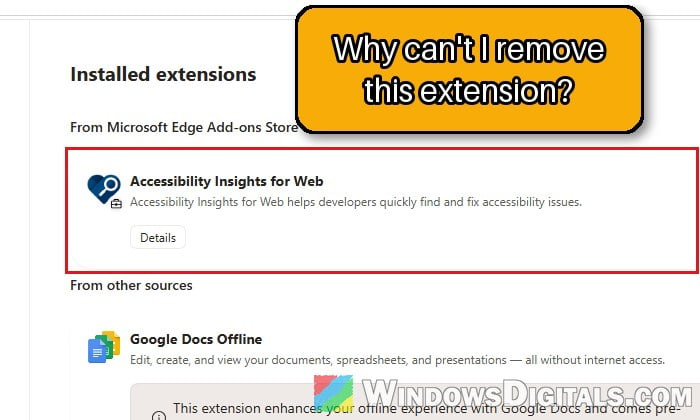
Why does Edge say the extension was added by your organization?
Edge has a set of policies that companies and schools use to manage their computers. One of them, ExtensionInstallForcelist, installs a list of extensions silently, and according to Microsoft, users can’t uninstall or turn off an extension installed this way. Edge doesn’t care who wrote the policy. If any program on your PC puts an extension ID into that list, Edge treats it as your “organization” and locks the extension in place.
On a home PC, the program behind it is usually one of these:
- Adware or a browser hijacker. These typically change your search engine or new tab page, and the forced extension is how they stop you from undoing it.
- Security or “web protection” software that forces its own browser extension into Edge.
- Tweak or debloat tools that write Edge policies to switch features off. They’re also a common reason Edge says it’s managed by your organization.
The good news is that the policy is just a registry entry. Once it’s gone, Edge removes the extension by itself.
Linked issue: Chrome Keeps Redirecting to Yahoo Search Through smartingly.com
Check which extension is forced and what its ID is
Before removing anything, confirm that it really is the ExtensionInstallForcelist policy, and note down the extension’s ID so you can match it in the registry later. Here’s how to do it:
- Open Edge, type
edge://extensionsin the address bar and press Enter. A forced extension has a small briefcase icon next to its switch and only a “Details” button, with no “Remove“.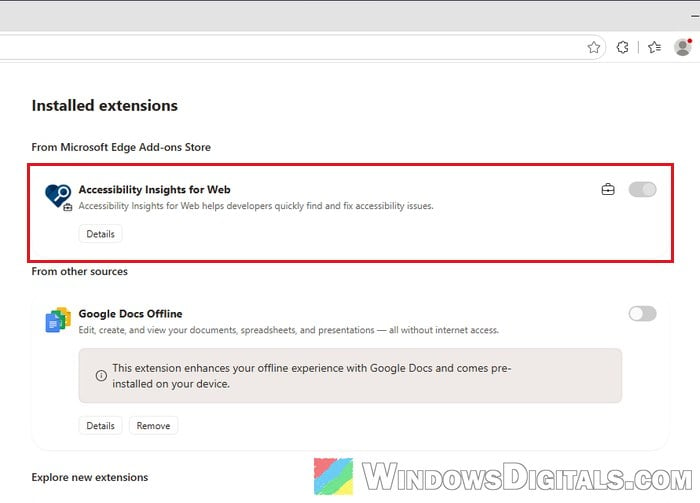
- Click “Details” under that extension. At the bottom of the page, “Source” says “Added by your organization“. The long string of 32 letters at the end of the address bar (after
?id=) is the extension’s ID (you’ll also see it in the next step).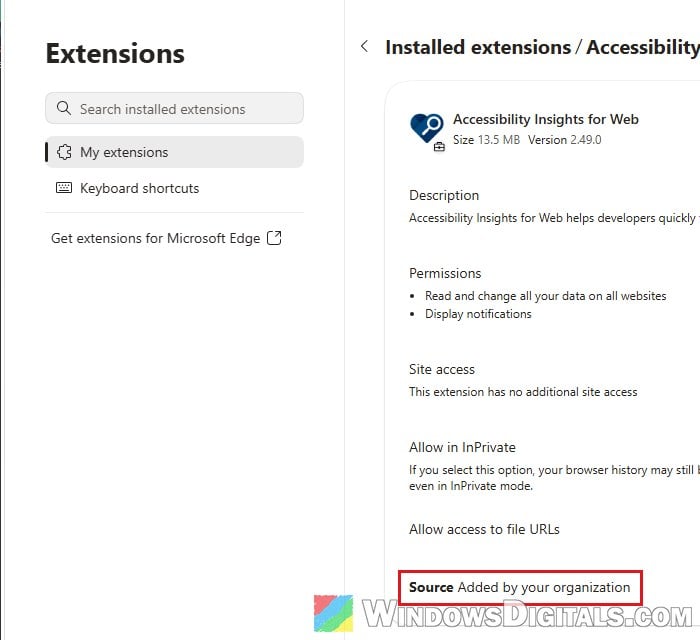
- Now type
edge://policyin the address bar and press Enter. Look for ExtensionInstallForcelist in the list. Its “Policy Value” shows the same ID, and you might find other policies set there too.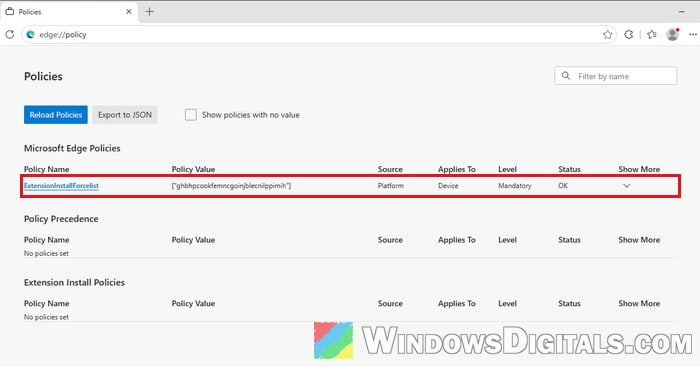
If you see it there, read on to remove it.
Uninstall the program that put it there
The cleanest fix is to remove whatever wrote the policy in the first place. If you delete the policy but leave that program installed, it can simply write it back. If its uninstaller also clears the policy, Edge removes the extension by itself.
Think back to what you installed around the time the extension showed up. Here’s how to find it:
- Open Settings > Apps > Installed apps.
- Click the “Sort by” menu and choose “Date installed“, so the most recently installed programs are on top.
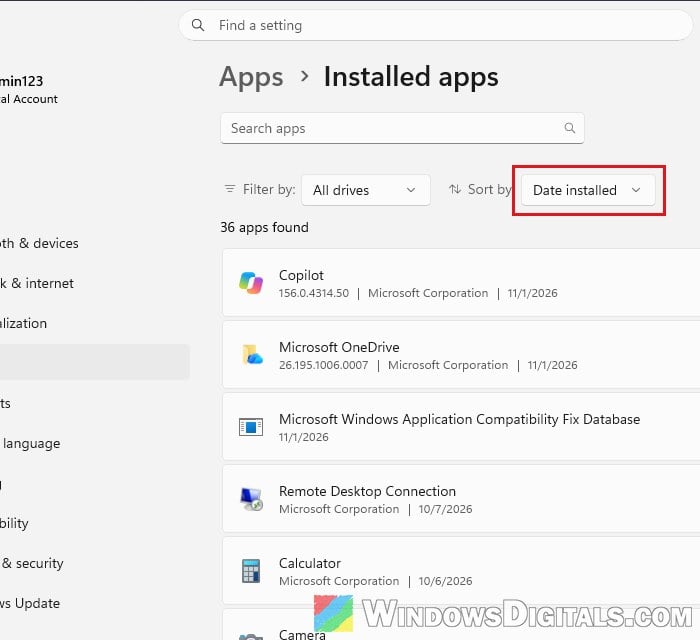
- Look for anything you don’t recognize, or the security suite the extension belongs to, click the three dots next to it and select “Uninstall“.
- Go back to
edge://policyin Edge and click “Reload Policies” to see if the policy is gone.
If the extension comes from a security suite you actually use, it’s not malware. You can either keep it, or uninstall the suite to get rid of it.
Related problem: Is “AdBlock Next” Popup and Extension Safe or a Virus?
Delete the ExtensionInstallForcelist key in Registry Editor
If there’s no program to uninstall, or the policy is still there afterwards, you can delete it from the registry yourself. Deleting the key is what actually takes the extension off Edge’s list.
Incorrectly changing the registry could cause serious problems with Windows, so please at least create a system restore point first. If in doubt, get someone who knows to help you instead. When you’re ready, here’s what you should do:
- Press Win + R, type “regedit” and press Enter. Click “Yes” if prompted.
- Copy and paste the following path to the address bar of Registry Editor and press Enter (if you don’t see an address bar, click View > Address Bar):
HKEY_LOCAL_MACHINE\SOFTWARE\Policies\Microsoft\Edge\ExtensionInstallForcelist
- On the right, you should see a value named “1” (or 2, 3 and so on) with the extension’s ID as its data. Make sure it matches the ID you noted earlier.
- Right-click the ExtensionInstallForcelist key on the left and select “Delete“, then click “Yes” to confirm.
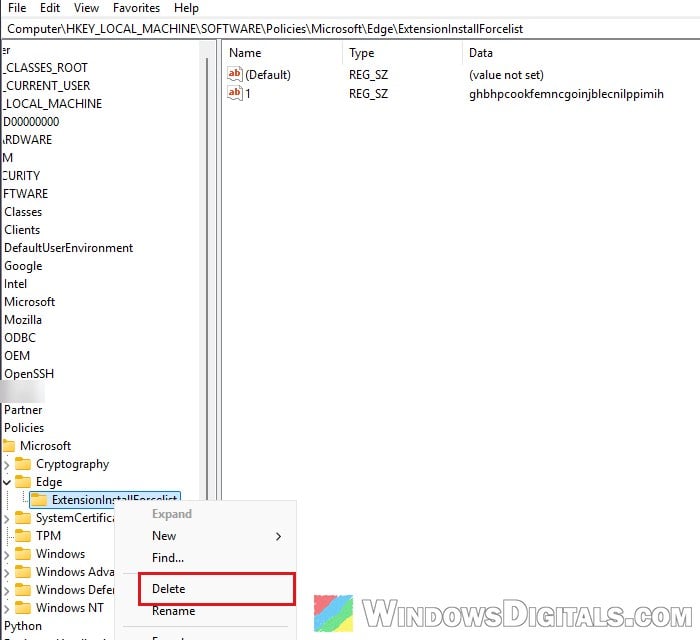
- Check the same key in these two places as well, and delete it if it’s there:
HKEY_CURRENT_USER\SOFTWARE\Policies\Microsoft\Edge\ExtensionInstallForcelist
HKEY_LOCAL_MACHINE\SOFTWARE\WOW6432Node\Policies\Microsoft\Edge\ExtensionInstallForcelist
- In Edge, go to
edge://policyand click “Reload Policies“.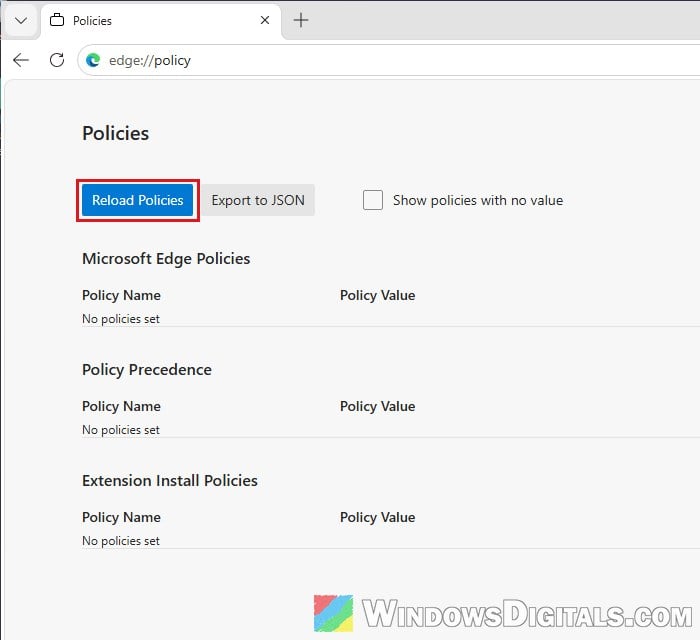
When I tested this, the forced extension disappeared from edge://extensions the moment the policies were reloaded, along with the “Managed by your organization” note. If it’s still there for you, close Edge completely (it can keep running in the background) and open it again.
Remove all Edge policies at once
If edge://policy shows several policies you never set, you can clear every Edge policy in one go instead of hunting down each key. Please be warned that this also removes any Edge policies you set on purpose, for example with a tweak or privacy tool, so you’d have to set those again.
- Search for “cmd” in the Start menu, right-click Command Prompt and select “Run as administrator“.
- Type the following commands one by one, and press Enter after each:
taskkill /im msedge.exe /f
reg delete "HKCU\Software\Policies\Microsoft\Edge" /f
reg delete "HKLM\Software\Policies\Microsoft\Edge" /f
- Open Edge and check
edge://policyandedge://extensionsagain.
If one of the reg delete commands says it can’t find the key, there were simply no policies in that place. These commands don’t touch the WOW6432Node location, so if you found the key there earlier, delete it in Registry Editor too.
Scan for malware if the policy keeps coming back
If the key or the extension comes back after a restart, something on your PC is still writing it. It’s a pretty common issue with browser hijackers, and you’ll find it discussed a lot on Reddit and Microsoft’s forums.
Run a full scan first, then the Microsoft Defender offline scan, which restarts your PC and scans before Windows loads, so this kind of malware can’t hide as easily. Here’s how to do it:
- Open Windows Security from the Start menu and go to “Virus & threat protection“.
- Click “Scan options“.
- Select “Full scan” and click “Scan now“.
- When it’s done, select “Microsoft Defender Antivirus (offline scan)” and click “Scan now“. Save your work first, since the PC will restart.
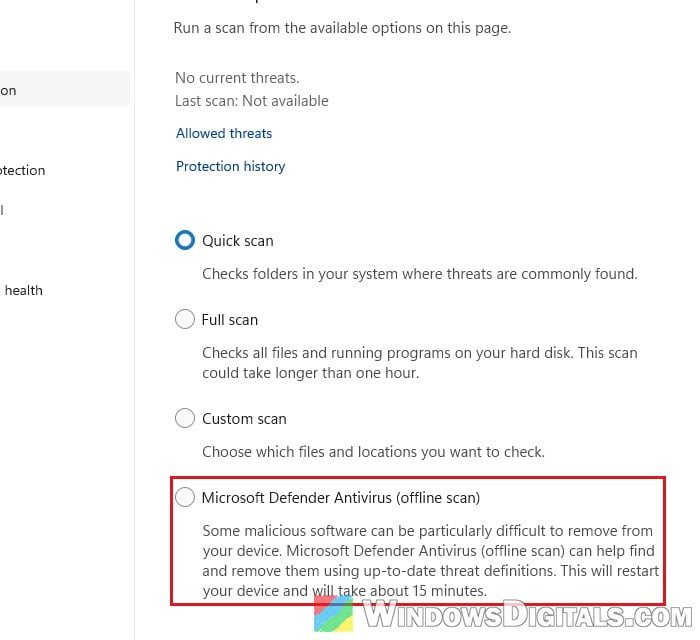
- Afterwards, delete the policy again as shown above and see if it stays gone.
You can also run the scan from Safe Mode if the normal scan can’t get rid of it. If you sign in to Edge with a Microsoft account, also check Edge’s sync settings and turn off syncing for extensions while you clean things up, so an extension you removed isn’t brought back from another device.
In the worst cases, where the policy keeps returning no matter what you remove, backing up your files and resetting Windows is the surest way to get rid of whatever is behind it.