PowerShell is a very common and useful script tool for users who manage systems and networks in Windows. This guide will show you how to check if a port is open on another device using PowerShell, which is usually much safer than using Telnet. Telnet is an old-school network thing that’s not very secure anymore.
Also see: How to Install Telnet via CMD or PowerShell in Windows 11
Page Contents
Why use PowerShell to test port?
PowerShell is more than just a command-line tool. It’s made for managing systems and works with objects, not just text, which is very good for tricky tasks.
Back in the day, when people needed to check if they could connect to a port on another computer, they mostly used Telnet. This is a way to talk to another computer over the network. But Telnet wasn’t very secure because it sent everything – even passwords – in text that anyone could read if they caught it in transit. Because of this, most people have moved away from using Telnet for safer options.
The good news is, you can use PowerShell for many admin tasks, including checking out network issues. It’s got this very useful cmdlet called Test-NetConnection. This tool not only helps you see if you can connect to a port but also gives you detailed info like how fast the connection is and the route your data takes. It’s a much safer and more powerful option than Telnet.
Relevant guide: How to Ping IPv6 Address in Windows 11
Testing port connection with PowerShell
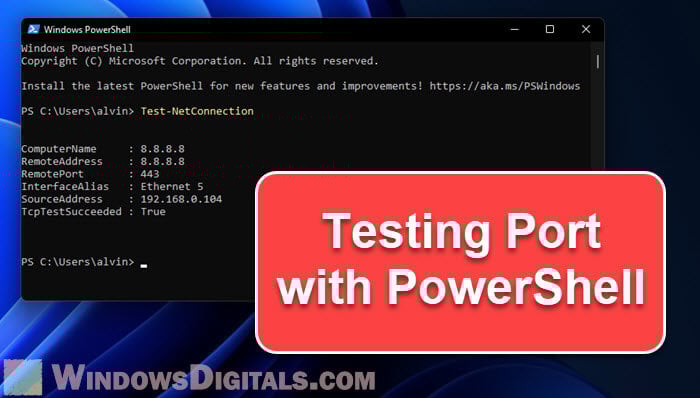
The main command used for testing network connectivity via ports in PowerShell is the Test-NetConnection cmdlet.
Test-NetConnection -ComputerName <HostName> -Port <PortNumber>
Where <HostName> is the IP address or domain name of the computer you are trying to connect to, and <PortNumber> is the number of the port on the <HostName> that you are testing.
Example:
If you wanted to test if you can reach Google’s primary DNS server on port 53 to see if the port is open on that server, you would enter the following command:
Test-NetConnection -ComputerName 8.8.8.8 -Port 53
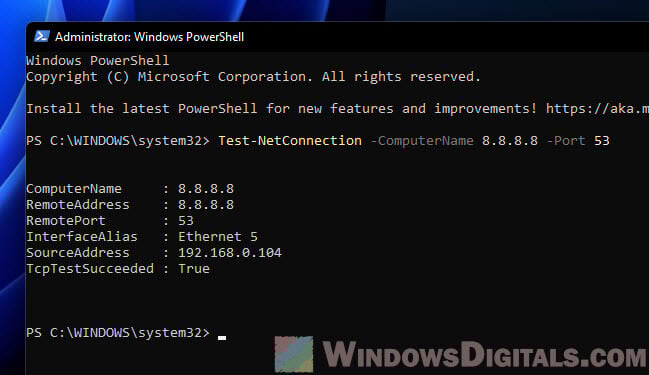
The output of the command provides a lot of useful information:
ComputerName : 8.8.8.8
RemoteAddress : 8.8.8.8
RemotePort : 53
InterfaceAlias : Ethernet
SourceAddress : 192.168.0.2
TcpTestSucceeded : True
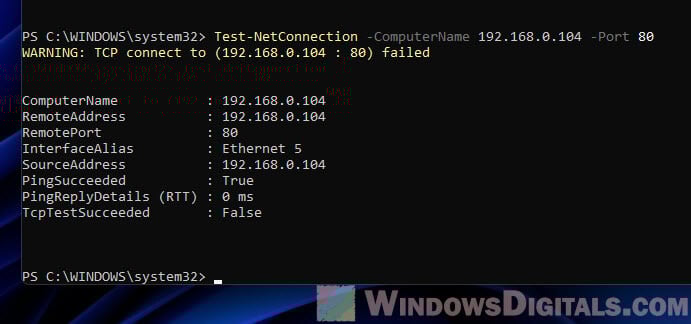
The TcpTestSucceeded : True means the TCP connection to the remote server on the port has succeeded. If the connection failed, it would display TcpTestSucceeded : False.
Related resources:
- How to Open an RDP Connection via CMD in Windows 11
- How to Remote Desktop Over The Internet in Windows 11
Testing multiple port connections
Checking a bunch of ports one by one can be an extremely tiring task. But, PowerShell can make it less tiring with only a simple script:
$HostName = "<HostName>"
$Ports = "<Port1>", "<Port2>", "<Port3>"

foreach($Port in $Ports){
$Result = Test-NetConnection -ComputerName $HostName -Port $Port
$Result | Format-List -Property ComputerName, RemoteAddress, RemotePort, TcpTestSucceeded
}
Replace <HostName> with the target hostname or IP address, and <Port1>, <Port2>, <Port3> with the port numbers you wish to test. This script loops through each port, testing the connection and showing you the result.
Example:
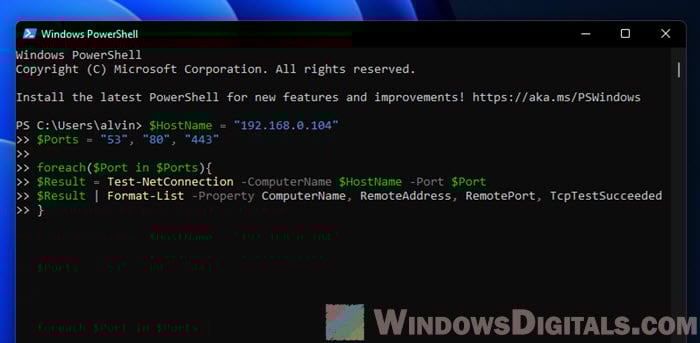
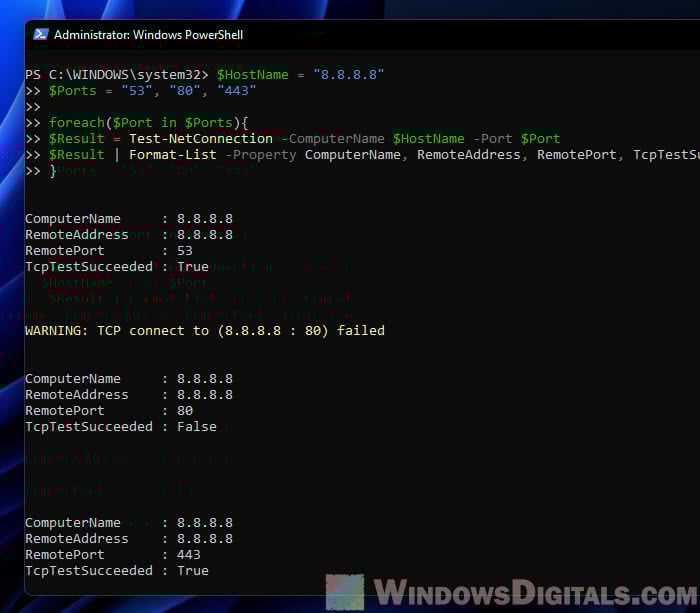
In this example, we will use Google’s DNS server (8.8.8.8) as the host. We will check the server’s availability on three different ports: 53 (typically used for DNS), 80 (used for HTTP), and 443 (used for HTTPS). Our script will loop through each port, test the connection, and then output the results. The following is the specific PowerShell code used for this scenario.
$HostName = "8.8.8.8"
$Ports = "53", "80", "443"

foreach($Port in $Ports){
$Result = Test-NetConnection -ComputerName $HostName -Port $Port
$Result | Format-List -Property ComputerName, RemoteAddress, RemotePort, TcpTestSucceeded
}
Using these techniques when fixing network related issues
For advanced users, Test-NetConnection can be a part of bigger scripts to help fix network issues. Imagine making a script that checks if you can connect to several servers and tells the network team by email if something’s not right.
With PowerShell, you can even make things fix themselves based on what you find out. Like, you could have a script that restarts a service if it sees that the port it’s supposed to be using is closed.
Can I test UDP port using PowerShell?
Yes, testing UDP ports with PowerShell is possible, but it’s a bit more complicated and not as simple as checking TCP ports. Well, it’s all about how UDP works. Unlike TCP, UDP doesn’t really tell you if your data got through or in what order. This makes it tough to say for sure if a UDP port is open and ready for action.
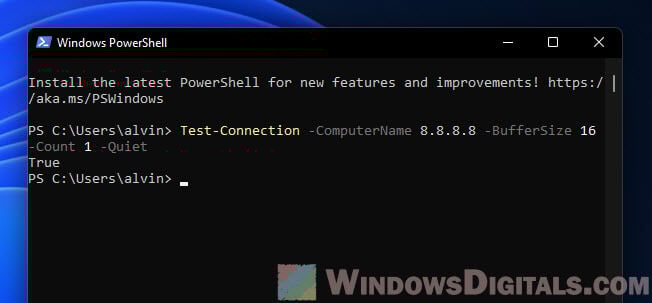
Even though the Test-NetConnection cmdlet in PowerShell doesn’t directly do UDP checks, you can try using other cmdlets like Test-Connection as a sort of workaround. Test-Connection is more about checking if you can reach a place on the network using ICMP, not UDP, so it’s more of a basic “are you there?” check than a true UDP port test. If you need something more tailored to UDP, you might have to look into other tools or maybe even write your own script that uses .NET to send UDP packets and see what happens.
Some final notes
PowerShell is a handy scripting language that makes managing network tasks a lot easier. The Test-NetConnection cmdlet is a strong tool that lets you test port connections easily, so you don’t have to use old and less secure tools like Telnet. With PowerShell, you can check your network, automate jobs, and manage many connections in a smart and effective way.
Always remember to think about the legal and ethical issues when testing networks. Only run tests on networks and systems where you have clear permission.