Active Directory Users and Computers (ADUC) lets you take care of user accounts, groups, and other stuff in Active Directory (AD) through a nice visual setup. In the past, to get this tool, you had to download something called the Remote Server Administration Tools (RSAT) separately. But now, if you’re using Windows 11 or Windows 10, you don’t have to do that. RSAT is part of the “Features on Demand,” so you can just add it straight from the system itself.
This guide will show you how to add RSAT Active Directory Users and Computers and the Active Directory PowerShell module using either PowerShell or Command Prompt.

Page Contents
Install Active Directory Users and Computers in Windows 11 or 10 via PowerShell
PowerShell is likely the easiest way to add different features in Windows thanks to its easy yet powerful commands. The following steps will show you how to use it to install Active Directory Users and Computers on your Windows 11 or 10 PC.
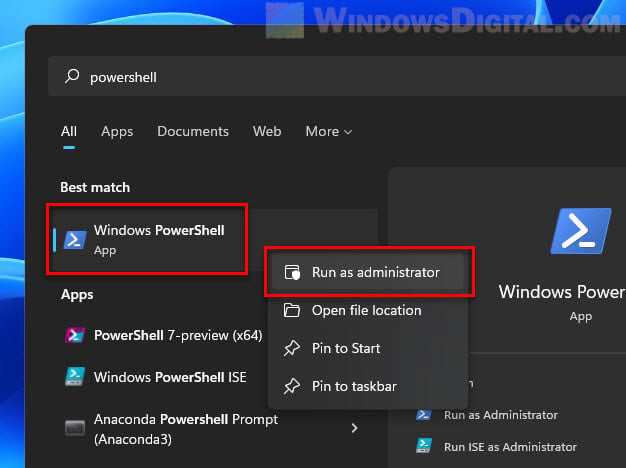
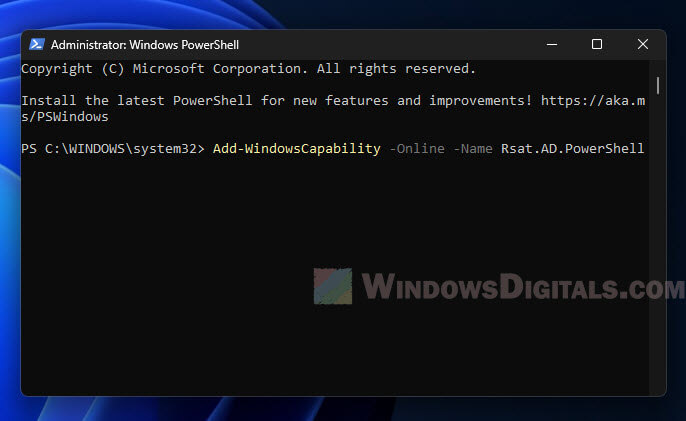
- First, you need to open PowerShell as an admin. Press the Windows key, type “PowerShell,” right-click on “Windows PowerShell,” and pick “Run as administrator”.
- Make sure your PC is online before you start adding features with PowerShell.
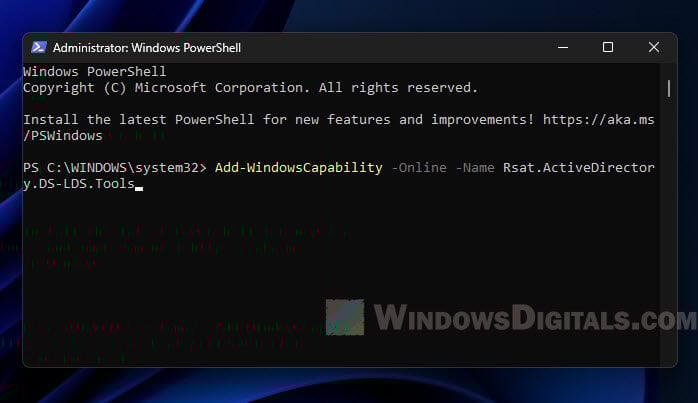
- To add ADUC, type in this command:
Add-WindowsCapability -Online -Name Rsat.ActiveDirectory.DS-LDS.Tools
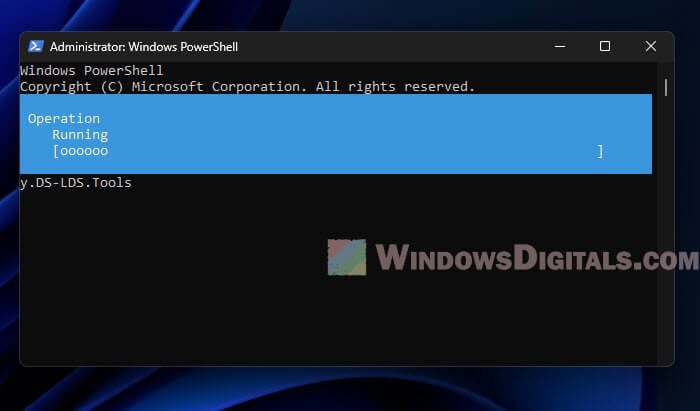
- After you run the command, it will check with Windows Update to download and add what’s needed. You’ll see a message when it’s done.
It’s okay to skip adding a version number when you run the command. If you don’t add it, Windows will just get the newest version available.
Also see: Run CMD, PowerShell or Regedit as SYSTEM in Windows 11
Install Active Directory PowerShell Module
The Active Directory PowerShell Module is very useful for managing AD right from the command line. But it doesn’t come with the ADUC GUI tools, so you need to install it separately.
- Open PowerShell as an admin and run this command:
Add-WindowsCapability -Online -Name Rsat.AD.PowerShell
- Wait a bit, and you’ll see a message saying it’s done.
- Right after installing, you can start using the AD commands in your current session by typing:
Import-Module ActiveDirectory
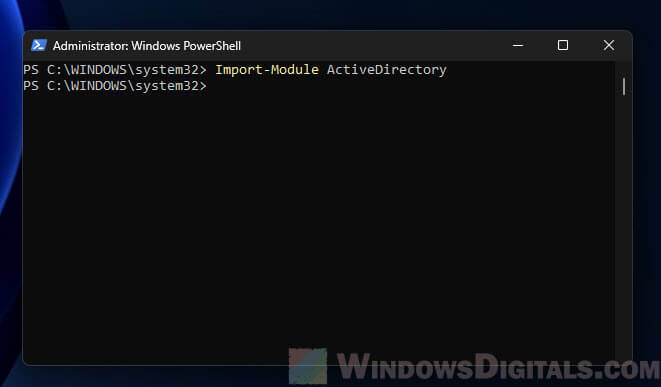
This loads the Active Directory module so you can use commands likeGet-ADUserandGet-ADComputerfor AD tasks.
Useful tip: How to Install Telnet via CMD or PowerShell in Windows 11
Install ADUC in Windows 11 or 10 via CMD
Although PowerShell is amazing for a lot of Windows admin tasks, some users might still prefer to use the old-school Command Prompt (CMD). Even though CMD doesn’t have as many fancy commands as PowerShell, you can still use DISM (Deployment Image Servicing and Management) to add features like ADUC.
- Open Command Prompt as an admin by pressing the Windows key, typing “cmd,” right-clicking on “Command Prompt,” and picking “Run as administrator”.
- Being online is important here too, since the features come from Windows Update.
- To add ADUC with CMD, enter this command:
dism /online /add-capability /capabilityname:Rsat.ActiveDirectory.DS-LDS.Tools
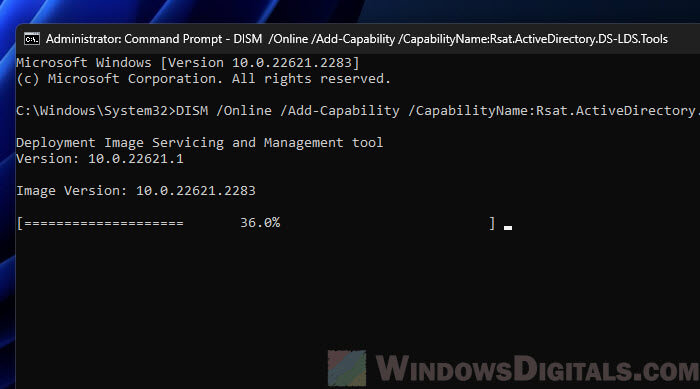
This also reaches out to Windows Update to download and add what you need. You’ll know it’s done when you see a message.

- If you want the Active Directory PowerShell Module too, use this command:
dism /online /add-capability /capabilityname:Rsat.AD.PowerShell
After that, you’re set to use the AD-specific commands in PowerShell.
Just like with PowerShell, you don’t have to specify a version number. Leaving it out means Windows will pick the latest version for you.
Related resource: Using PowerShell to Test Port Connection Without Telnet
What to do after installing them
After you’ve added ADUC, below are some tips to get familiar with it and make sure everything’s running as intended.
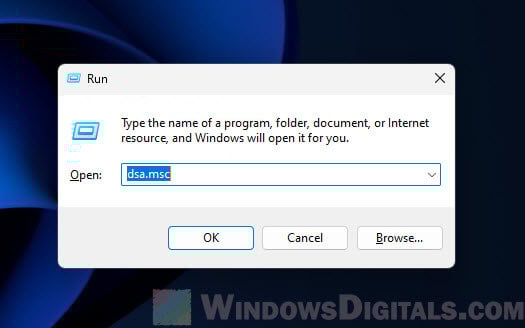
Launch ADUC
Press Windows + R, type “dsa.msc”, and hit Enter. This opens the Active Directory Users and Computers interface.
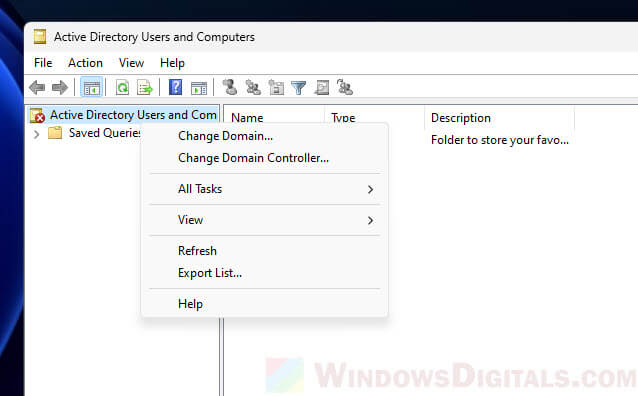
Connect to a Domain or a specific Domain Controller
If your PC is part of an Active Directory domain, ADUC will usually find a domain controller by itself. But if you need to hook up to a different domain, right-click on “Active Directory Users and Computers” at the top left and pick “Change Domain”.
For connecting to a specific domain controller in your current domain, choose “Change Domain Controller”.
Trying out ADUC
Take some time to check out the different areas and organizational units (OUs) in the domain. This is where you manage all the users, groups, computers, and more.
PowerShell module
If you added the Active Directory PowerShell module, open PowerShell and type Import-Module ActiveDirectory to dive into using Active Directory commands.
Some common issues when installing ADUC
In most cases, there shouldn’t be any problem if you add ADUC using one of the ways described above. Below are some common problems you might see when installing ADUC and how to fix them.
Installation failures
Check you’re online since some parts might need to come from Windows Update. Make sure you have admin rights to run the commands.
ADUC not connecting to domain
Check your PC’s connection to the domain controller.
Make sure your domain login details are correct; you might need more rights to see or change certain things.
Missing tabs or features in ADUC
If you’re missing some options, it might be because you need more Windows features or the right permissions in Active Directory. For instance, the “Attribute Editor” tab shows up only if “Advanced Features” is turned on from the “View” menu.
PowerShell module errors
Double-check you’ve got the Rsat.AD.PowerShell feature added. Make sure you’re using PowerShell with admin rights too.
Some final notes
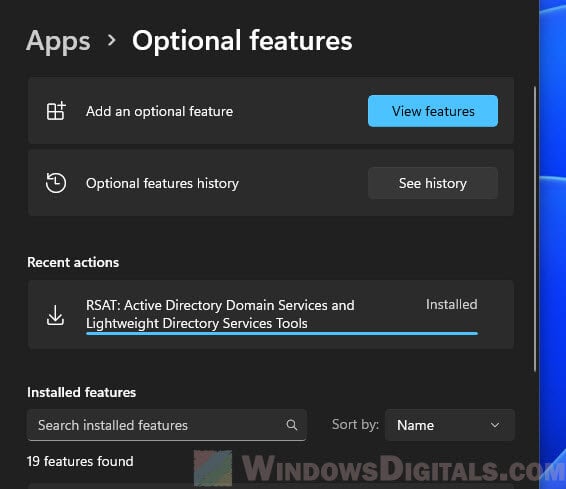
Usually, tools like Active Directory Users and Computers are set up on client PCs, not directly on servers. If you’re adding Active Directory Users and Computers to a client machine, the normal way is through the system settings: “Settings” > “Apps” > “Optional features”. This method is pretty straightforward and what most users would use because it’s visual and easy to understand.
But, if you’re looking to add ADUC through the command line, either using PowerShell or Command Prompt, this guide will be of help for that. You should try these things on a test machine first before using them in a work environment.