Telnet is a very well known network tool that allows you to remotely access and manage devices over a network conveniently. It is (or used to be) a must have tool for many network admins and IT people who always need to do a lot of networking related tasks or fix connection issues. This guide will show you how to install Telnet using command line via CMD or PowerShell in Windows 11 or 10.
Also see: How to Remote Desktop Over The Internet in Windows 11
Page Contents
What actually is Telnet?
Telnet (stands for Teletype Network) is a text-based method to remotely access devices using a command-line interface like CMD. It was created in the late 1960s. It’s indeed very old but still quite widely used for managing networks and testing things locally. However, Telnet doesn’t actually encrypt its data, which makes it not so safe for private info. So, it’s best to use it only in safe environments or for testing purposes only.
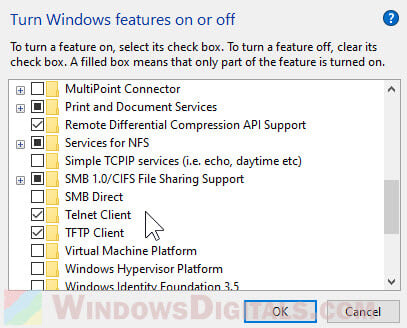
Usually, you would turn on the Telnet client in Windows 11 or 10 through the “Turn Windows features on or off” window. That window lets you switch on or off different Windows features easily, including Telnet, with only a few clicks.
But sometimes, there can be cases where you might want to install the Telnet client using the command line. This is especially the case for system admins managing lots of machines or if you prefer using command-line tools over the graphical interface.
Before you start
Make sure you have Administrator rights on your Windows 11 PC. You’ll need this to change system settings and add features.
Useful tip: Run CMD, PowerShell or Regedit as SYSTEM in Windows 11
Step 1: Open CMD or PowerShell as an admin
To add Telnet, you can use either CMD or PowerShell. Here’s how to open them with admin rights:
- Hit the Windows key to bring up the Start menu.
- Type CMD or PowerShell in the search bar.
- Right-click the search result and pick Run as administrator. This lets you make changes at the system level.

Step 2: Add Telnet using the command line
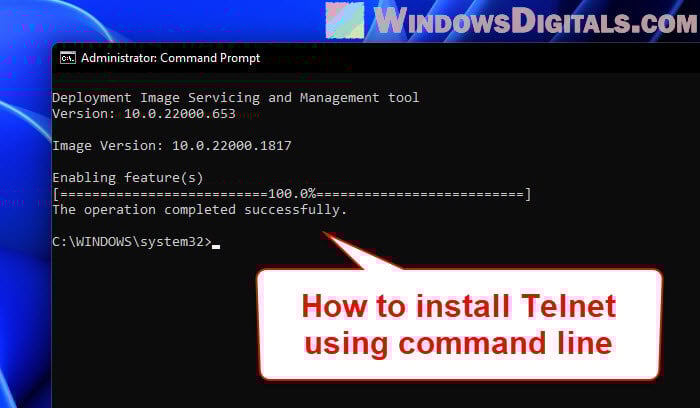
With CMD or PowerShell open, run this command to add the Telnet client to your Windows 11:
dism /online /Enable-Feature /FeatureName:TelnetClient
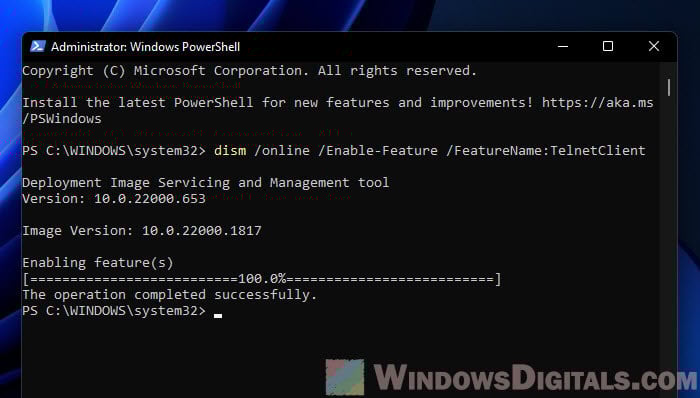
This tells Windows to turn on the Telnet Client feature. You’ll see a progress bar and then a message that says it’s all done.
Suggested resource: How to Check Who is Logged in Remotely or Locally on Windows 11
Step 3: Check if Telnet is ready
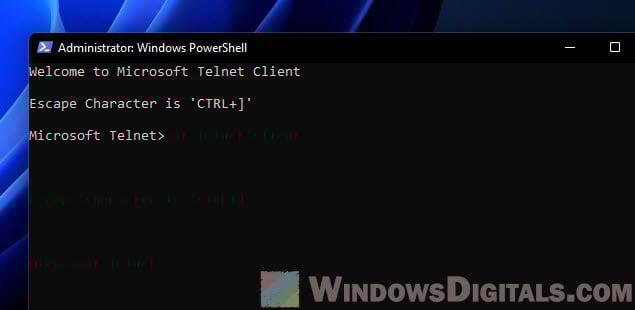
To see if Telnet is up and running, try this in CMD or PowerShell:
telnet
If everything’s good, you’ll see a welcome message from the Telnet client.
To leave Telnet, just type quit and hit Enter.
Step 4: How to use Telnet
Now that Telnet’s installed, you can use it to connect to devices remotely. Here’s the basic way to do it:
telnet <hostname> <port>
Swap <hostname> with the device’s IP address or domain name, and <port> with the port you’re connecting through.
For example, to connect to a device at 192.168.1.10 on port 23:
telnet 192.168.1.10 23
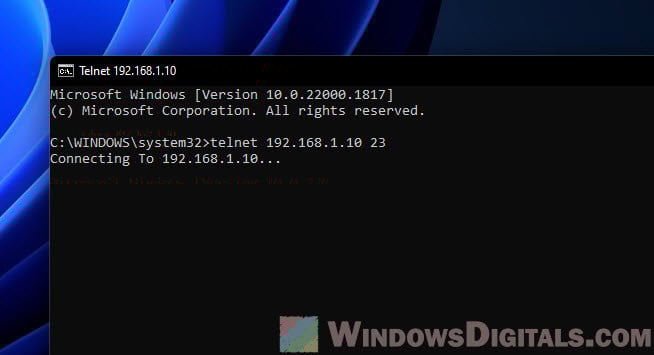
If it works, you’ll need to log in. Once in, you can control the device like you’re right there.
Just remember, because Telnet isn’t secure, only use it in safe places or for tests.
Related guide: How to Use Netsh Interface IP Set Address or DNS in CMD
Step 5: If you don’t want Telnet anymore
If you’re done with Telnet or worried about security, turning it off is easy. Here’s how with CMD or PowerShell:
- Open CMD or PowerShell as an admin, like in Step 1.
- To turn off Telnet, run this command:
dism /online /Disable-Feature /FeatureName:TelnetClient
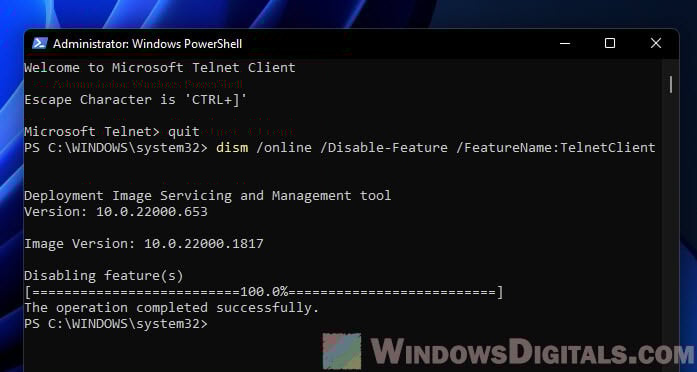
- To check if Telnet is really off, try:
telnet
If Telnet’s off, you’ll get a message saying it’s not recognized.
Some final words
Even though Telnet is already old and not very secure in recent years, it can still be useful for certain tasks. Just be sure to use it correctly and safely.