If Windows keeps showing you McAfee alerts saying your PC is infected or your subscription has expired, often right after you clicked Allow on a page that asked you to prove you’re not a robot, these alerts are fake, and if you don’t even have McAfee installed, that alone gives it away. They come from a website that was given permission to send you notifications, not from McAfee or Windows. This guide will show you how to stop them and what to check afterward.
Similar scamming tactic: “Windows locked due to unusual activity” Scam
Page Contents
Why do these McAfee virus alerts keep popping up?
Browsers like Microsoft Edge, Chrome and Firefox let websites send you notifications, but only after you allow it. Scam pages abuse this by showing something that looks like a CAPTCHA or a “verify you’re not a robot” check and telling you to click Allow to continue. The prompt you’re clicking is actually the browser asking whether the site can send you notifications.
Once you allow it, the site can push alerts to your desktop whenever it wants. They show up in the lower-right corner and in the notification center like any other Windows notification, and they can appear even after you’ve closed that tab. The alerts pretend to be McAfee and claim that threats were found or that your protection has expired.
Here’s how you can tell they’re fake:
- Real McAfee alerts come from the McAfee app installed on your PC, not through your web browser. If you never installed McAfee, they can’t be from McAfee.
- The buttons (“Scan”, “Renew”, “Activate”) lead to fake scan pages, fake subscription offers or tech support scams. The scammers usually get paid when someone buys an antivirus license through their link.
DO NOT click the alerts, don’t call any phone number they show, and don’t enter any payment details. According to Microsoft, its own error and warning messages never include phone numbers.
Linked issue: Beware: You need to update your browser to view the content
Remove the site’s permission to send notifications
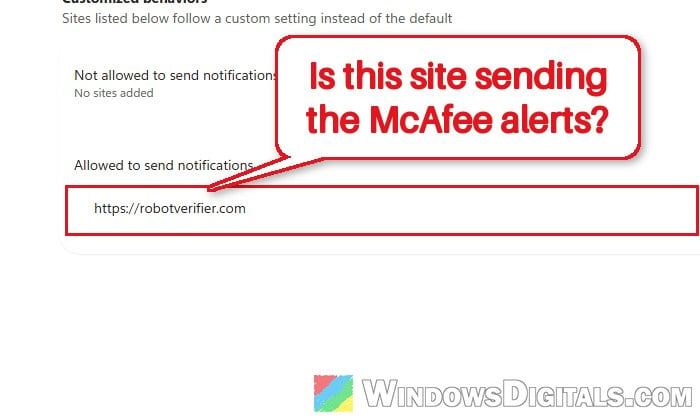
This is the actual fix. Since the alerts come from a site you allowed, removing that site’s permission stops them right away. Check the list for every site you don’t recognize, because these pages often get you to allow more than one.
Microsoft Edge
To remove or block a site’s notifications in Edge, follow the steps below:
- Open Edge, click the three dots (Settings and more) in the upper-right corner and select Settings.
- Go to Privacy, search, and services > Site permissions > All permissions > Notifications. You can also just paste
edge://settings/content/notificationsinto the address bar. - Under Allowed to send notifications, find the site you don’t recognize.
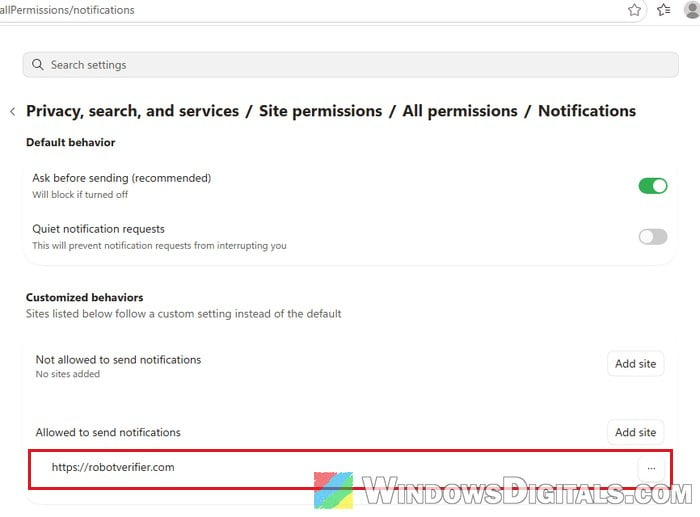
- Click the three dots next to it and select Block to stop it for good. Remove also stops the notifications, but the site can ask again the next time you visit it.
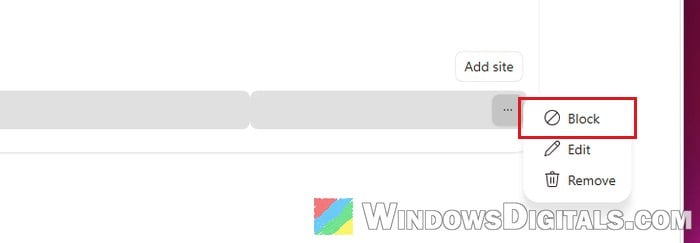
- Repeat for any other site in the list that you don’t recognize.
The fake McAfee alerts should stop showing up right after you block the site. If they keep coming, check the other browsers you have installed too.
If you never want sites to ask again, turn off “Ask before sending (recommended)” at the top of the same page. Edge will then block all notification requests from websites.
Google Chrome
In Chrome, the setting sits in a similar place. Here’s how to remove a site’s notification permission:
- Click the three dots (More) at the top right and select Settings.
- Go to Privacy and security > Site settings > Notifications.
- Under Allowed to send notifications, click the three dots next to the site you don’t recognize and select Block or Remove.
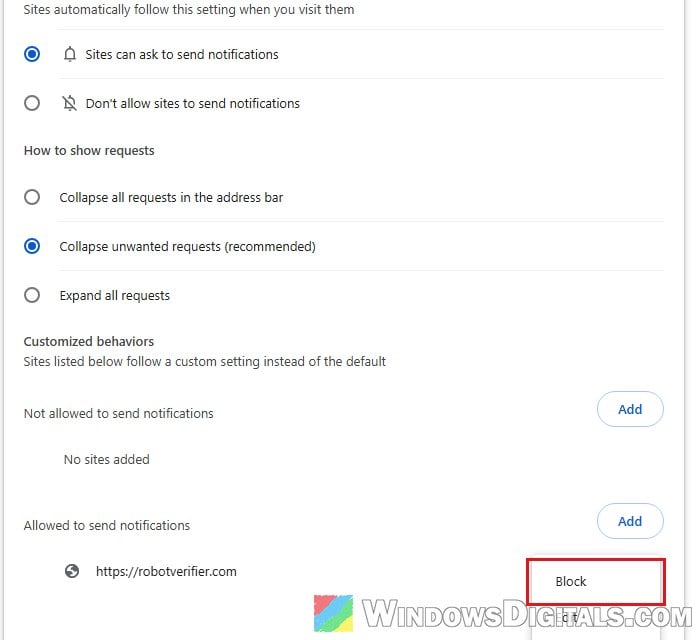
The alerts from that site should stop after that.
To stop all sites from asking in Chrome, select “Don’t allow sites to send notifications” on the same page.
Chrome can also take away a site’s notification permission by itself when it finds the site disruptive, but you shouldn’t wait for that to happen.
Mozilla Firefox
In Firefox, open Settings > Privacy & Security, scroll down to Permissions and click Settings… next to Notifications. Select the site, set it to Block (or remove it), then click Save Changes.
Might be useful: How to Disable Desktop Pop Up Notifications on Windows 11
Clear your browser’s cookies and site data
If you don’t see anything strange in the notifications list, or the alerts somehow keep coming back, clearing the browser’s cookies and site data is the next thing to try. Sometimes that alone is enough to stop the pop-ups. Keep in mind that it also signs you out of most websites.
In Edge, here’s what to do:
- Click the three dots and select Delete browsing data. You can also press Ctrl + Shift + Delete.
- Set the time range to All time.
- Tick Cookies and other site data and Cached images and files. Further down the list, you can also tick Site permissions.
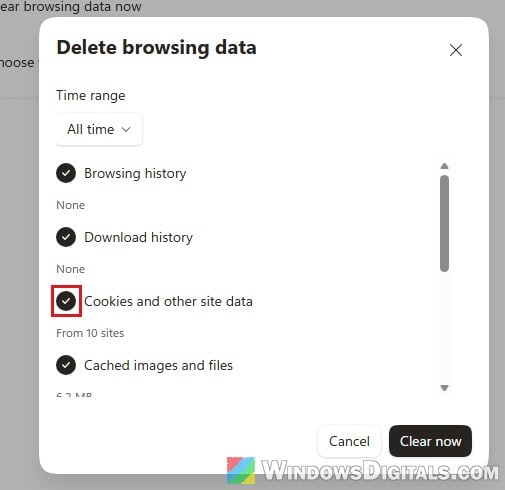
- Click Clear now.
Close and reopen Edge, then wait a while to see if the fake McAfee alerts still show up.
For Chrome and other browsers, see: How to Clear Cookies in Windows 11.
Check your browser extensions
Less often, the fake alerts come from a malicious browser extension instead of a site. In Edge, paste edge://extensions into the address bar (in Chrome, chrome://extensions) and look through the list. Remove anything you don’t remember installing yourself.
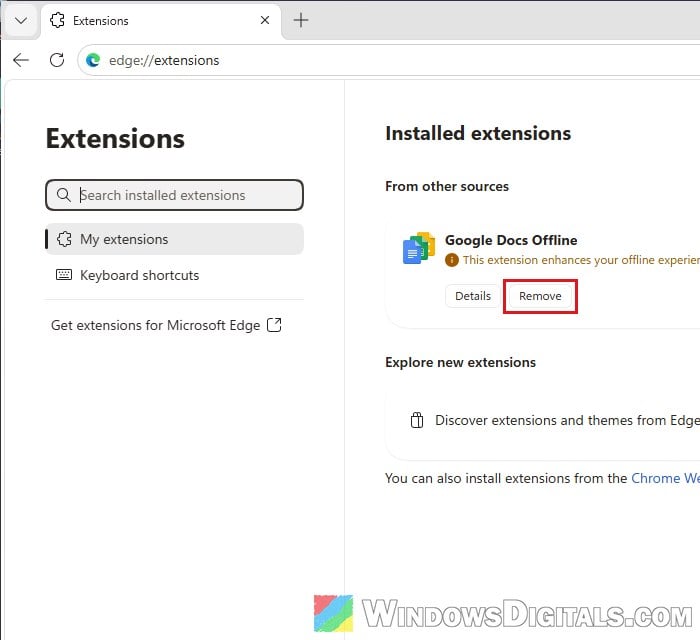
Restart the browser after removing an extension and see if the fake alerts stop.
Pro tip: Is “AdBlock Next” Popup and Extension Safe or a Virus?
Run a virus scan with Windows Security
Allowing notifications alone doesn’t put a virus on your PC. But if you clicked one of the alerts and downloaded or installed something, it’s worth running a scan with the antivirus that’s already built into Windows 11 and 10:
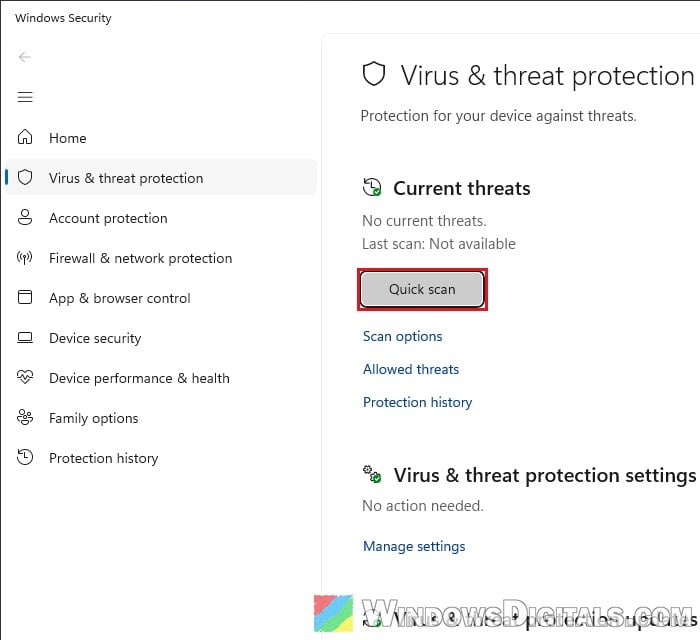
- Open the Start menu, search for Windows Security and open it.
- Click Virus & threat protection.
- Click Quick scan, or go to Scan options and run a Full scan for a deeper check.
While you’re at it, open Settings > Apps > Installed apps and uninstall any program you don’t recognize or didn’t mean to install.
What if you already clicked the alert or paid?
If you only clicked an alert and closed the page, blocking the site as shown above is usually enough. If you went further, here’s what Microsoft suggests:
- Uninstall any app the scam page told you to install, and run a full scan with Windows Security.
- Change your passwords, including your Microsoft account password.
- Call your credit card provider to contest the charge if you already paid for a “renewal”, and let them know what happened so they can cancel and replace the card.
- Never pay with gift cards or cryptocurrency for a “virus removal”. Microsoft never asks for that.
To avoid this in the future, never click Allow on a page that says it’s needed to prove you’re not a robot, to continue a download or to watch a video. A real CAPTCHA never needs notification permission.