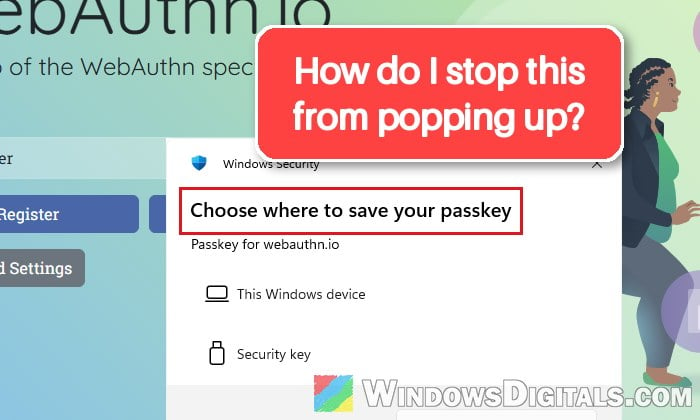
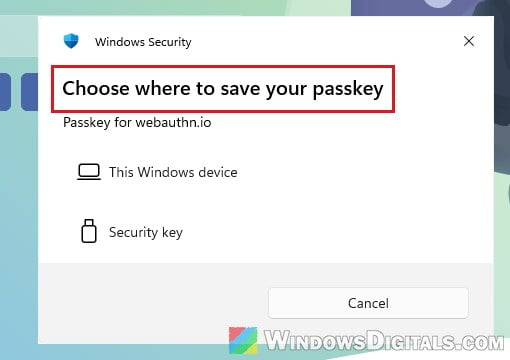
Windows 11 can save passkeys for websites and protect them with Windows Hello, so whenever a site wants to create one, a Windows Security window pops up and asks you to “Choose where to save your passkey“. The trouble is that it can keep coming back on sites like Amazon even if you’ve never used a passkey and don’t want one, and the passkey switch in Settings won’t even let you turn it off. This guide will help you find what keeps triggering it and stop it for good.
Also see: Invalid 2FA Code from Google or Microsoft Authenticator
Why does the passkey pop-up keep showing up?
A passkey is a sign-in key saved on your device that replaces the password for a website. Windows doesn’t make passkeys on its own: the website asks for one, your browser passes the request on to Windows, and Windows shows its own Windows Security window. That’s why the window says Windows Security even though you’re only using Chrome, Edge or Firefox. Often it first says “Save your passkey“, and its “Change” link opens this choice.
There are a few things that can start it:
- The website offers a passkey at sign-in. Many sites now show a “Create a passkey?” prompt when you sign in, and some keep asking on other pages too (Amazon is one of them).
- Your browser upgrades accounts to passkeys by itself. Newer versions of Microsoft Edge and Google Chrome can create a passkey for a site you already sign in to with a password.
- An old passkey is still tied to your account, so the site keeps asking for it every time you sign in.
There’s no setting that just hides the window, so you’ll need to stop whatever keeps asking for a passkey.
Related guide: How to Remove PIN Login From Windows 10/11 Startup
Close it and pick another way to sign in
If you just need to get into the site now, you don’t have to save anything. Click “Cancel” on the Windows Security window (or press Esc), then choose another sign-in option on the website itself, like your password or a code. Depending on the site, it might be called “Other ways to sign in“, “Other ways to verify” or something similar.
This won’t stop the window from coming back, but nothing is saved and your account stays as it was.
Turn off the passkey prompt in the website’s settings
If the window only ever shows up on one website, the site itself is usually the one asking. Many sites have passkey options in the account’s security settings, where you can remove a passkey you don’t use or stop the site from offering one. On Amazon, for example, changing the passkey option there has stopped the pop-up from showing up on random pages.
The exact place differs per site. Sign in to the website with your password, open your account’s security or sign-in settings, and look for its passkey options. Remove any passkey you don’t recognize or don’t use, and turn off any option that offers to create one, if the site has it. For a Microsoft account, they’re listed at account.live.com/proofs/manage. Make sure you still have another way to sign in before removing one.
Might be useful: How to Disable Desktop Pop Up Notifications on Windows 11
Stop your browser from creating passkeys by itself
Both Edge and Chrome have a setting that creates passkeys automatically for sites you already sign in to with a saved password. In Edge, it’s turned on by default starting with Edge 149. If you never wanted passkeys, turning these off means your browser won’t start the request by itself.
Microsoft Edge
- Open Microsoft Edge, click the Settings and more (three dots) menu at the top right and select Settings.
- Click Passwords and autofill on the left, and then Microsoft Password Manager.
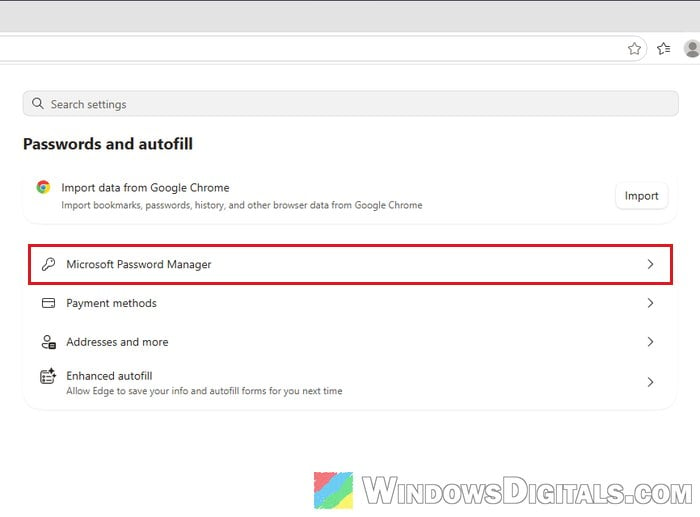
- Click More settings.
- Turn off “Automatically upgrade to passkeys“.
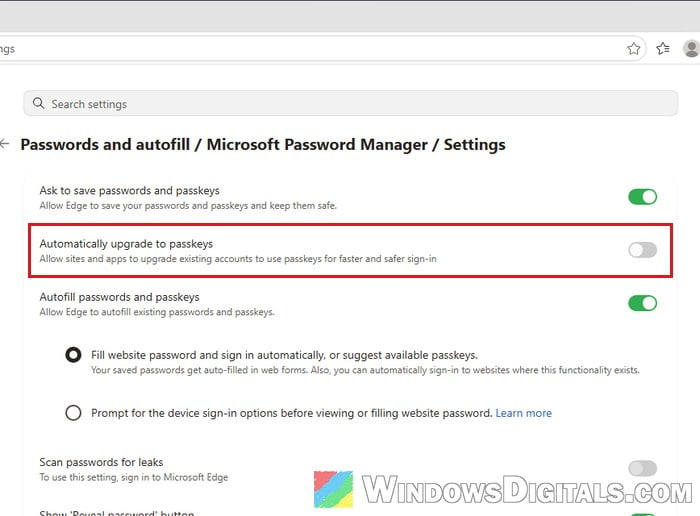
If you don’t want Edge to offer to save anything at all, you can also turn off “Ask to save passwords and passkeys” on the same page. Passwords and passkeys you’ve already saved will still work.
Google Chrome
- Open Chrome and type
chrome://password-manager/settingsin the address bar, then press Enter. You can also get there from the three-dot menu > Passwords and autofill > Google Password Manager > Settings. - Turn off “Automatically create a passkey to sign in faster“.
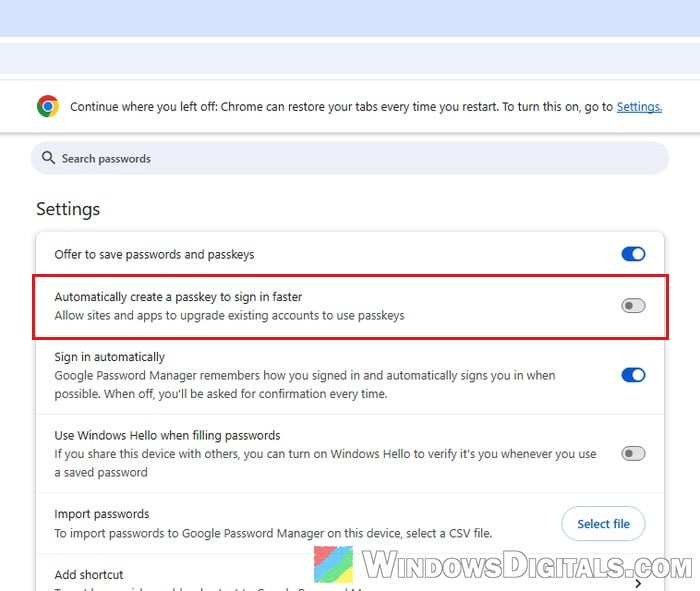
Suggested read: Chrome or Firefox keeps opening new tabs on its own, virus?
Delete passkeys you don’t use
If Windows Security asks you to sign in with a passkey (or insert a security key) on a site where you don’t use one anymore, an old passkey may still be tied to that site. You can see and remove the passkeys Windows has saved in Settings.
- Press Win + I to open Settings.
- Go to Accounts > Passkeys.
- Find the passkey for the site, click the three dots next to it and select “Delete passkey“.
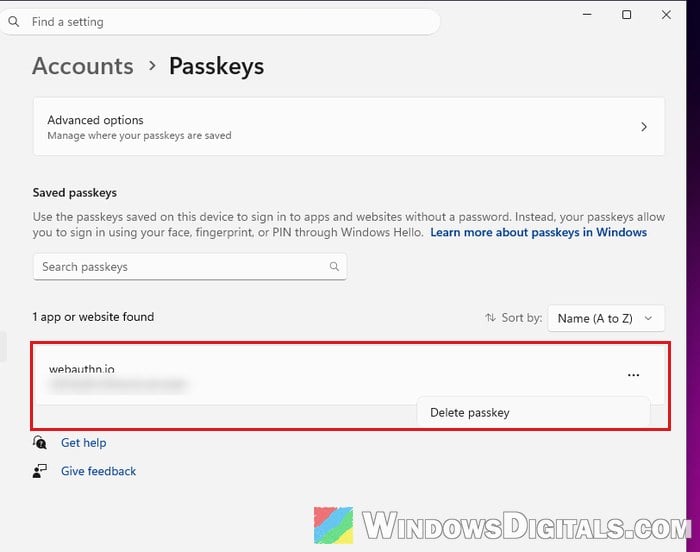
Note that deleting a passkey in Windows doesn’t remove it from your account on the website. If the site still lists it, remove it there too (see the website section above), otherwise the site may keep asking for a passkey this PC no longer has.
Turn off “Passkey access” in Windows
Windows 11 also has a privacy page for passkeys, just like the camera or the microphone. Its “Passkey access” switch decides whether apps can create or use passkeys at all. With it off, Windows no longer shows the passkey window, and a site that asks for one just gets an error instead.
Please be warned that this turns passkeys off for every app and every user on the PC, including passkeys you’ve already saved, so you’ll have to sign in with your password on sites where you used a passkey. If you use passkeys for some sites, stick with the steps above instead. You’ll also need to be signed in as an administrator.
- Open Settings and go to Privacy & security > Passkeys.
- Expand “Recent activity” if you want to see which app asked for a passkey in the last 7 days.
- Turn off “Passkey access“.
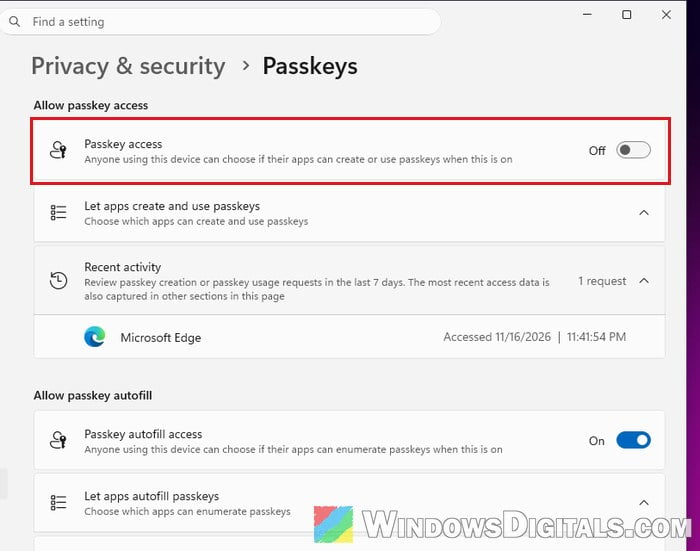
There’s also a “Let apps create and use passkeys” list on the same page for blocking single apps, but browsers like Edge may not show up there, only under Recent activity. For Edge, at least, the main switch is the one that works.
Why can’t you turn off “Save passkeys to this Windows device”?
If you’ve opened Settings > Accounts > Passkeys > Advanced options, you’ve likely noticed that the “Save passkeys to this Windows device” switch is on and grayed out. That’s normal. Without a third-party passkey manager, there’s nothing to switch to, so Windows won’t let you turn it off.
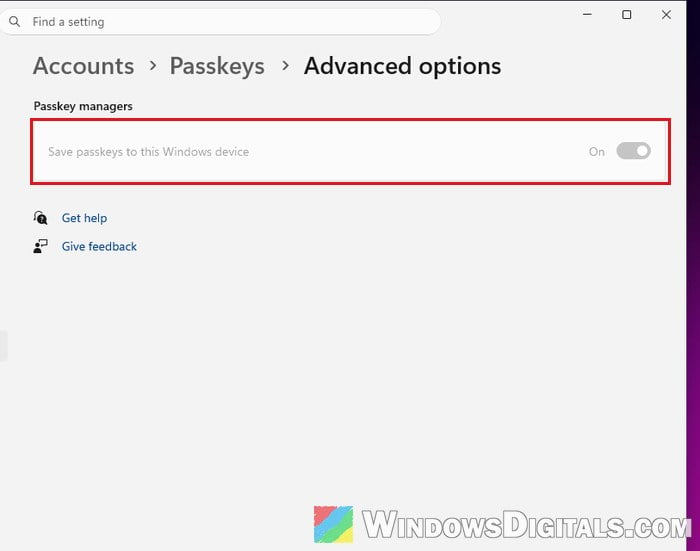
The switch only becomes available after you install and turn on a third-party passkey manager like 1Password or Bitwarden on the same page. Then the pop-up also lets you pick that manager instead of Windows. On a work or school PC, your organization may have locked this setting, in which case only your IT admin can change it.