Ever wished you could keep a Chrome tab open and running in the background while you do other stuff? Sometimes, Chrome tries to save memory by putting tabs you’re not using to sleep. But what if you’re keeping an eye on a website, watching a live event, or need a webpage for quick reference? We’ll show you how you can keep tabs active in Chrome without them dozing off. Here, we’ll talk about three ways you can use to do that.
Also see: How to cycle through tabs in Chrome
Page Contents
Turning off Chrome’s “Memory Saver” feature
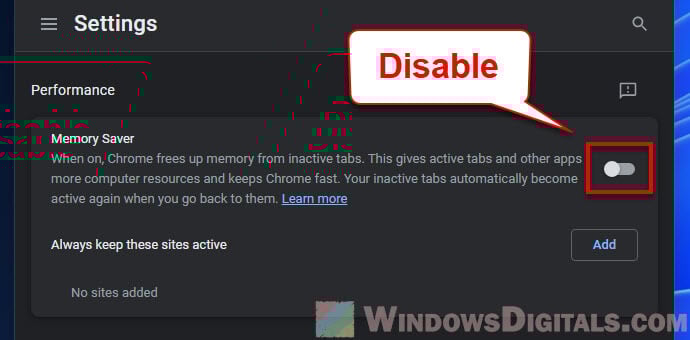
Chrome has this thing called “Memory Saver” that tries to free up your computer’s memory by putting inactive tabs (tabs you’re not looking at) to sleep. But if you have a tab that needs to stay active, you might want to switch this feature off.
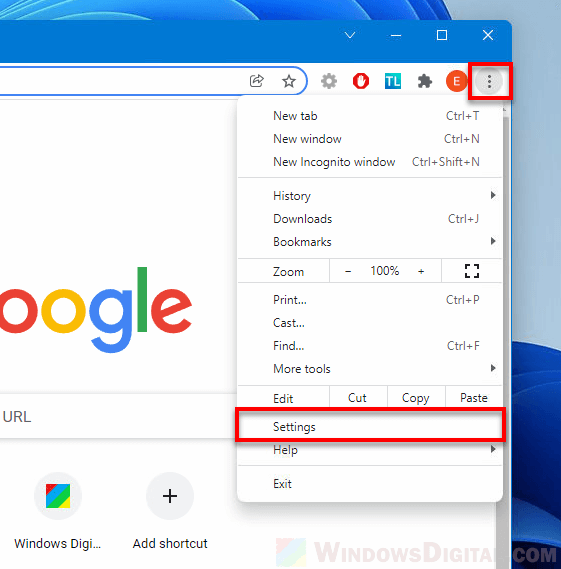
- Open up Chrome and look for three dots in a line at the top right. That’s the menu button. Click it to see more options.
- Find and click on “Settings” in the menu.
- In the settings, click on “Performance” from the list on the left.
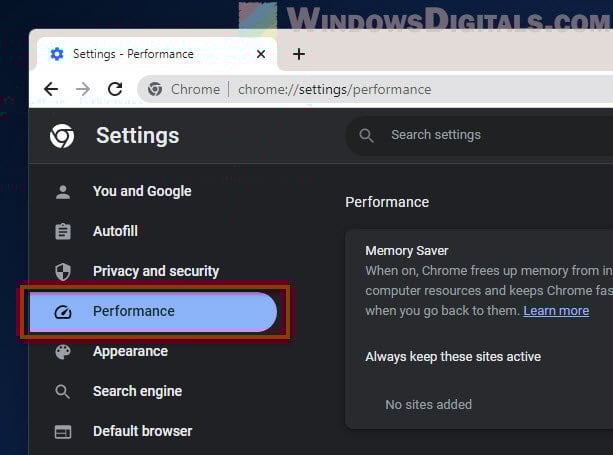
- Look for “Memory Saver.” If it’s on, it will try to save your memory by snoozing tabs. Click the switch next to it to turn it off.
With “Memory Saver” off, Chrome won’t put your tabs to sleep anymore. But if you want to save memory and still keep certain tabs awake, try the next option.
Pro tip: How to bookmark all tabs in Chrome
Using the “Always keep these sites active” feature
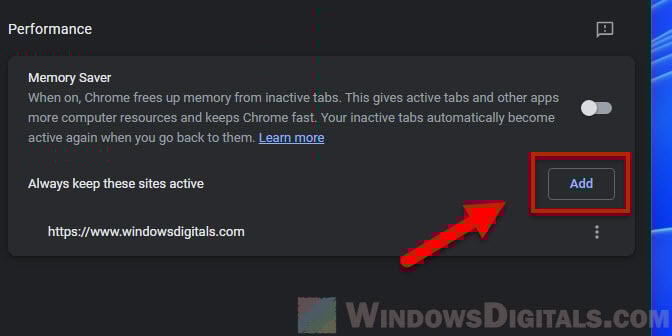
Inside the “Memory Saver” feature, there’s an option to keep certain sites always active. This is perfect for when you have sites you don’t want to pause.
- Go back to the “Performance” settings in Chrome like we did before.
- Under “Memory Saver,” you’ll see “Always keep these sites active.”
- Click “Add” next to it, and a box will show up asking for the website’s URL you want to stay active.
- Type in the website and click “Add.” This site will now stay active, no matter what.
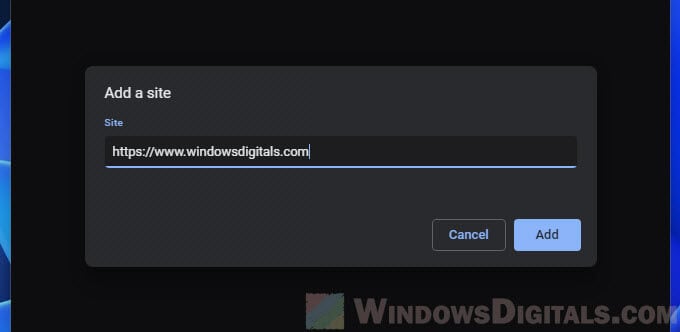
- If you change your mind later, just hit “Remove” next to the website’s URL.

This way, you can pick and choose which tabs stay active while still saving memory on others.
Related issue: Chrome keeps opening new tabs on its own
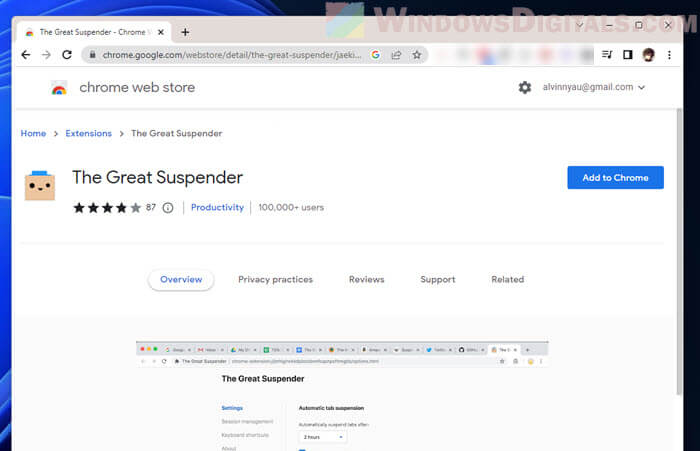
Using extensions like “The Great Suspender”
Sometimes, you might need more control over your tabs than what Chrome can provide you. That’s where extensions like “The Great Suspender” might come in handy. It’s designed to put tabs to sleep, but you can also tell it to always keep certain sites active.
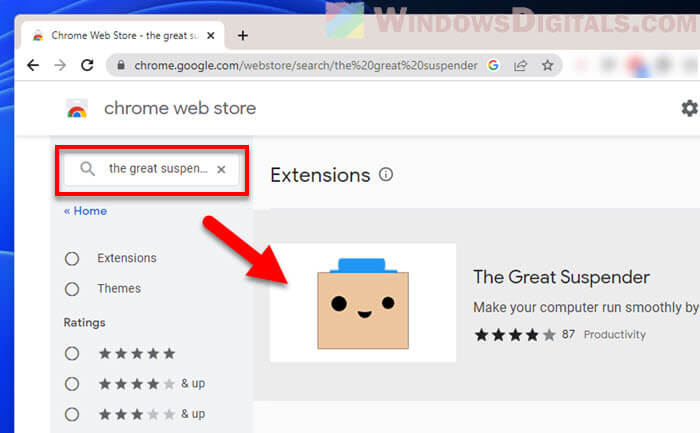
- Head over to the “Chrome Web Store” to find extensions for Chrome.
- Use the search bar at the top to look for “The Great Suspender,” then hit Enter. Select it from the results.
- Click “Add to Chrome” to get the extension. Make sure you’re okay with what it does and the permissions it asks for.
- Once it’s installed, you’ll see its icon next to your other extensions. Click it and go to “Settings”.
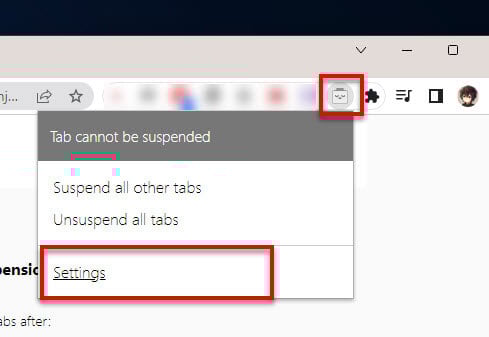
- In the settings, you can whitelist websites to keep them from being suspended.
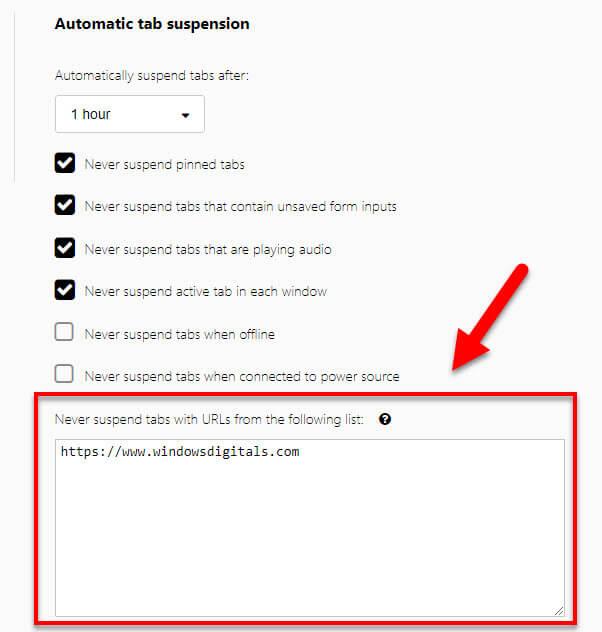
If a tab is opening a site that is listed on the “Never suspend tabs” section in the extension, it will never be forced to sleep because of inactivity. It’ll now always be active.
Some final words
Getting around with lots of tabs and keeping them in line is important for both work and entertainment. Chrome’s got some very useful built-in features like “Memory Saver” and “Always keep these sites active” to help save your memory from inactive tabs or allow you to always keep a tab awake.
Besides, with extensions like “The Great Suspender,” you get even more freedom to mange your tabs. Just note that when you’re adding any new extensions, it’s good to check out what they do and what permissions they need from you.