If you’re seeing nvngx_update.exe (or NGX Updater) in Task Manager on Windows 11 or 10 (often several copies at once after you launch a game), or Event Viewer says it slowed down your PC’s startup, it’s a file that comes with your NVIDIA graphics driver. This guide explains what nvngx_update.exe actually does, whether it’s safe, and what you can do when it keeps running or slows things down.
Also see: NVIDIA Web Helper.exe Service: Should I Disable it?
What is nvngx_update.exe (NGX Updater)?
nvngx_update.exe is NVIDIA’s NGX Updater. NGX is the part of NVIDIA’s driver behind its AI features for RTX graphics cards, such as DLSS. According to NVIDIA, the NGX Updater is a small program that downloads newer versions of these NGX features, so the apps and games that use them always get the latest ones.
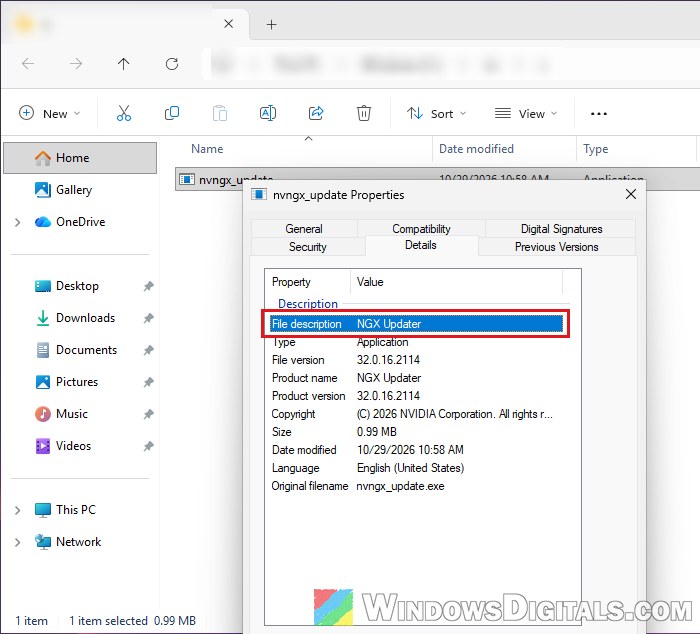
You didn’t install it yourself. It ships inside the NVIDIA graphics driver package itself, right next to the other NGX files, so it’s there whether or not you use GeForce Experience or the NVIDIA App. When you check the file’s properties, its description reads NGX Updater and the copyright says NVIDIA Corporation.
The real file lives inside the driver’s own folder in C:\Windows\System32\DriverStore\FileRepository\. The exact folder name depends on your driver and your PC maker, but it starts with nv and has .inf_amd64_ in it, like nv_dispi.inf_amd64_<random letters> or nvmdi.inf_amd64_<random letters>.
Suggested read: What is NVIDIA NodeJS Launcher and Share Window?
Why does it start when you launch a game?
The NGX Updater doesn’t run all the time. It’s started by NVIDIA’s NGX component when an app or game that uses NGX features (DLSS, for example) loads, and it then checks NVIDIA’s servers for newer versions of those features. That’s why, if you look at it in a tool that shows parent processes (like Process Explorer), it shows up under the game itself.
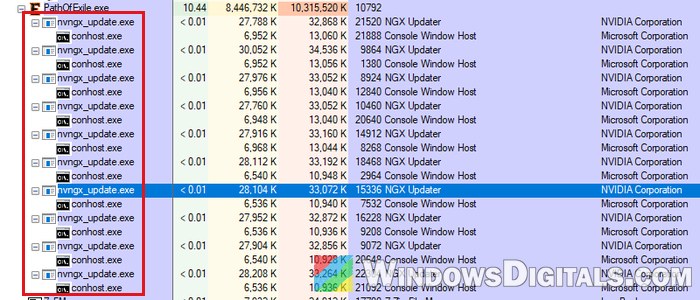
It’s meant to do its check and close again, but it doesn’t always. Game developers and players have reported many copies of nvngx_update.exe staying open after the game is closed, sometimes 10 or more, piling up each time a game is launched. In some cases they used a bit of CPU each, and some games (or their launchers) wouldn’t start until they were closed.
Can nvngx_update.exe slow down your PC’s startup?
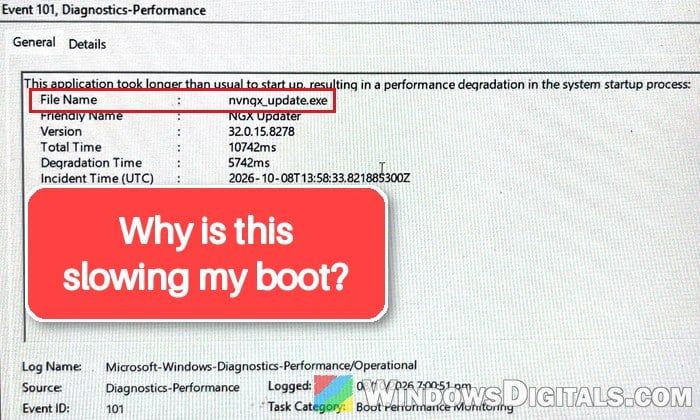
It can, since Windows keeps a record of programs that make startup slower than usual, and nvngx_update.exe sometimes shows up there. In the example below, Event Viewer says the NGX Updater took about 10.7 seconds to start, and about 5.7 seconds of that (the Degradation Time) slowed down startup.
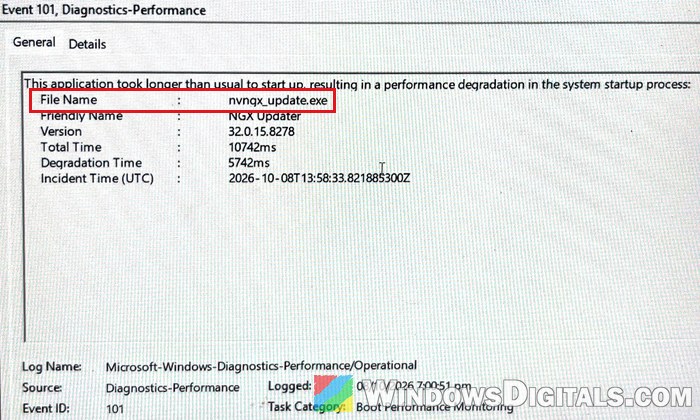
To check this on your own PC, open Event Viewer (search for it in the Start menu), then go to Applications and Services Logs > Microsoft > Windows > Diagnostics-Performance > Operational. Click the entries with Event ID 101 and read the File Name and Degradation Time lines in the bottom pane.
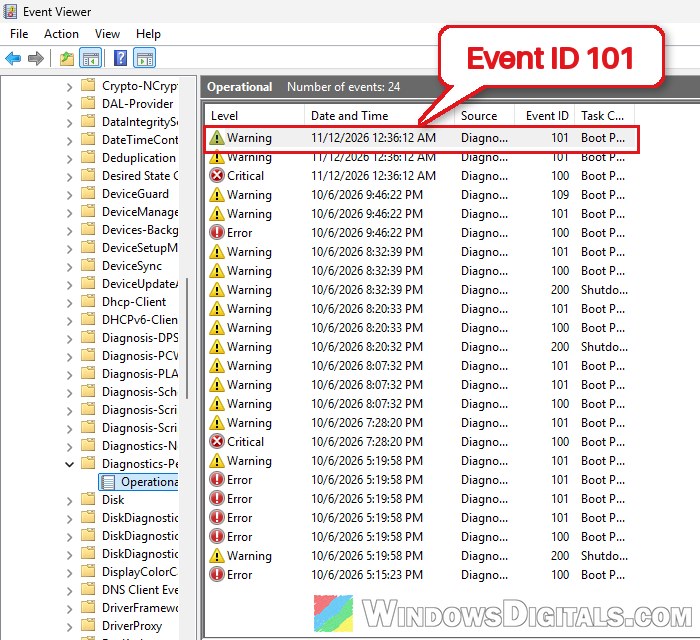
A few seconds from one program is usually not the whole reason a PC boots slowly, though. If nvngx_update.exe is only one of many entries there, look at what else starts with Windows, too.
Pro tip: How to Disable Startup Programs in Windows 11
Is nvngx_update.exe a virus?
The real nvngx_update.exe is a safe, signed NVIDIA file. But like any .exe, malware can use the same name to hide, so it’s worth a quick check if something feels off. Here’s how:
- While it’s running (right after you start a game, for example), press Ctrl + Shift + Esc to open Task Manager and go to Details.
- Right-click nvngx_update.exe and select Open file location. It should open a folder inside
C:\Windows\System32\DriverStore\FileRepository\that starts withnv. - Right-click the file and select Properties.
- Go to the Digital Signatures tab. The signer should be NVIDIA Corporation.
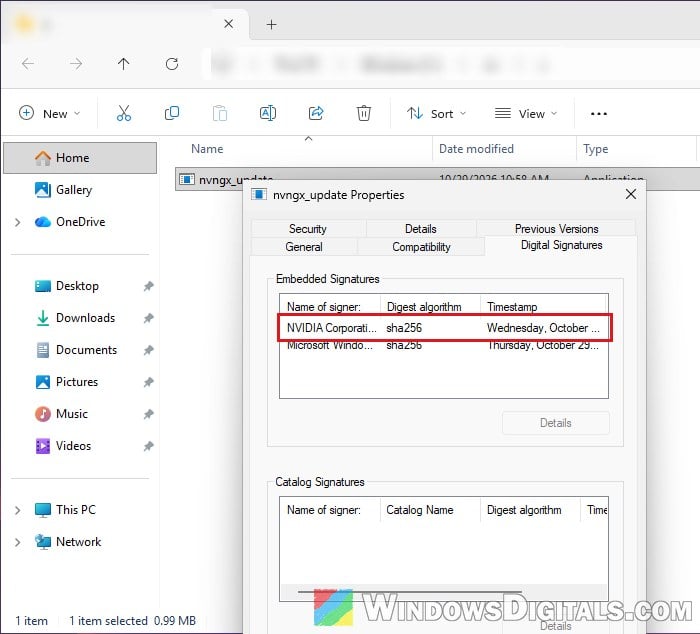
If the file is somewhere else (your Downloads, AppData or Temp folder, for example), or it isn’t signed by NVIDIA, treat it as suspicious and scan your PC with Windows Security or your antivirus.
Learn more: How to Scan an .exe File for Viruses to Check If It’s Safe
What to do when nvngx_update.exe keeps running
If you only see it briefly when a game starts, you don’t need to do anything. If the copies pile up, use CPU or stop a game from starting, try the following, in this order.
End the leftover NGX Updater processes
This is the quickest fix, though it usually only helps for a while. In Task Manager’s Processes tab, the copies show up as NGX Updater under Background processes. Right-click each one and select End task, then start the game again. Ending them should be safe, since the updater is started again the next time a game needs it.
Update or clean-reinstall the NVIDIA driver
Since the NGX Updater comes with the driver, it’s worth ruling out the driver itself with a fresh or clean install. Get the latest driver for your graphics card through the NVIDIA App, or from NVIDIA’s own driver page at https://www.nvidia.com/en-us/drivers/ using the Manual Driver Search.
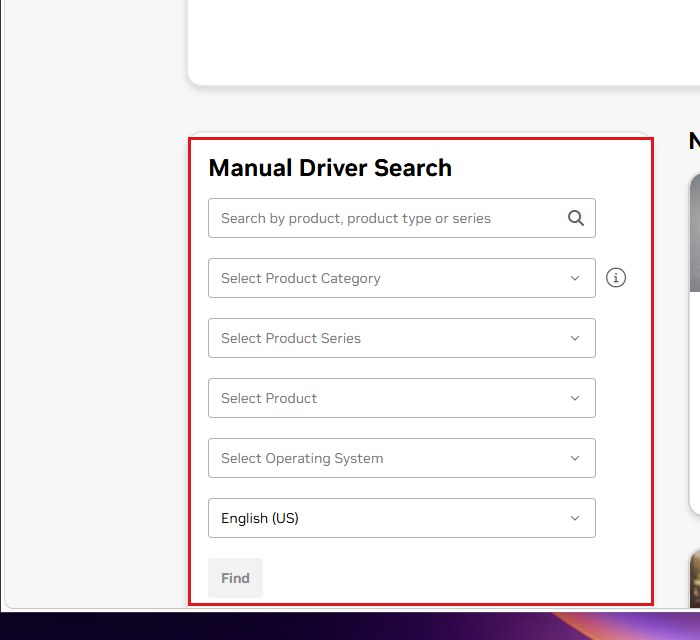
If updating doesn’t help, do a clean reinstall. A common way is to remove the old driver completely with Display Driver Uninstaller (DDU) by Wagnardsoft in Safe Mode first, then install the newest one.
Related guide: How to Update Graphics Driver in Windows 11
Turn off NGX downloads in the registry (optional)
NVIDIA documents a registry value that stops its Windows driver from downloading NGX components from ngx.download.nvidia.com. It’s written for NVIDIA’s virtual GPU (vGPU) driver, so it may not work the same with a regular GeForce driver, and it doesn’t necessarily stop nvngx_update.exe from starting.
NVIDIA’s steps set this value before the driver is installed, so it may only work after you reinstall the driver. If you try it, you’ll stop getting NVIDIA’s newer NGX feature files through the driver.
Incorrectly changing the registry can cause serious problems with Windows, so please create a system restore point first. If you’re not sure what you’re doing, it’s better to skip this one.
- Press Win + R, type
regeditand press Enter. - Copy and paste the following path to the address bar and press Enter:
HKEY_LOCAL_MACHINE\SOFTWARE\NVIDIA Corporation\Global
If Global isn’t there, right-click NVIDIA Corporation, select New > Key and name it Global.
- Right-click Global, select New > Key, and name it NGXCore (skip this if it’s already there).
- With NGXCore selected, right-click an empty space in the right pane, select New > DWORD (32-bit) Value, and name it EnableOTA.
- Leave its value at 0. If EnableOTA was already there, double-click it and set its Value data to 0.
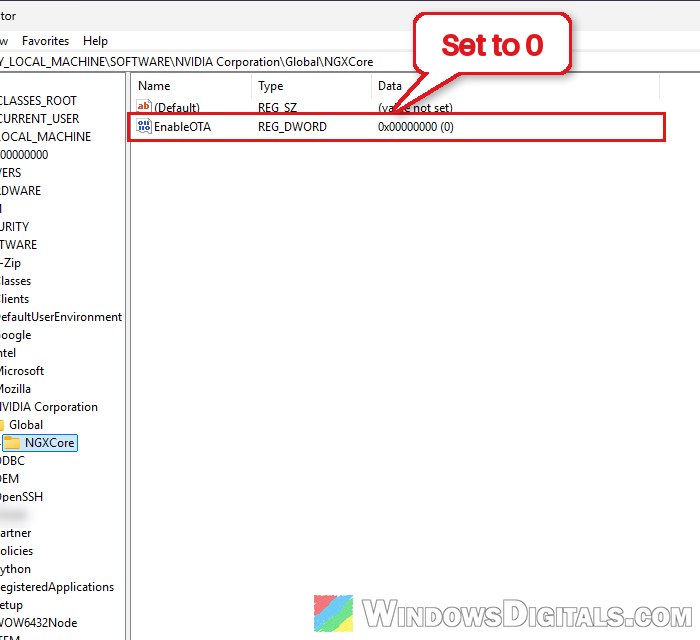
To undo it, set EnableOTA to 1 or delete the value.
Should you delete or block nvngx_update.exe?
No, it’s best not to. Some people have removed it from the driver folder, deleted the other NGX files, or blocked it from running with a security policy or another tool. That can stop the extra copies, but removing NGX files can break DLSS in your games, and the next driver install puts the file back anyway. If nothing above helps and the leftover copies keep getting in the way, ending them in Task Manager when they appear is the safer workaround.