If you take a screenshot with Win + Shift + S or the Snipping Tool app and it gets copied to the clipboard, but nothing shows up in your Pictures\Screenshots folder anymore, even though Snipping Tool still says it saves there, this guide will show you where the captures might be going and how to get them saved again.
Also see: How to Find Snipping Tool History in Windows 11 or 10
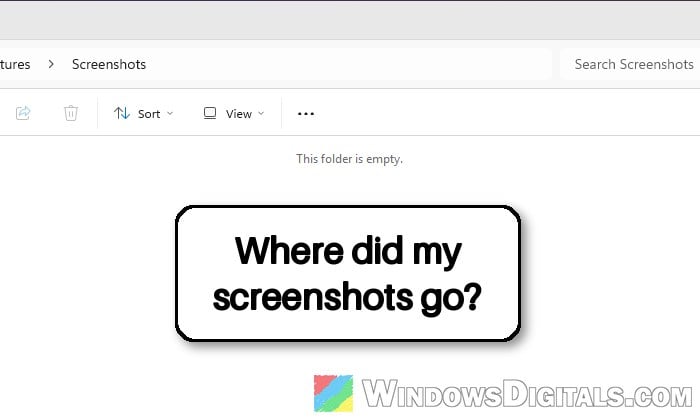
Why does Snipping Tool stop saving screenshots?
By default, Snipping Tool saves every capture to C:\Users\<your name>\Pictures\Screenshots and copies it to the clipboard at the same time. When the file stops showing up, it’s usually one of these:
- Automatic saving got turned off, or the save folder was changed, often after an app update, a reset or a Windows reinstall.
- OneDrive is backing up your Pictures folder, so the screenshots are saved to the Screenshots folder inside OneDrive instead of the local one.
- Microsoft Defender’s Controlled folder access is blocking writes to the Pictures folder.
- The Snipping Tool app itself is broken and needs a repair, reset or reinstall.
It’s a pretty common issue on Reddit and Microsoft’s forums, and the first two checks below are where to start.
Pro tip: How to Open Clipboard History in Windows 11
Check Snipping Tool’s save settings first
Snipping Tool has its own switch for saving captures, and it’s separate from copying them to the clipboard. If that switch is off, every capture still pastes fine but never becomes a file. Newer versions of the app also let you pick the save folder there, so it might simply be saving somewhere you don’t expect. Here’s how to check:
- Open Snipping Tool from the Start menu.
- Click the See more (three dots) button at the top right and select Settings.
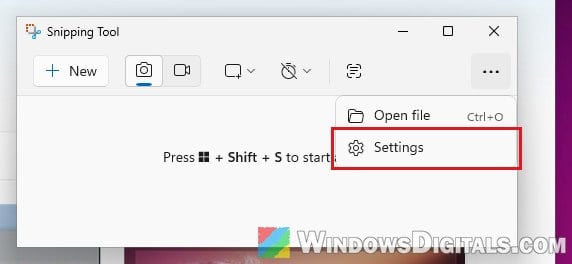
- Make sure “Automatically save original screenshots” is turned on.
- Right under that switch, check the path next to “Screenshots are saved to“. If it’s not the folder you’re looking in, click Change and pick the one you want (or go back to Pictures\Screenshots). Open folder takes you straight to it.
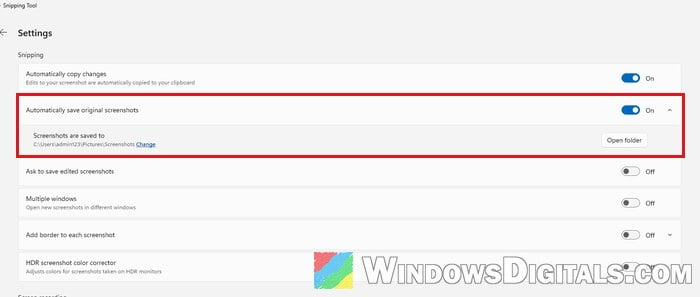
Take a new snip with Win + Shift + S and check the folder again. If the switch was already on and the folder was right, move on to the next section.
Look in OneDrive’s Screenshots folder
When OneDrive backs up your Pictures folder, the Pictures folder you see actually lives inside OneDrive. Your screenshots then go to C:\Users\<your name>\OneDrive\Pictures\Screenshots, and the old local Pictures\Screenshots folder stays empty. According to Microsoft, screenshots are now backed up through this Pictures folder backup, although some OneDrive versions still have a separate “Save screenshots I capture to OneDrive” switch as well.
First, open File Explorer and check both of these folders:
C:\Users\<your name>\Pictures\ScreenshotsC:\Users\<your name>\OneDrive\Pictures\Screenshots
If your snips are in the OneDrive one, you have two choices. Either set Snipping Tool’s save folder to the folder you want (previous section), or stop OneDrive from backing up Pictures:
- Click the OneDrive icon in the taskbar’s system tray, click the gear icon (Help & Settings) and select Settings.
- On the Sync and backup page, click Manage backup.
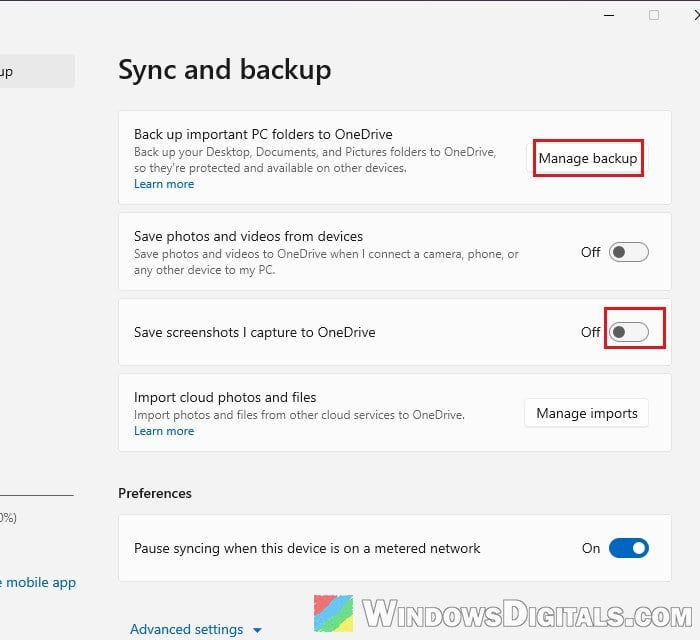
- Turn off Pictures and follow the prompts to stop backing it up.
- Back on the Sync and backup page, if you see “Save screenshots I capture to OneDrive“, turn it off too.
Then take a new snip and check which of the two folders it lands in.
Might be useful: How to Reset or Reinstall OneDrive in Windows 11
Controlled folder access might be blocking it
Controlled folder access is a ransomware protection in Windows Security. When it’s on, it protects folders like Documents, Pictures, Videos, Music and Desktop, and blocks any app it doesn’t trust from writing to them. Since the Screenshots folder is inside Pictures, a blocked save just never appears, and you might only see a quick “Protected folder access blocked” notification you didn’t pay attention to. It’s off by default, so this only applies if it was turned on.
To find out if that’s what’s happening, follow the steps below:
- Open Windows Security from the Start menu.
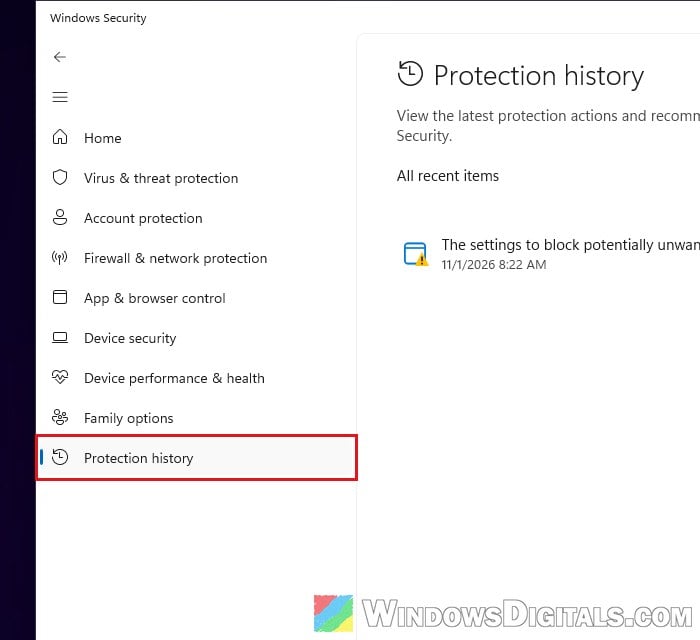
- Click Protection history in the left menu and look for a blocked folder access entry from around the time you took a screenshot. Open it to see which app was blocked.
- Go to Virus & threat protection, scroll down and click Manage ransomware protection.
- Click “Allow an app through Controlled folder access“, then Add an allowed app and add the app the blocked entry named.
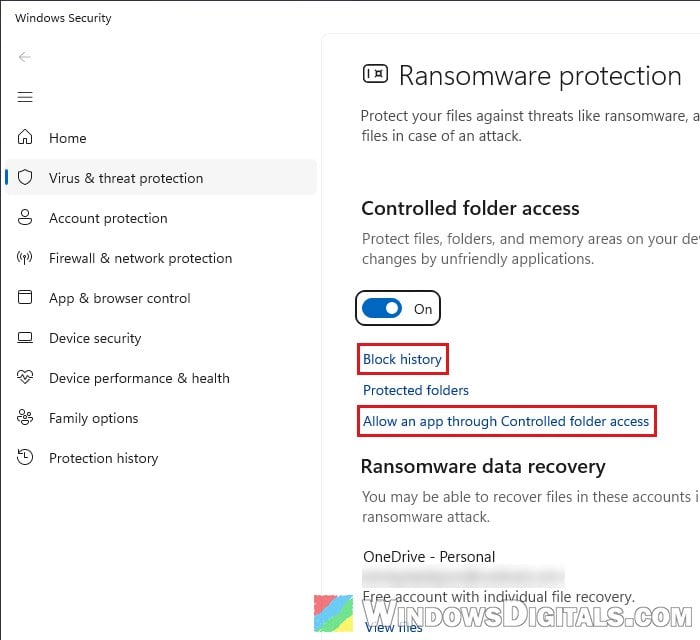
Take another snip and see if it’s saved this time. You can also turn Controlled folder access off for a moment as a quick test, but turn it back on afterward, since it’s what protects your files from ransomware.
Related concern: Explorer.exe Blocked by Windows Defender or Firewall?
Turn on Snipping Tool’s notifications
After a Win + Shift + S capture, Snipping Tool can show a notification with a preview of your snip. Clicking it opens the snip in the app, where you can edit and save it. If notifications for Snipping Tool are off, that pop-up never shows, and the snip only lands on the clipboard unless automatic saving is on. It’s worth checking, especially after a reinstall. Here’s how:
- Open Settings and go to System > Notifications.
- Scroll down to the list of apps and turn on Snipping Tool. If it’s not in the list, it hasn’t sent any notification yet.
Take a new snip with Win + Shift + S and check that the notification shows up.
Repair or reset Snipping Tool
If the settings look right and the files still don’t appear, the app’s own data might be corrupted. A Repair keeps your settings, while a Reset clears them and starts the app fresh. Try a repair first:
- Open Settings > Apps > Installed apps.
- Find Snipping Tool, click the three dots next to it and select Advanced options.
- Scroll down and click Repair. Test a snip.
- If that doesn’t help, click Reset on the same page.
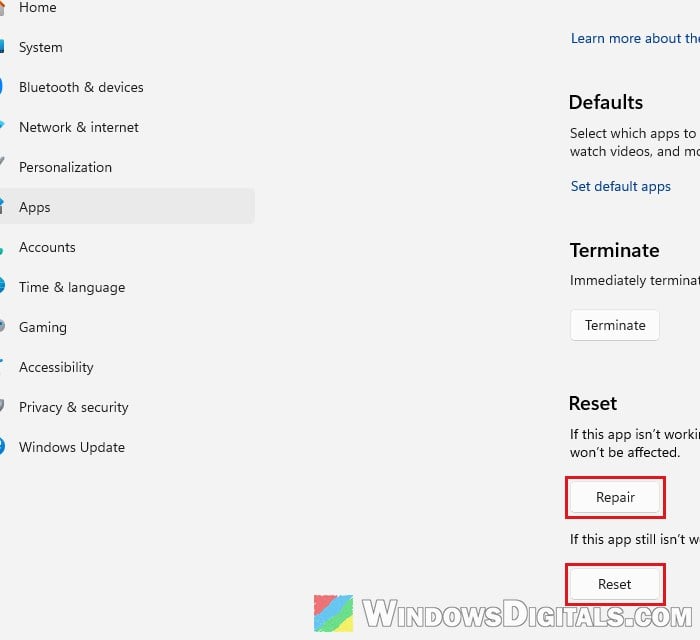
After a reset, open Snipping Tool and turn “Automatically save original screenshots” on again, then check the save folder.
Reinstall Snipping Tool from the Microsoft Store
When nothing else works, a clean reinstall gives you a fresh copy of the app and its settings. Here’s how:
- Go to Settings > Apps > Installed apps, click the three dots next to Snipping Tool and select Uninstall.
- Restart your PC.
- Open the Microsoft Store, search for Snipping Tool and click Get to install it again (Microsoft’s Store page for it is
https://apps.microsoft.com/detail/9mz95kl8mr0l).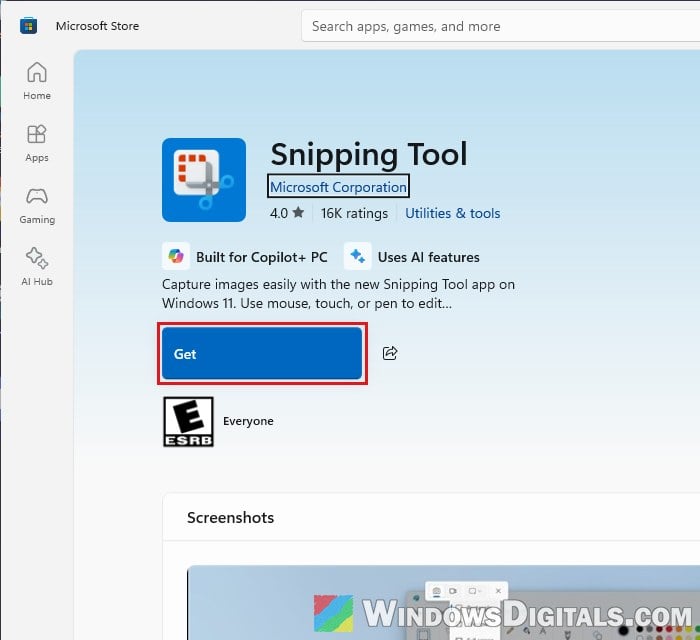
- Open Snipping Tool, go to See more > Settings and turn on “Automatically save original screenshots“.
If you’d rather use the command line for this, see: Install or Uninstall Windows 11 Snipping Tool via PowerShell.
Use Win + Print Screen in the meantime
While you sort this out, pressing Win + Print Screen captures your whole screen and saves it straight to the Screenshots folder without going through Snipping Tool’s save setting. It can tide you over until the fix sticks (unless OneDrive is the problem, since it moves that folder too).