Snipping Tool is a simple screenshot tool that comes pre-installed in Windows 11 and Windows 10. Due to its simplicity, it lacks many of the abilities to edit screenshots after they have been taken.
While you may think that drawing a straight line in Snipping Tool is not possible because there is no such button in the editor after taking a screenshot, you will be surprised to find that there is actually a way to do this. You can also highlight a straight line in Snipping Tool in the same way.
Also see: How to Draw a Box Around Text in Snipping Tool
In addition, the same method to draw or highlight straight line in Snipping Tool is also applicable to Snip and Sketch in Windows 10. Since Windows 11, Snipping Tool has been merged with Snip and Sketch, and it is now known only as Snipping Tool, not as two separate pieces of software.
Page Contents
Draw or highlight straight line in Snipping Tool
To draw or highlight a straight line on a taken screenshot in Snipping Tool, follow the steps below.
- Open Snipping Tool and take a screenshot.
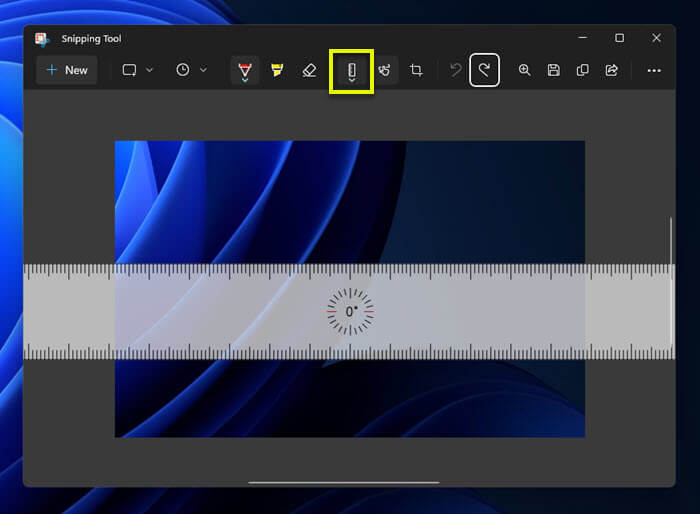
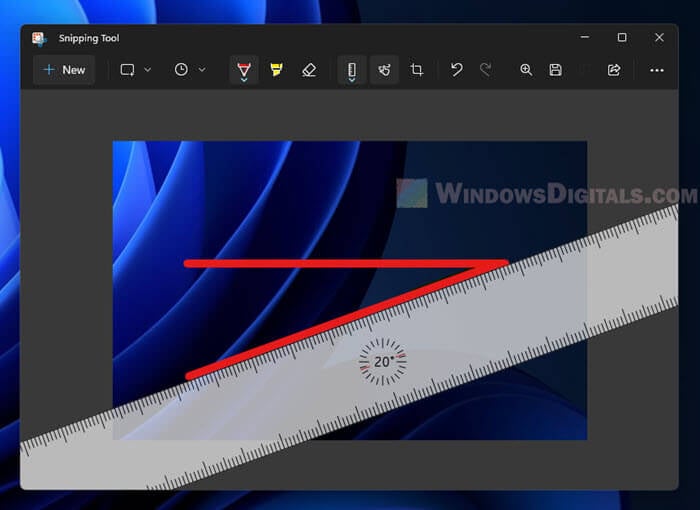
- In the editor, select the Ruler on the toolbar.
- Next, place the ruler where you want to draw the straight line on the screenshot.
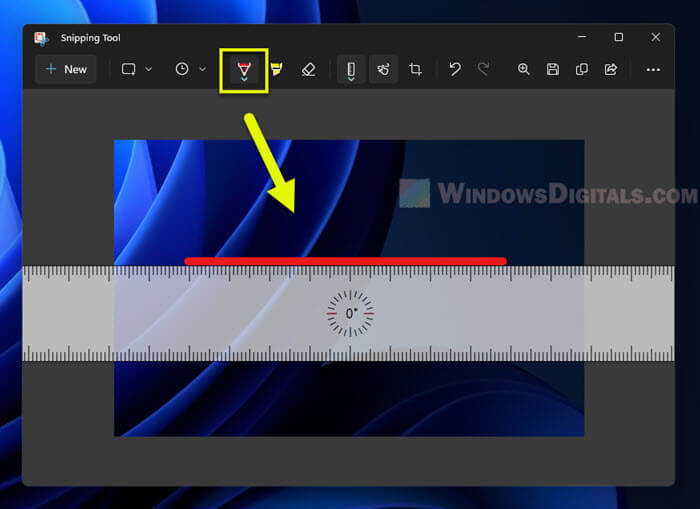
- Then, choose Ballpoint pen or Highlighter, depending on what you want to use, and select the color and size of the pen.
- To draw a straight line, simply draw along the ruler. You can draw along the top or bottom of the ruler.
Additionally, you can move the ruler even after you have placed it. Simply click and hold to drag the ruler to anywhere you want it to be on the picture.
To erase the straight line you’ve drawn, you can select the Eraser tool and click on the line to delete it. Alternatively, you can press Ctrl + Z to undo the line you drew (or whatever changes you last made).
Suggested read: How to Find Snipping Tool History in Windows 11 or 10
How to draw vertical or other angled straight line in Snipping Tool
The ruler tool in Snipping Tool is rotatable. You can rotate the ruler to draw a vertical or an angled straight line on the screenshot. You can also use all the edges of the ruler to draw the line, not just the top and bottom.
Open the screenshot in a better editor such as Paint
Since the editing tools available in Snipping Tool are very limited, it is best to just open the captured screenshot in an appropriate editor, such as Paint or Paint 3D in Windows 11 or 10, and draw straight lines there.
You don’t necessarily have to save the image before opening it in another editor. You can open the screenshot in a different editor directly from within Snipping Tool after capturing it.
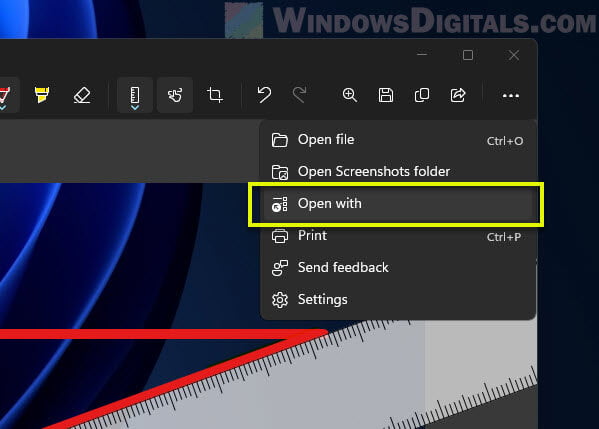
After taking a screenshot using Snipping Tool, in the editor, click the three-dots menu icon at the top right corner of the window and select Open with.
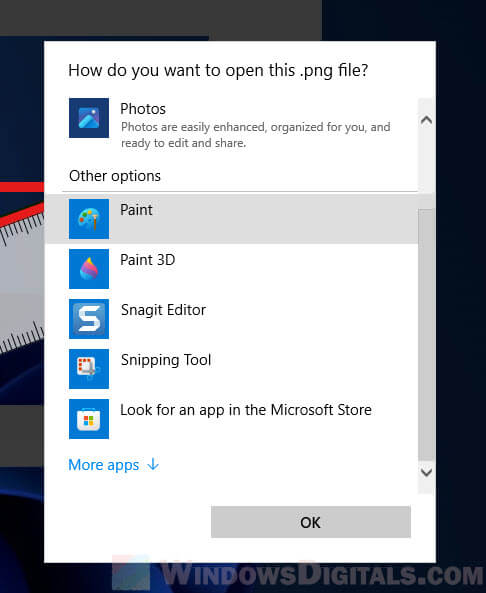
When you are prompted to select an application to open the image, select Paint or any other image editor you prefer.
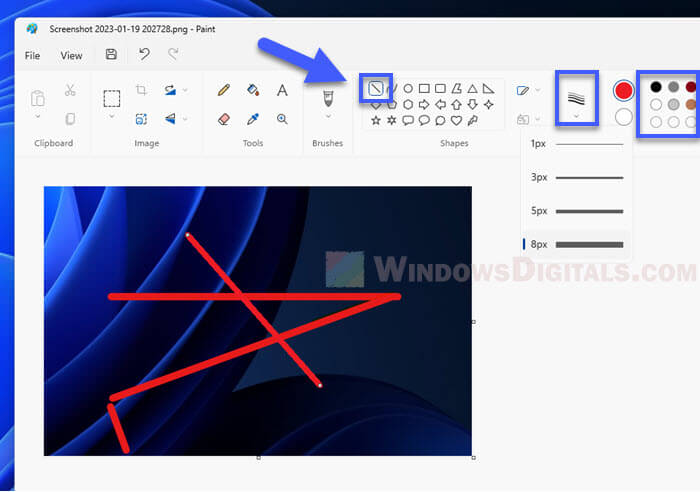
Side tip: To draw a straight line in Paint, click the line icon in the “Shapes” section. Optionally, you can choose the width and color of the line you want to draw. Then, click and hold on a point and release at another point in the image to draw a straight line.