GamingServices.exe and GamingServicesNet.exe are parts of what make gaming with Xbox on Windows 11 and Windows 10 work. They are responsible for all the tasks from getting your games onto your computer and keeping them running properly, specifically those you download from the Microsoft Store or Xbox app.
Also see: How to remove Xbox Game Bar from Windows 11
Page Contents
Gaming services in Windows 11 or 10
Think of GamingServices.exe and GamingServicesNet.exe as the backstage crew for Microsoft’s gaming show on Windows. They’re there to make sure your games are set up right, well updated, and that you have all the game-related features you want.
GamingServices.exe
GamingServices.exe is like a game manager for Windows, making sure your games from the Microsoft Store and Xbox app are installed and up-to-date. If it wasn’t around, you might have trouble getting your games to start or update properly.
GamingServicesNet.exe
And GamingServicesNet.exe looks after the online side of things, helping your online multiplayer games run without issues, managing streaming, and syncing your game saves onto the cloud.
Useful tip: How to know which app is using the internet in Windows 11
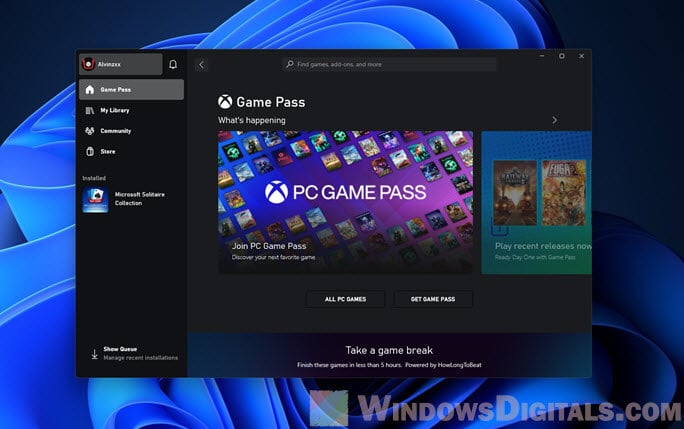
Locating GamingServices.exe and GamingServicesNet.exe
Knowing if these processes are running is easy using Task Manager:
- Right-click on the taskbar and pick “Task Manager”.
- Hit the “Details” tab.
- Look down the list for
GamingServices.exeandGamingServicesNet.exe.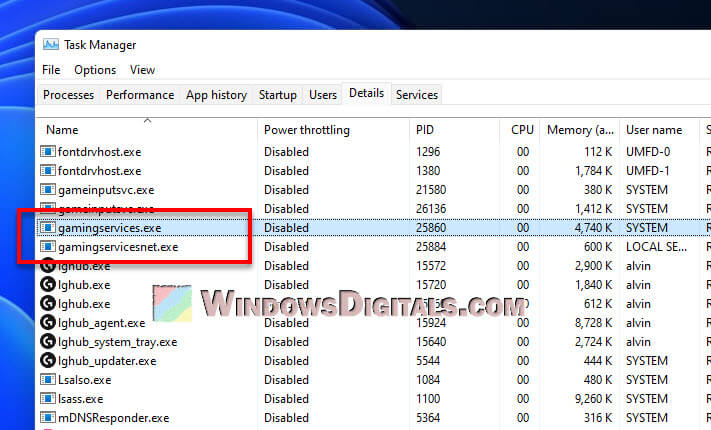
These processes should be running if you’re on Windows 10 or 11, especially if you’ve got games from the Xbox app installed.
Related resource: How to delete a service in Windows 11 or 10 using CMD
Is GamingServices.exe a virus?
Normally, GamingServices.exe and GamingServicesNet.exe are legit and safe. But it’s still important to check they’re the real deal and not bad software in disguise.
Follow the steps below to check where these files are located:
- Open “Task Manager” the way you did before.
- Hit the “Details” tab again.
- Find
GamingServices.exeorGamingServicesNet.exe, right-click, and choose “Open file location”.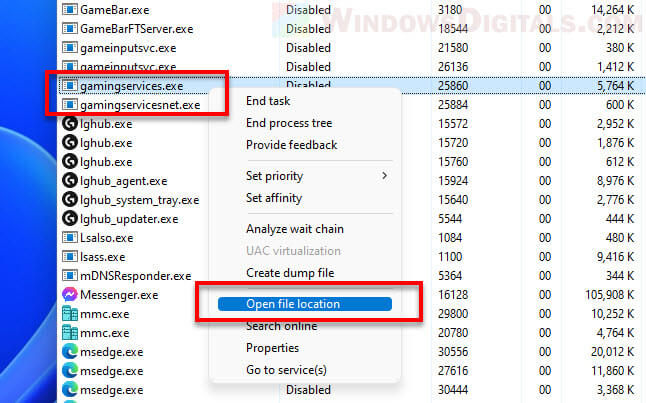
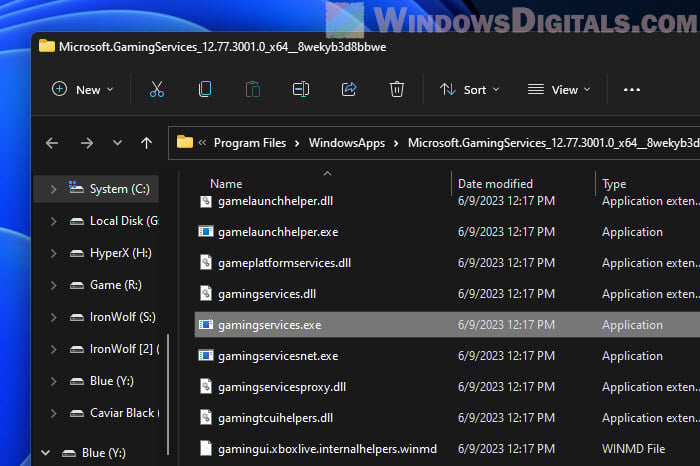
If they’re not in C:\Program Files\WindowsApps\Microsoft.GamingServices_..., something might be up. And, running a virus scan every so often is a common practice to keep malware away from your PC.
Pro tip: 30+ Windows 11 services to disable for better performance
Potential issues and solutions
Even though these processes are usually quiet, sometimes they might cause issue. The following are some common issues and how to fix them:
Gaming services high CPU or disk usage
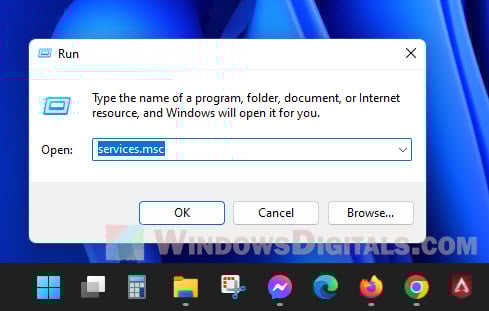
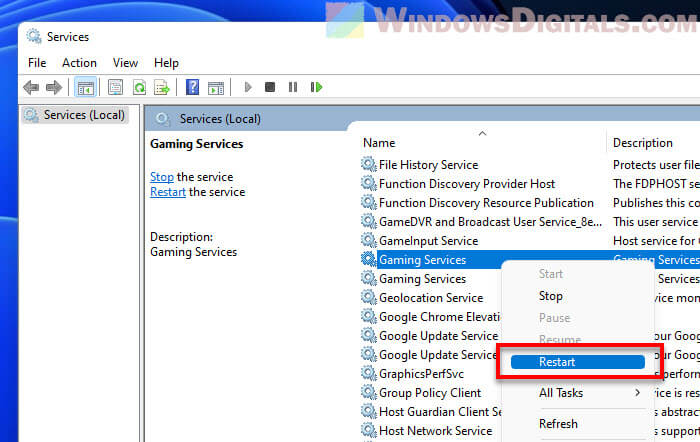
If your computer is slowing down because these services are working too hard and consuming too much CPU and disk resources, especially during game updates, try restarting the service:
- Hit Win + R, type “services.msc”, and press Enter.
- Scroll to “GamingServices”, right-click it, and click “Restart”.
Linked issue: High CPU usage after Windows 11/10 update (Fix)
Failure to launch games
If you can’t get a Xbox or MS Store game to start correctly, It might be a random problem with the Gaming Services. Try the following steps to fix it:
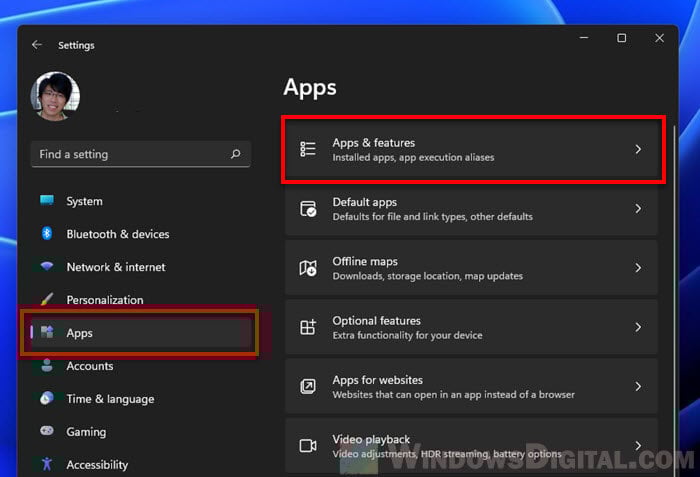
- Press Win + i to open Settings.
- Go to “Apps” then “Apps & features”.
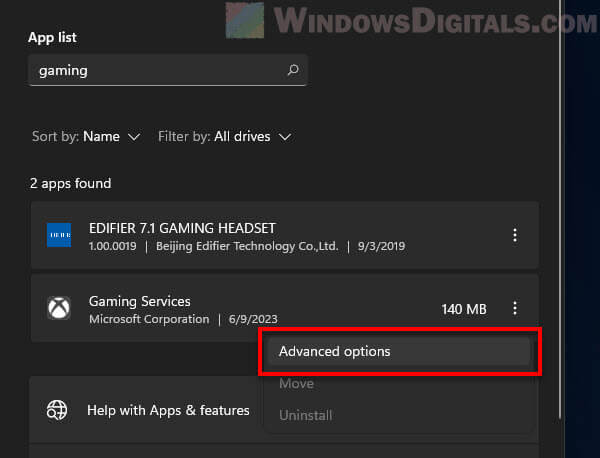
- Find “Gaming Services” in the list. Use the search bar to find it fast. Click the menu next to it and choose “Advanced options“.
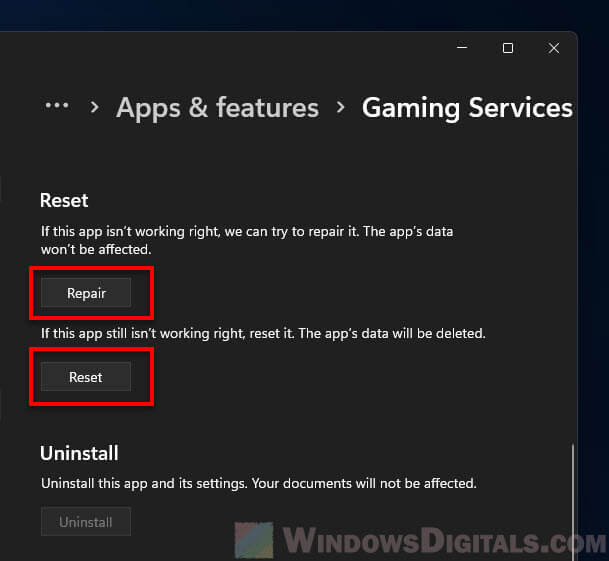
- Hit “Repair” to let Windows try fixing it. If your game still won’t start, hit “Reset“.
Similar problem: Xbox PC Game Pass stuck on syncing data in Windows 11
How to disable or uninstall GamingServices.exe
While GamingServices.exe and GamingServicesNet.exe are important for Xbox games on Windows, there might be times you want to turn them off. But, it’s not as simple as you’d hope. The system protects them because they’re so important.
For example, trying to stop them from starting up via services.msc won’t work; the option is greyed out. And, you can’t just uninstall Gaming Services the regular way either.

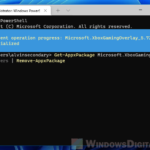
However, you can use PowerShell to remove them, though be aware this might affect your ability to play games from the Microsoft Store or Xbox app. Follow the steps below to do it:
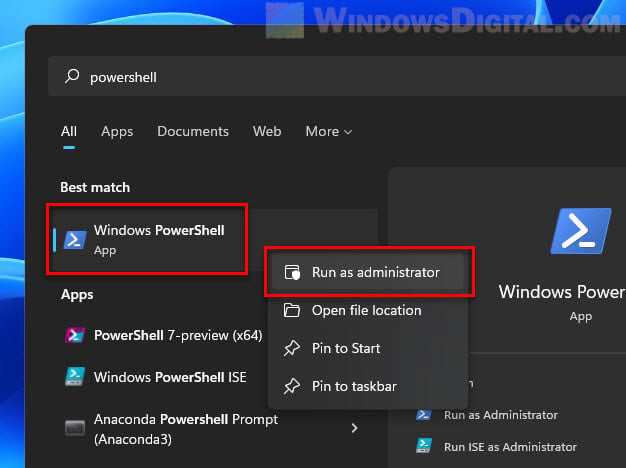
- Open the Start menu, type “PowerShell”, right-click “Windows PowerShell” and pick “Run as administrator”.
- Type the following and press Enter after each line:
Get-AppxPackage *gamingservices* | Remove-AppxPackage -allusers
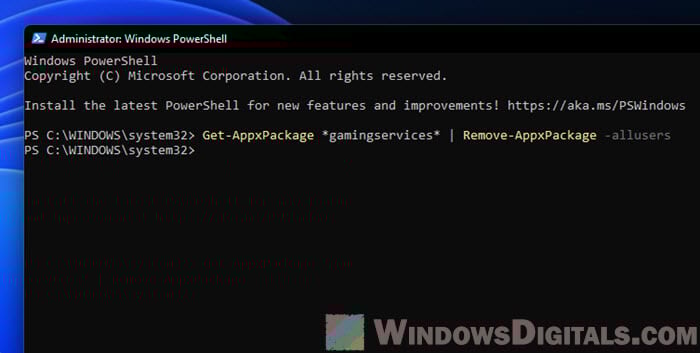
- Restart your computer to finish.
Check Task Manager under Services after rebooting. Gaming Services should be gone.
If you change your mind, installing any game from the Microsoft Store or Xbox app will bring Gaming Services back.

What have we learned?
GamingServices.exe and GamingServicesNet.exe are both very crucial processes if you do play games through the Xbox app or Microsoft Store on Windows 11 and 10. They are responsible for things like game installations, updates, and network stuff for games from the Microsoft Store and Xbox app.
While usually, they don’t cause issue, they can sometimes make your computer slow or not let games start right. Fixing these issues can be as simple as restarting or resetting the service. And, even though they’re safe, always keep an eye out for imposters pretending to be these services (just scan the files when in doubt).
Disabling them is possible but think twice before you do so, as it could break your games and cause issues with them. If you know what you’re doing and you really need to disable them, the steps above can help you out. Just be ready for the effects it might have on your games.