There are often situations where you would want to check which app is actually using the internet in the background to troubleshoot issues such as finding out why your internet speed suddenly becomes slow, to check if there is any app secretly uploading or downloading data without your permission, etc.
This guide will show you how to check which program is currently using internet on your PC in Windows 11.
Also see: How to Block a Program From Accessing Internet in Windows 11
Check which application is using the Internet using Task Manager
In Windows 11, Task Manager allows you to see details about your currently opened apps and system processes. You can view details such as CPU, memory, disk, GPU and network usage of all running processes. By checking on the network usage for each app, you can roughly see which app is using the internet on the PC.
Besides, you can also use the Resource Monitor in Task Manager to check in detailed which app is transferring or receiving data via the internet. See below to learn how to use Task Manager to check which app or program is using the internet in Windows 11.
First, press Ctrl + Shift + Esc keys to open Task Manager, or alternatively open it by right-clicking the Start on the taskbar and select Task Manager.
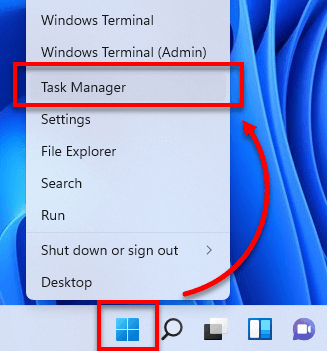
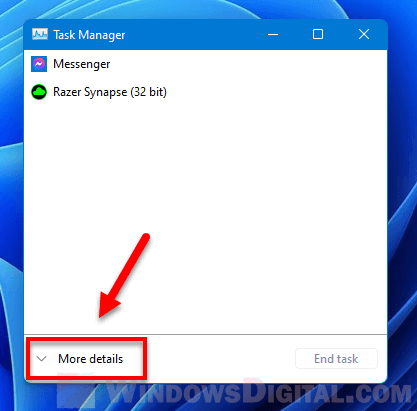
In the Task Manager window, if it’s in simplicity mode where only a few opened apps are shown in the window with no other information, click on More details at the bottom of the window to expand Task Manager to allow it to show more details.
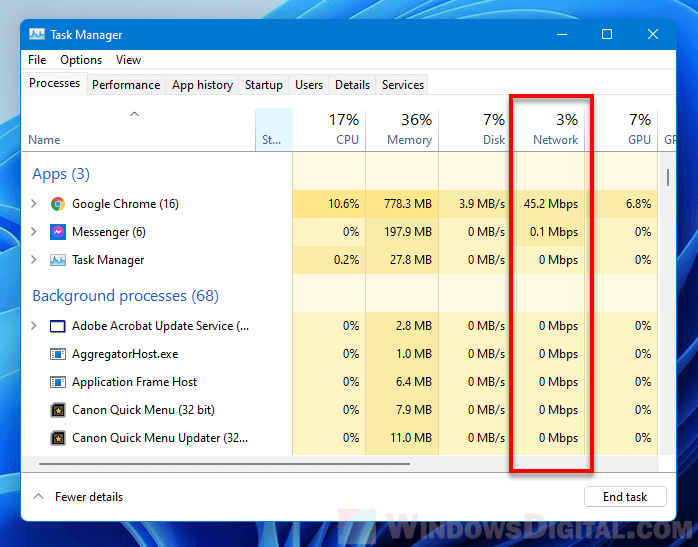
Next, if it’s not already in the “Processes” tab, click on the Processes tab to go into it. From there, you can see the Network usage of each opened app by looking at the Network column. The network column shows the current network bandwidth (data transfer rate) each app is using. If an app shows a usage of more than 0 Mbps, it indicates that the app is using the network.
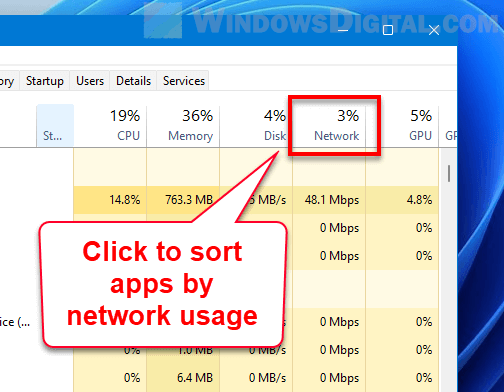
Optionally, you can click on the Network column to sort the apps by their current network usage from the most to the least. Doing so will make it much easier for you to spot the apps that are currently using the network bandwidth (apps with network usage of more than 0 Mbps).
With this stat, you can also find out which app is using a significant large amount of bandwidth that may be causing your internet speed to slow down.
Check how much bandwidth each app is using via Resource Monitor
To check the network bandwidth each app is using for sending data out or receiving data in, you can see the processes’ network activity via the Resource Monitor which can be opened through Task Manager.
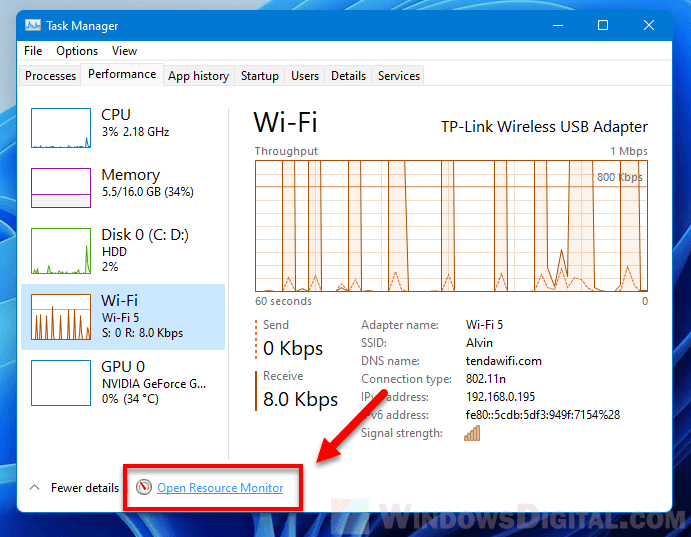
In Task Manager, go to the Performance tab. At the bottom of the window, click on Open Resource Monitor.
In the Resource Monitor window, click on Network tab. Then, click on Processes with Network Activity to expand it if it’s not already expanded. From here, you can see the network bandwidth usage of each active app by looking at the “Send (B/sec)“, “Receive (B/sec)” and “Total (B/sec)“.
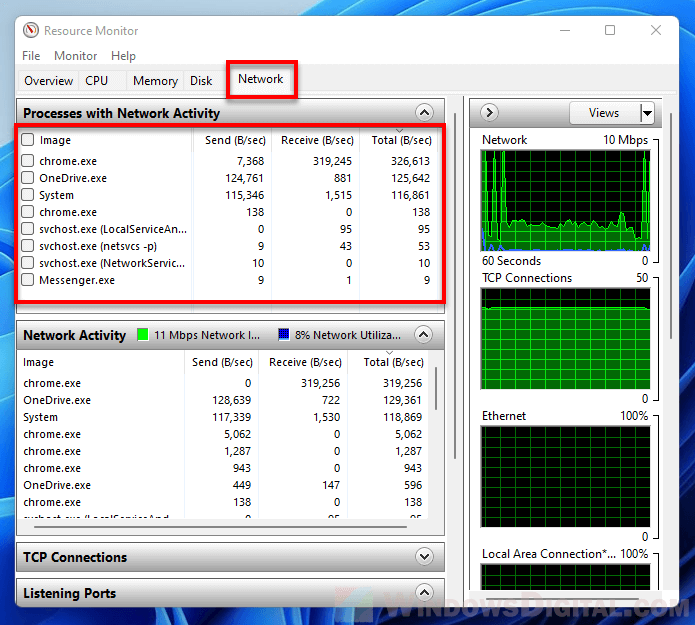
The Send column tells you how many bytes of data are currently being sent out of your PC per second by each app, while the Receive column tells you how many bytes of data are currently being received into your PC per second by each app. The Total column is the sum of Send and Receive.
Note: If you transfer data between computers in the same network, the transfer will also be reflected on the network stats. This means that even when your PC is not connected to the internet, if you are transferring data to or receiving data from another computer over the same network, Task Manager will also show the transfer as network usage of the app you are using for the transfer. This is because task manager tracks traffic that’s going in and out of your network adapter which also include traffic in the local network.
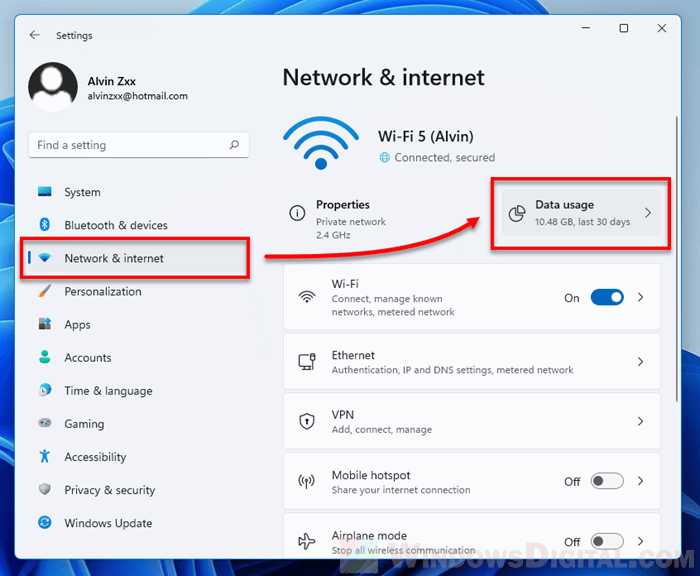
How to check how much data each app has used
In Windows 11 Settings, there is a place where you can check the data usage of each of your apps in the last 30 days. To view the data usage statistics in Windows 11, first press Win + i keys to open Settings.
On the left pane, click on Network & Internet. Then, on the right, click on Data usage.
Under Usage statistics, you can see a list of apps with their total data usage in the past 30 days, sorted from the app that used the most data to the least.
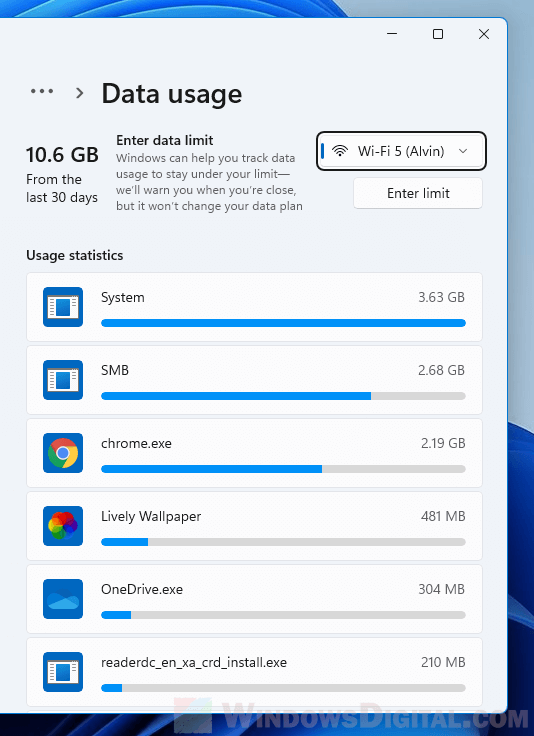
By looking at the data usage stats, you can learn which apps consume most of your internet data and whether an app did use any data at all in the last 30 days.