If you notice your computer’s brain (CPU) working way too hard (like at 100%) after getting the latest Windows update on your Windows 11 or Windows 10, this article is here to help you figure out why and how to fix it.
Also see: How to Limit CPU Usage of a Process in Windows 11
Page Contents
Slow hard drive can make CPU work too hard after Windows Update
We have a laptop in our office that runs on Windows 11, but it hadn’t been used for quite a while. When we finally turned it on, Windows Update automatically kicked in to catch up on any missed updates. Strangely, during and after the update, the CPU was maxed out at 100%, even when the laptop was literally doing nothing at all. After a little digging, it turned out that the old hard drive was causing the issue. We ran a full defragment for the drive and things went back to normal.
So, what we’ve learned is that, if you have a computer that hasn’t been used in a long time, or if it’s still running on an old hard drive instead of an SSD, turning it on and running Windows Update may sometimes cause CPU overload. This may be because the hard drive suddenly struggles to handle all the heavy tasks of reading and writing data.
Suggested read: Why is My Memory Usage So High When Nothing is Running?
To get your hard drive and CPU back in shape, you can try to defrag the problem disk. Here’s how to run defragment for your hard disk drive in Windows 11 or Windows 10:
- Hit Win + E to pop open File Explorer and head over to “This PC“.
- Right-click the main drive (often the C: drive) and choose “Properties“.
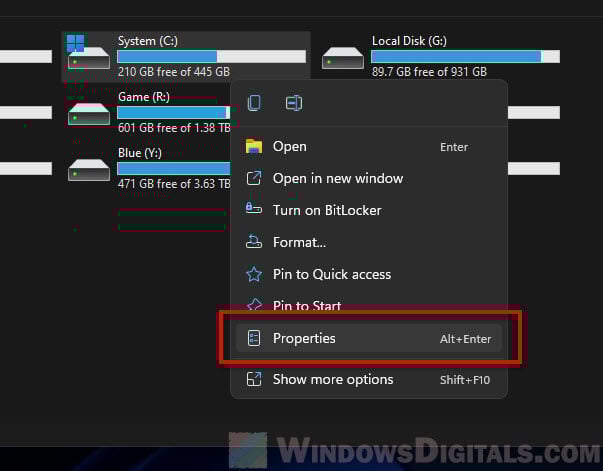
- Jump to the “Tools” tab and click “Optimize“.
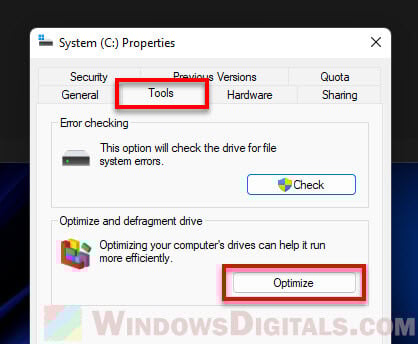
- Pick the main drive and hit “Optimize” to start the defrag.
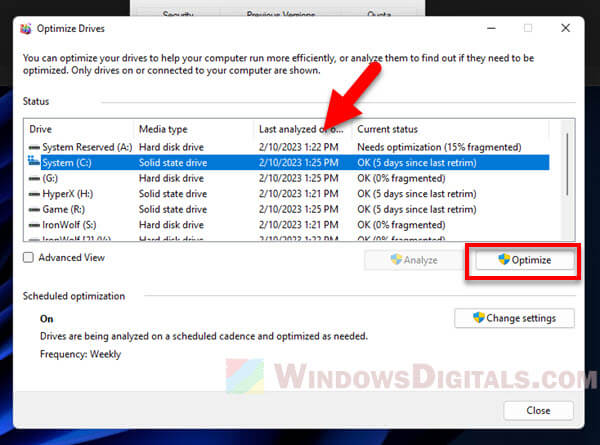
While the built-in Windows defragment tool usually does the job just fine, you might want to also consider a third-party tool for potentially better results.
Use CHKDSK to look for errors on your system drive
High CPU usage can also happen if there are errors on your system drive. Running CHKDSK can find and fix these errors.
- Open the Start menu and look for “Command Prompt“.
- Right-click it and choose “Run as administrator“.

- Type “
chkdsk c: /f /r” (switch C: with your drive letter) and hit Enter.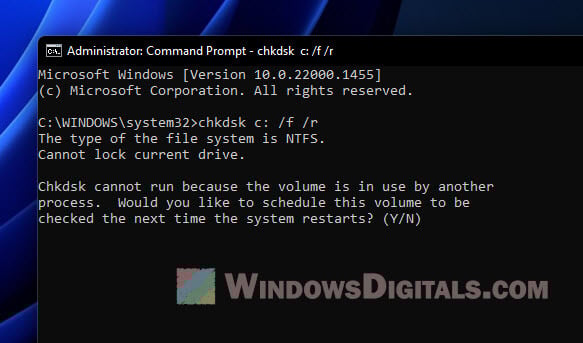
- Press “Y” then Enter to check the disk the next time you restart (if the disk is being used).
- Restart your PC, and CHKDSK will do its thing.
This check might take a few hours, especially on big drives. You might want to run it overnight. After fixing the disk, see if the CPU issue after updating Windows is gone.
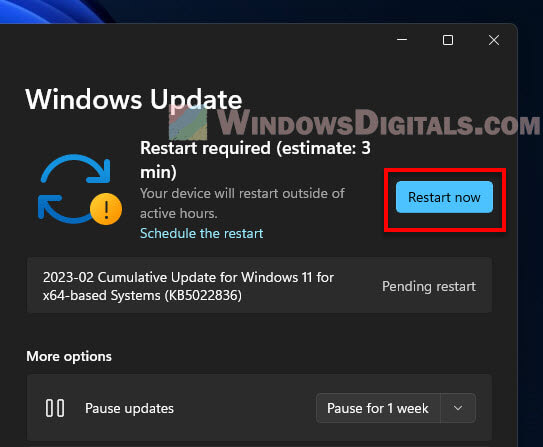
See if Windows Update is still doing its thing
If CPU usage jumps super high after a recent Windows Update, check if the update has fully installed. Some updates need a few restarts to finish up properly.
Sometimes, updates might not install correctly. If you’re unsure, head to Windows Update and hit “Check for updates” to be sure everything is current.
To see if Windows Update is still busy, do this:
- Press Win + i to open Settings.
- Go to “Windows Update” on the left.
- See if there’s an update in progress. If so, click “Install updates” or “Restart now” to finish up.
Give your computer a quick restart
Sometimes a simple reboot can solve the problem. Some programs or services might be stuck and hogging the CPU. Restarting your computer can clear these issues.
Related tip: How to Delete Windows Update Files in Windows 11
Go back to an earlier update
If you’re pretty sure a Windows update is causing the CPU to go haywire, you might want to undo that update. Here’s how:
- Hit Win + i to open Settings.
- Click on “Windows Update” then “Update history“.
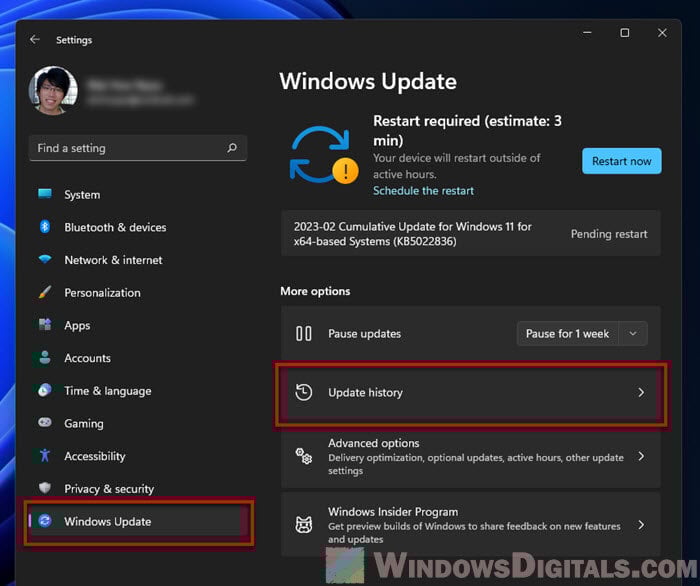
- Choose “Uninstall updates“.
- Find the troublesome update, click it, then “Uninstall“.

- Restart your PC and check if the CPU issue is fixed.
You can also roll back to a previous version if it was a big update.
Unplug extra devices for a bit
Try unplugging stuff like external drives, printers, or USB gadgets from your computer. These can sometimes mess with Windows updates or cause CPU usage spikes.
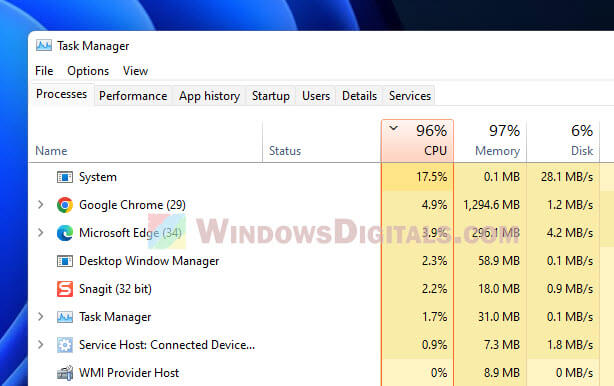
Find out what’s keeping the CPU busy
Use Task Manager to see which process is using too much CPU. Here’s how:
- Press Ctrl + Shift + Esc to open Task Manager.
- Go to the “Processes” tab.
- Sort by the “CPU” column to see who’s using the most CPU.

- Find the greedy process.
- Right-click it and pick “End task” to stop it.
Just be careful though, stopping a process will make the program that relies on it stop working. If you’re unsure, Google the process name for more info.
Software conflicts with Windows Update
Sometimes, software you installed might clash with Windows Update, causing high CPU use. To fix this, you can try turning off or getting rid of any software you think might be the culprit. Or try updating it to the latest version.
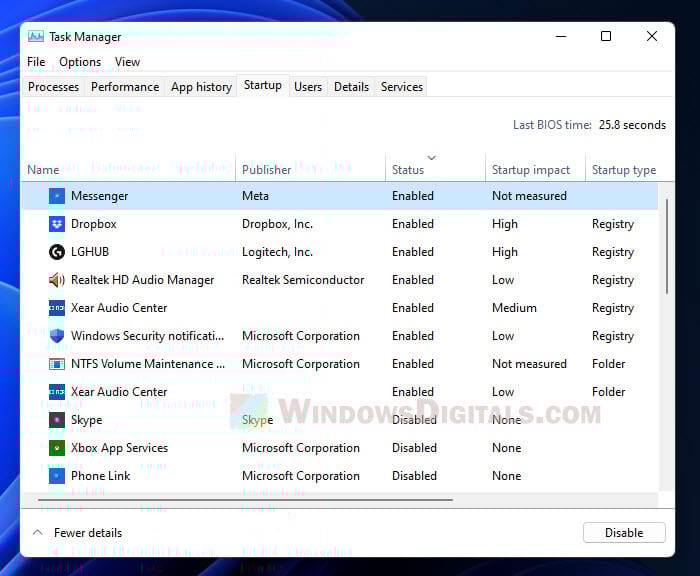
Stop apps from starting when your computer does
Some apps just can’t wait to get going as soon as you turn on your computer, and they start using up your CPU power right away. You can find these eager apps in the “Startup” tab of the Task Manager. From there, you can choose to stop them from starting up automatically. Doing this might help your CPU use less power.
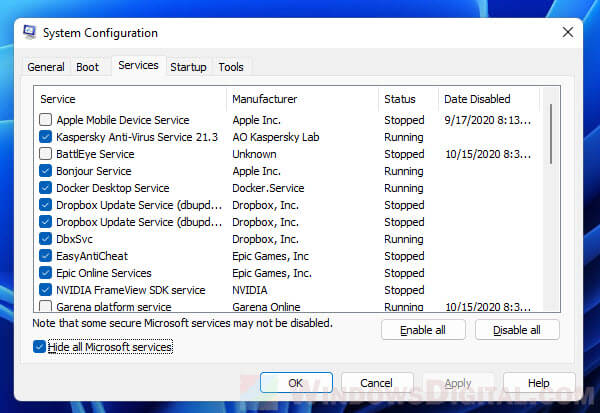
Turn off services you don’t use
There are some Windows services your computer runs that you might not need every day, but they’re still running in the background, eating up your CPU. You can shut these services off by heading into the “Services” app or “msconfig“. Just make sure not to accidentally turn off something your computer really needs.
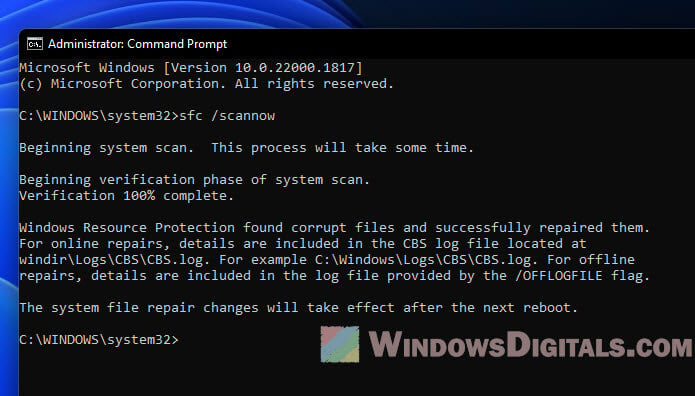
Repair broken system files
Windows comes with tools called System File Check and DISM that are there to help fix any system files that might be causing problems. To use them, open the Command Prompt as an admin and type “sfc /scannow” and then “DISM /Online /Cleanup-Image /RestoreHealth“.
Look at your power settings
The power plan you pick for your computer affects how hard your CPU works. If it’s on “Power saver”, it might not be making the most out of your CPU. Switching it to “High performance” through the Control Panel might just help your CPU run better (but consume more battery of course).