If you’ve ever noticed your computer slowing down and your disk constantly at high usage with low available memory, you may have checked your Task Manager and found a process called svchost.exe or Service Host Local System running at very high CPU, disk, memory, or network usage in Windows 10 or 11. In this guide, we’ll explain what the svchost.exe process is and how you can fix the high resource usage issue caused by the service.
See also: Why is My Memory Usage So High When Nothing is Running?

Page Contents
What is “Service Host: Local System” (svchost.exe) in Windows 11/10?
Service Host: Local System, also known as Svchost.exe, is a group of services consisting of core services of Windows. There are a huge number of Windows services that run under the Service Host Local System process, which is why you often see multiple Svchost.exe processes in the Task Manager’s Details tab.
If you notice any Svchost.exe or the Service Host Local System is hogging up resources and causing high CPU, disk, or RAM usage (as high as 100%), it means that one of the Windows services under this process is currently running aggressively in the background.
Linked issue: Windows Font Cache Service Failed to Start and High CPU
Finding out the problem service
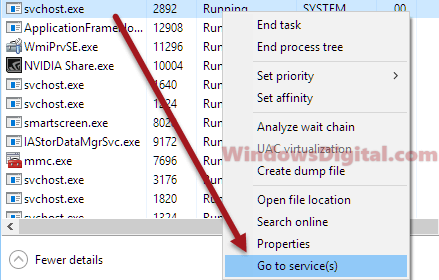
To figure out the service that is causing the issue, you need to expand the Service Host Local System process in the Task Manager and look at the name of each individual service that is using high amount of resources. Alternatively, you can also right-click the high CPU usage svchost.exe process and select Go to service(s).
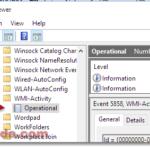
It will then bring you to the Services tab with the selected service highlighted along with all the info and full name of the service. For example, in the screenshot below, the svchost.exe I have selected is the UsoSvc Update Orchestrator Service under netsvcs group.

Once you find the problem service, you can search its name online to decide if you can disable it without causing other issues.
Disable a service in Windows 10 or 11
It’s easy to disable a service in Windows 10 or 11, but disabling the wrong service or a service that your system needs might bring up more issues than you would want to face. If you’re sure about what you’re doing, follow the steps below to disable any service you want through the Services window.
- Press the Windows key + R to open the Run dialog box.
- Type “services.msc” and press Enter. This will open the Services window.
- In the Services window, find the service you want to disable.
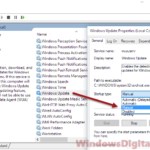
- Double-click on the service to open its properties window.
- In the properties window, under the General tab, you will find the “Startup type” option. Click on the drop-down menu next to it and select “Disabled.”
- Click on the “Apply” button to save the changes.
- If the service is currently running, you can click on the “Stop” button to stop it immediately. If not, the service will be disabled the next time you restart your computer.
To determine if you can actually disable a service safely, you should research it online first. In many cases, disabling a service is not really the best solution, and you may need to consider alternative fixes.
Common fixes for svchost.exe causing high CPU, disk or memory usage
If you have problem trying to find out the problem service, you can try the following fixes instead, which is commonly used to repair Windows when there are high CPU, Disk or Memory usage issues.
Run DISM repair tool
Some of these svchost.exe processes are related to Windows Update and other core Windows services.Running the DISM image repair tool can help fix the high resource usage problem. The tool will scan your Windows image for any corrupted or missing system files, and replace them with known good versions from the Windows image.
- Open the Command Prompt as an administrator.
- In the Command Prompt window, type the following command:
Dism /Online /Cleanup-Image /RestoreHealth
- Press Enter to execute the command.
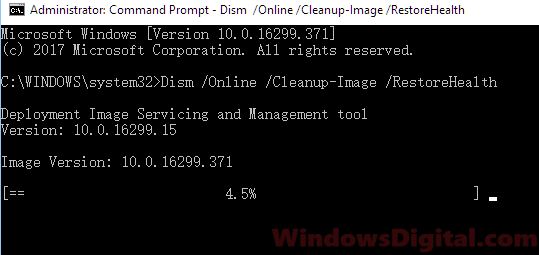
- The tool will begin scanning your Windows image and repairing any issues it finds. This process may take some time to complete.
- Once the tool has completed its repairs, restart your computer.
After restarting your computer, check if the Svchost.exe Service Host Local System high CPU, disk, or memory usage issue has been resolved.
Disable Superfetch service
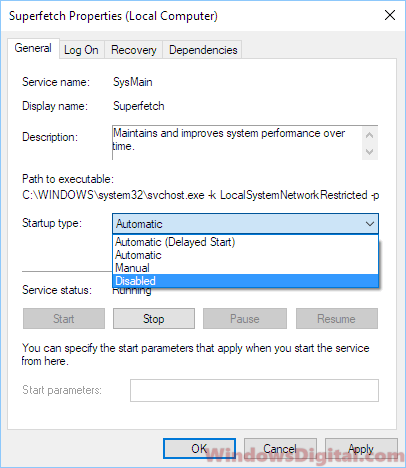
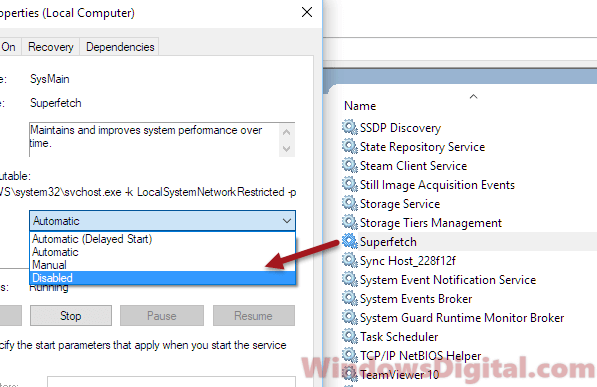
Superfetch service is one of the most common services that often causes high CPU usage for Svchost.exe Service Host Local System process. You can try to disable Superfetch service by following the instruction of how to disable service as outlined above. Select Superfetch from the Service window. Double-click on it and select “Disabled” for Startup type.
Run System File Check on CMD
When there is a missing or corrupted system file that relates to one of the services under svchost.exe, it may also cause high resource usage. Running System File Check can help to automatically scan and repair these missing and corrupted system files in Windows 11/10.
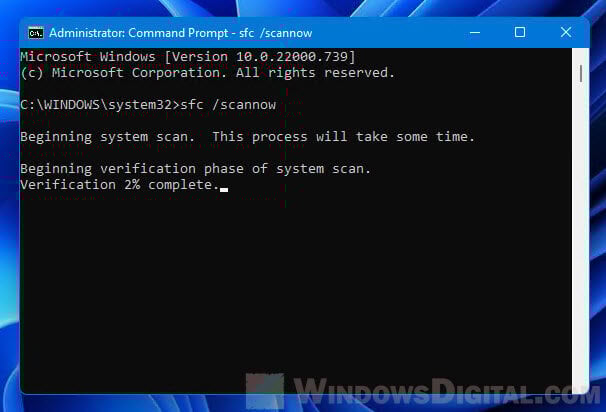
Open Command Prompt as administrator as instructed above. In the command prompt, enter the following command: sfc /scannow. Wait for the scan to complete and restart your PC when it’s done. On your next reboot, check to see if the problem is fixed.
End Task svchost.exe process
If you are in a rush and have no time to learn what the problem service is about, you can try to just kill the service by selecting it and then clicking “End Task.” This will temporarily terminate the service. But in most cases, it will eventually come back running again. Also, if some of these services are core components Windows relies on to run, your Windows may crash when you kill the process. So, do this at your own risk.