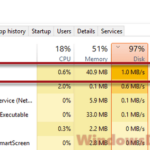
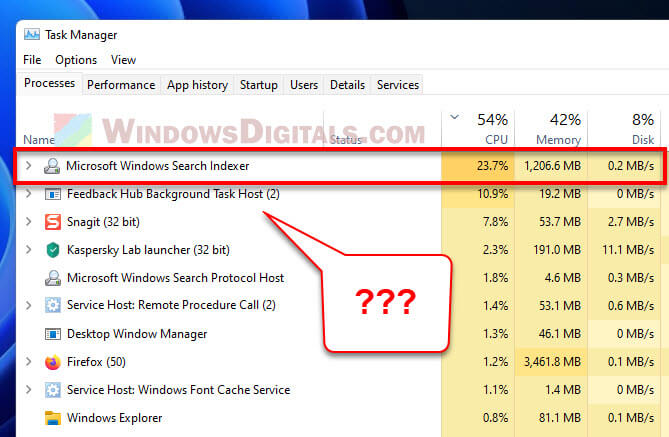
If you’re using Windows 11 and notice your computer is running slow or acting weird, with the CPU and disk going crazy, know that this can happen very commonly. A usual suspect for this mess is something called Windows Search Indexer. This tool actually helps speed up your search for your files and folders. In this guide, we’ll talk about what Windows Search Indexing is, why it might make your computer use more CPU and disk space, and how to fix the problem.
Also see: Windows 11 search slow? How to speed up search in Start and File Explorer
Page Contents
What is Microsoft Windows Search Indexing?
Windows Search Indexing is a very useful feature that makes finding files and folders on your computer much quicker than without it. It creates a special database with information about all your files so that Windows can locate them fast when you’re searching.
By default, this tool goes through most files on your computer, like your documents, pictures, and music.
Why does Windows Search Indexing use a lot of CPU and Disk resources?
The indexing process needs to use a significant amount of CPU power, memory, disk’s reading and writing, as well as disk space. It is because it has to run through and check every single file on your computer to make them into the index. The process can also take a while. If you have lots of files or an relatively older hard drive, the search indexing will consume more time and make your computer slow as it runs in the background.
- If your computer stores many files, the Windows Search Indexer will need more time to scan and index them.
- Whenever you add, delete, or change files, the Windows Search Indexer has to scan and index these files again. This is especially true if you make big changes to many files at once.
- If your computer’s processor isn’t very powerful, or if you’re still using HDD instead of SSD, the Windows Search Indexer might struggle to run the indexing and searching.
- Sometimes, the Windows Search Indexer service might have issues or stop working properly.
Learn: How to Limit CPU Usage of a Process in Windows 11
Let the search indexer finish its job
If your computer is slow because of the indexing process, the best first step is to just let it finish. It usually works in the background, so it might take some time. If you leave your computer on overnight, it should get done. Once it’s finished, your computer’s CPU and disk usage should go back to normal.
Related issue: High CPU Usage After Windows Update
How to turn off Windows Search Indexer in Windows 11
If you rarely search your PC for files or you don’t mind having a slower search (much slower just for your information), you can consider turning off the Windows Search Indexer service completely. Doing so will stop it from ever running again, no matter if you make changes to your files or not. Here’s how you do it.
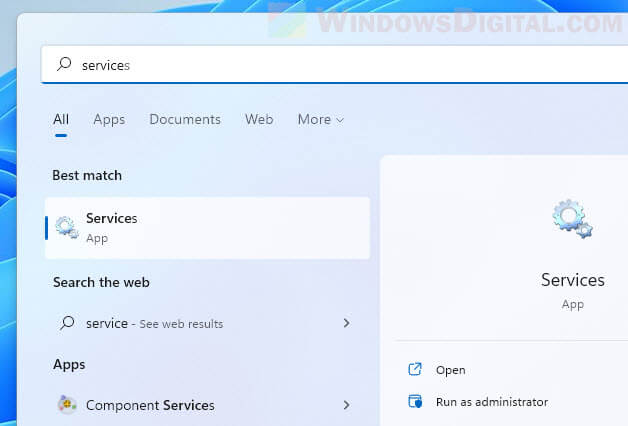
- Open the Start menu and type “Services” in the search box.
- Choose “Services” from the search results.
- Find “Windows Search” in the list.
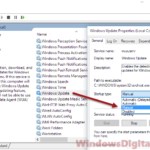
- Right-click “Windows Search” and pick “Properties”.
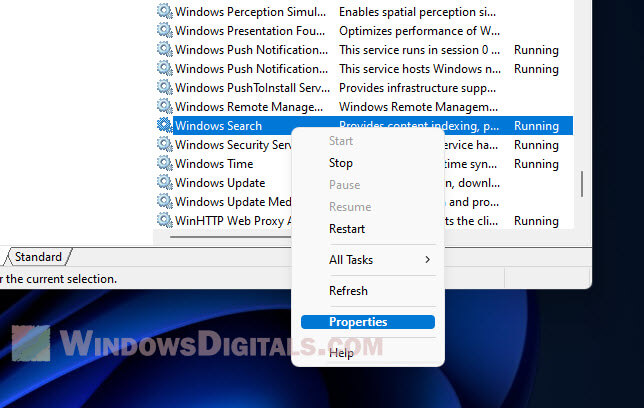
- In the “Startup type” menu, choose “Disabled”.
- Hit “Apply” and then “OK”.

What happens if you turn off Windows Search Indexing
Turning off Windows Search Indexing can really change how your computer performs. Searches will take longer, and if you ever turn indexing back on, you’ll have to rebuild the database from scratch.
Check for apps that change files a lot
As mentioned, when files get changed, the indexer has to update. If you have apps that often modify files, like backup or syncing software, they can make the indexer work overtime. If your computer is slow and uses lots of CPU or disk space, check if any apps are frequently changing files. You might need to tweak these apps to reduce the changes they make.
Choose fewer folders for indexing
You can also lighten the load on Windows Search Indexing by choosing fewer folders to index. This means the indexer only checks those folders, which can help reduce CPU and disk use.
- Search for “Indexing Options” from the Start menu.
- Pick “Indexing Options” from the results.

- Hit the “Modify” button.
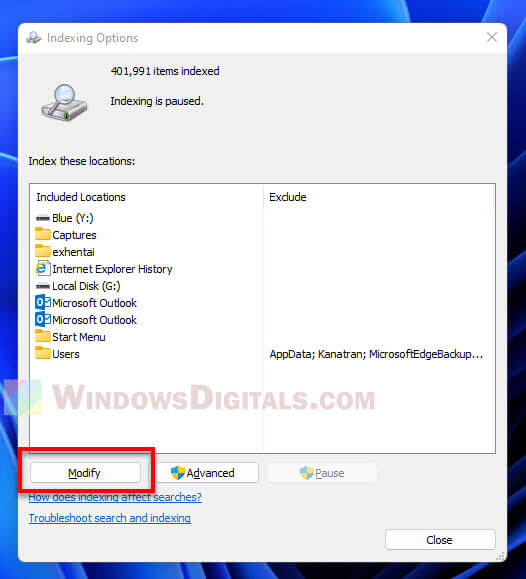
- Uncheck any folders you don’t want indexed.
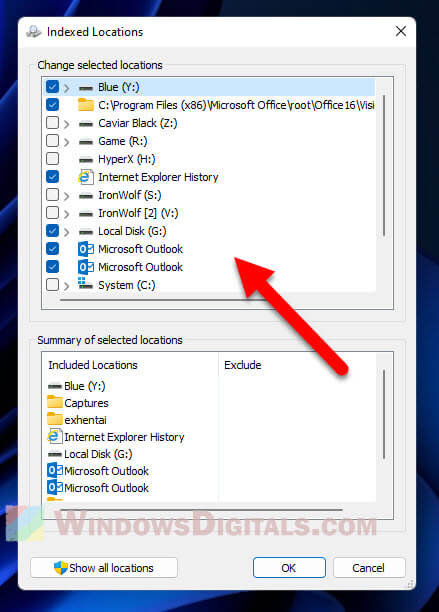
- Click “OK” to save your settings.
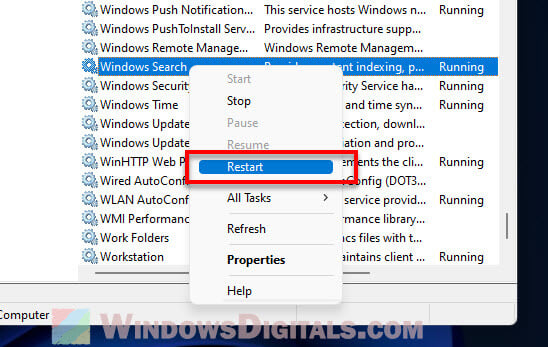
Restart Windows Search Services
If the indexer gets stuck or isn’t working right, try restarting the Windows Search Services. This stops and starts the indexing process again.
See also: How to Unpause Indexing in Windows 11
- Go to the Start menu, search for “Services”, and open it.
- Find “Windows Search” in the list.
- Right-click it and choose “Restart”.
Rebuild the index
Sometimes the index might have problems and keep indexing the same files over and over, which uses lots of CPU and disk space. If this happens, you might want to rebuild the index.
- Hit Start and search for “Indexing Options”.
- Choose “Indexing Options” from what comes up.
- Click the “Advanced” button.
- Press the “Rebuild” button.
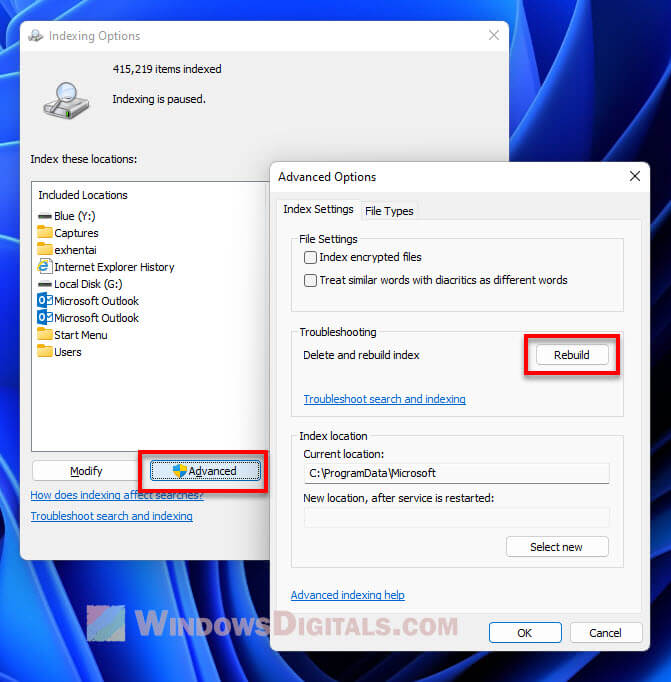
- Hit “OK” to start rebuilding.
Keep in mind, rebuilding the index can take a while, depending on how many files and folders need to be looked at.
Do a clean install of Windows 11
If nothing else works and your computer is still slow because of Windows Search Indexing, you might need to do a clean install of Windows 11.
To do a clean install, you’ll need to make a bootable USB drive with Windows 11 on it, then start your computer from that USB. Follow the steps on the screen to install Windows 11. You’ll get the option to delete all the old stuff on your hard drive and start fresh.
One last thing
Check your computer’s power settings and make sure it’s not on power-saving mode. If your PC is set to save power, your computer will not use its resource to its fullest and will slow things down, such as the indexing process. Try to switch the power mode to either “Balanced” or “High Performance” and see if it fixes your issues. Note that doing so will cause your computer (especially laptop) to use more power, meaning your battery will run out faster if you’re not plugged in.