By default, the search bar in the Start menu or the Search icon on the taskbar in Windows 11 is meant to only search from general directories (Documents, Pictures, Musics and Desktop folders), installed apps or programs, or from the web. It is, by default, not set to search for files or folders from all other directories or drives on your PC.
However, you can configure the Start and Search to also be able to include searching your entire PC when you search for a query.
- Can’t search or see results from the Start menu search?
- Expected files or folders don’t appear in the search results?
- Search is slow in Windows 11?
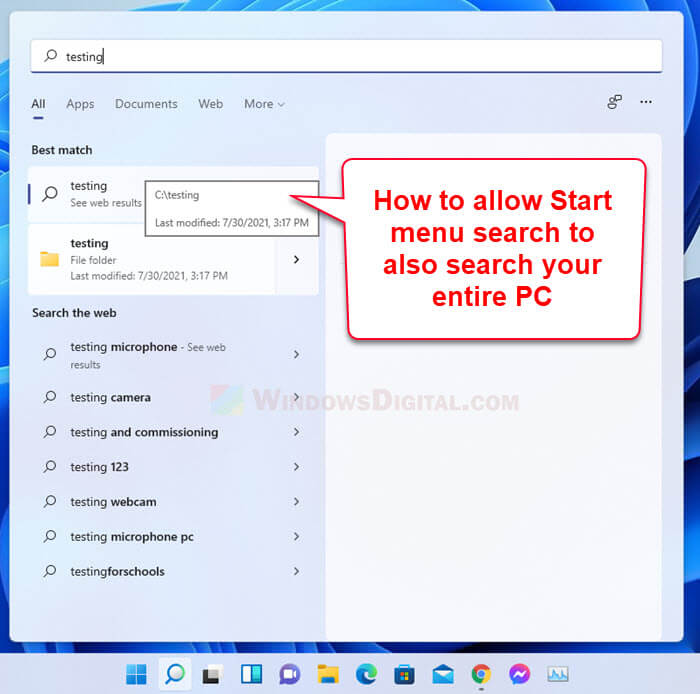
If you have any of the issues listed above, this guide will show you how to configure search indexing in Windows 11 to either include entire PC for indexing, or manually selecting only folders or directories you want to search in. This guide also shows how to exclude folders from the search index so that files from these excluded folders don’t appear on the search results when a query matches.
Page Contents
How to search entire PC for files in Windows 11 Start menu search
For the Start menu search to also be able to search your entire PC for files, you need to enable Enhanced indexing for Find my files in Windows 11. Here’s how to do it.
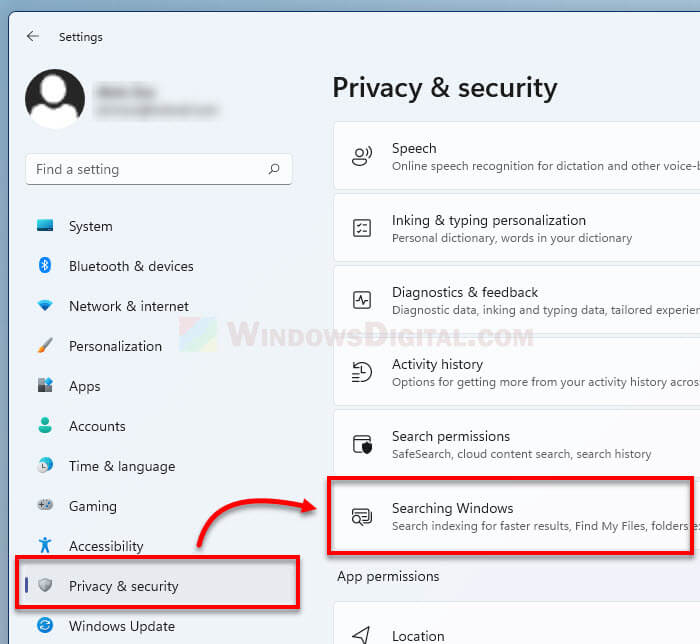
- Click on Start, then select Settings. Alternatively, press Win + i keys to open Settings app directly.
- In Settings window, on the left pane, select Privacy & Security.
- On the right pane, select Searching Windows.
- Click on “Find my files” to expand it.
- Select Enhanced.
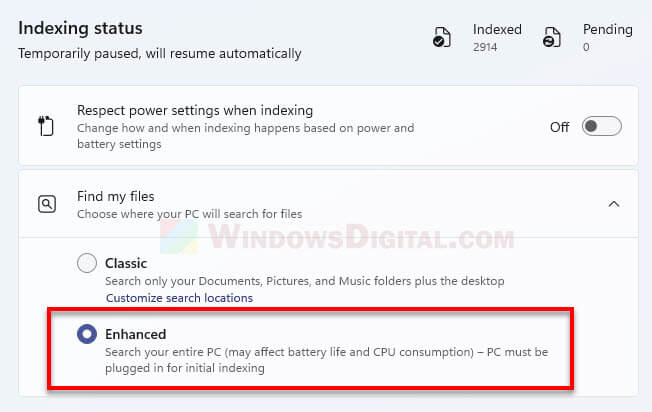
Windows will now begin to index your entire PC so that files and folders can appear in the search result when you search on the Start menu or Search app.
It will also significantly speed up the search time after indexing is completed. The improvement in search time also affects the search in File Explorer since both use the same index.
However, depending on the files and folders that need to be indexed, it may take some time for the indexing to complete. The indexing will run itself in the background. It will automatically pause when you shut down and resume when you start your PC again. You can leave it alone and continue doing what you’ve been doing. Eventually, the indexing will be done.
As stated in the settings, the indexing process may affect battery life and CPU consumption. You may want to make sure you’re plugged in if you’re using a laptop or notebook computer. Optionally, you may want to turn on the “Respect power settings when indexing” option for Windows to automatically pause or resume indexing based on your laptop’s power and battery settings.
How to manually choose which folders to index
If you have too many drives with too many files to be indexed, you can manually customize which folder to be included to the Windows search index.
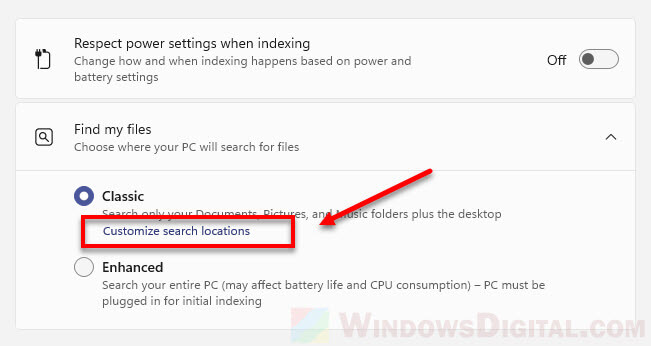
To do so, follow step 1 to 4 in the instruction above. Select Classic, then click on the “Customize search locations” link below the Classic option.
In the indexing options window, click on the Modify button.
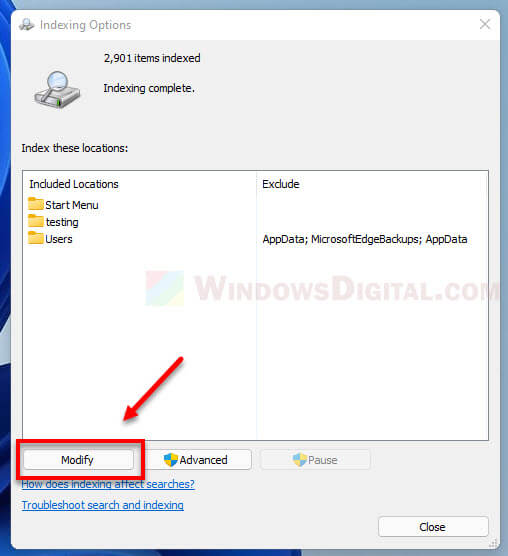
Under “Change selected locations“, browse to and select the folders you want to include to the Windows search index. Click OK when you’ve done selecting.
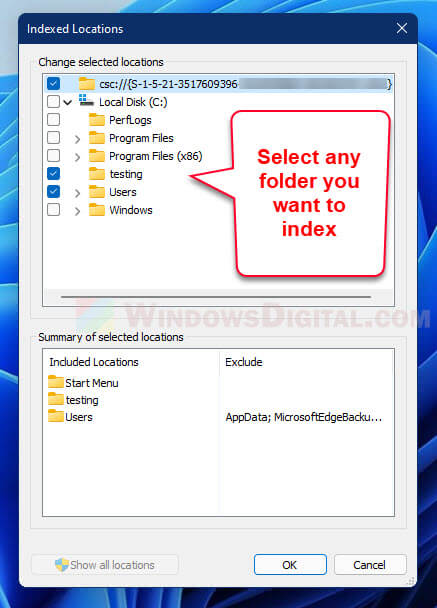
Windows will now index only the selected folders.
If there is any folder that doesn’t appear as you browse the list, click on “show all locations” first to allow Windows to show hidden folders.
How to exclude folders from Windows 11 search
If you have certain folders you want to exclude from the search index so that files in those folders will not appear on the search results when a search query matches any of them, here’s how to exclude these folders from the Windows 11 search index.
Follow step 1 to 3 in the instruction above. In the “Searching Windows” settings, under “Exclude folders from enhanced search“, click on Add an excluded folder. Next, browse to the folder you wish to exclude and then click Select Folder.
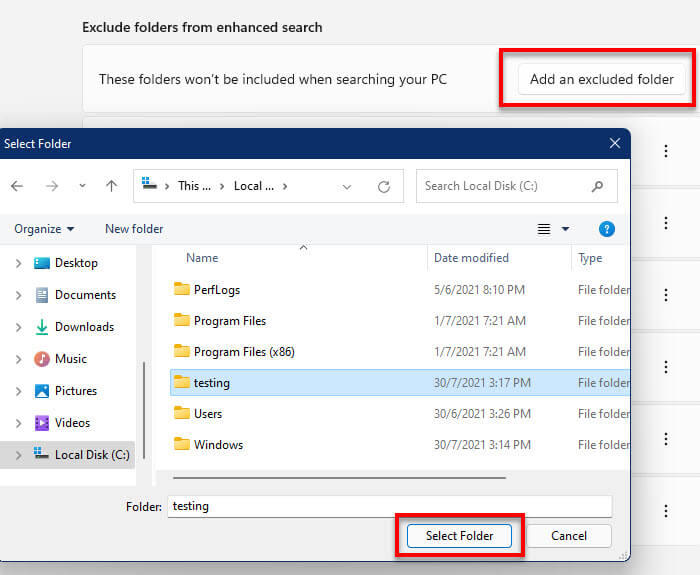
Once a folder is added as an excluded folder from the search index, Windows will not search in this folder.