Windows Update is a necessity and a norm if you use Windows operating system such as Windows 11. It keeps your Windows up to date with the latest security patches, driver updates, features updates, etc. from Microsoft. Windows Update runs automatically to check your computer for updates on a regular basis.
When Windows Update runs, it will first check if there is any update your computer needs to install. If there is any, it will automatically download the updates to a folder that specifically stores downloaded Windows Update files. It will then install the updates using the downloaded files from the folder.
Windows will not clear the downloaded update files automatically even after installing the updates. These updates that you no longer need can accumulate and take up disk space. Eventually, you will need to run disk cleanup to clear the update files, or manually delete the Widows Update files through File Explorer, if you want to free some space on your system drive.
Deleting the Windows Update files is also often an effective solution to fix Windows Update related issues such as Windows 11 Update Stuck at 0% or 100%, etc. After the downloaded update files are deleted (which could be the culprit of the problem), Windows Update can start afresh to re-check for updates and download them all over again.
This guide will show you (3 methods) how to delete Windows Update files manually in Windows 11 via File Explorer, or clear the update files using Disk Cleanup or Storage settings.
Also see: How to Restart Windows Update Service on Windows 11
Page Contents
Delete Windows Update Files manually in Windows 11
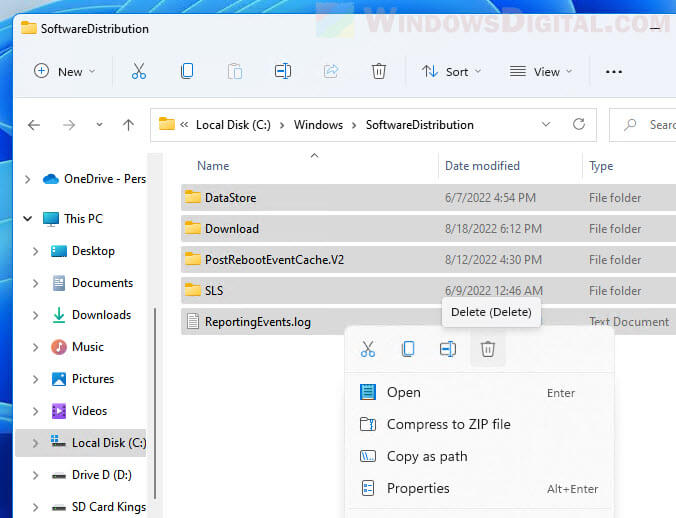
In Windows 11, Windows Update stores downloaded update files in a folder called SoftwareDistribution (no space) in the Windows directory on your system drive. System drive (usually the C: drive) is where your Windows was installed.
In short, you can find the downloaded Windows update files in C:\Windows\SoftwareDistribution directory. This is where Windows stores temporary update files downloaded by Windows Update.
To manually delete the Windows Update files in Windows 11, open File Explorer or This PC and navigate to the C:\Windows\SoftwareDistribution directory. Select all the files in the folder and delete them.
Suggested Guide: How to Clean C: Drive in Windows 11
Clean up Windows Update files using Disk Cleanup
Another method to delete the downloaded Windows Update files in Windows 11 is to use the Disk Cleanup tool. There is an option to clear the copies of installed updates from Windows Update in Disk Cleanup.
To clear Windows update files using Disk Cleanup, follow the steps below.
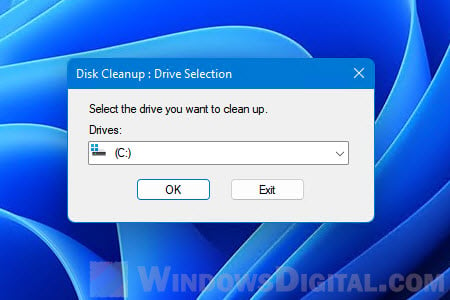
- Search for Disk Cleanup via Start and open it.
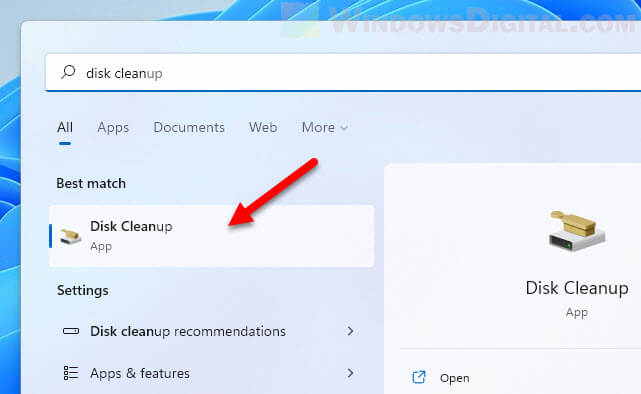
- When you are prompted to select a drive you want to clean up, select your system drive – the drive where your Windows was installed, in most cases, the C: drive.
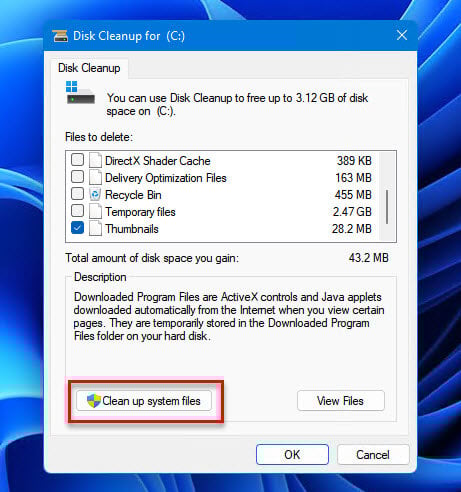
- After a short while of calculating the files, Disk Cleanup will show you the files you can delete. However, the system files will not be listed yet. You will need to click the “Clean up system files” for it to also calculate and include the system files. This action requires administrator rights.
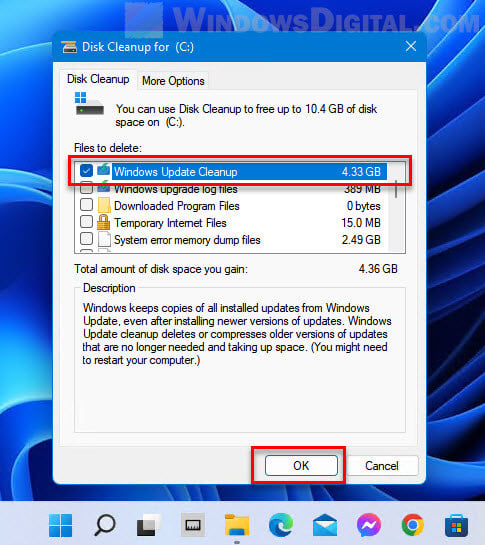
- Next, once Disk Cleanup has done calculating the files you can delete, select “Windows Update Cleanup” in the Files to delete section, and then click OK to proceed the cleanup.
Delete downloaded updates via Storage settings
Optionally, you can use the Storage settings instead of Disk Cleanup to delete the downloaded Windows Update files in Windows 11. To remove the Windows Update files using storage settings, follow the steps below.
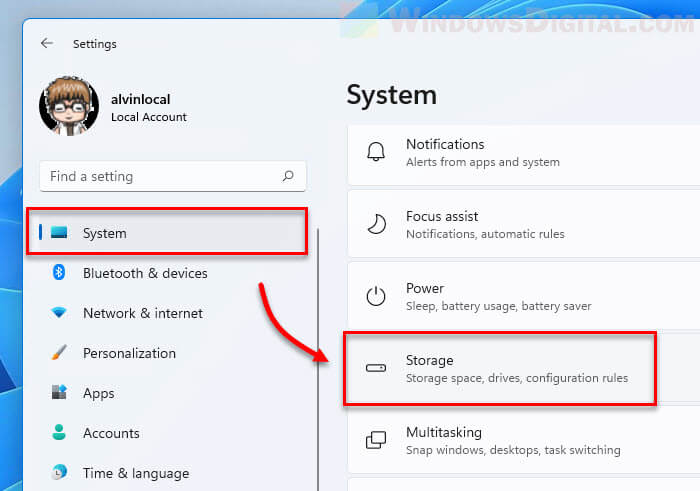
- Press Win + i to open Settings in Windows 11.
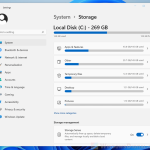
- On the left pane, select System, and then select Storage on the right.
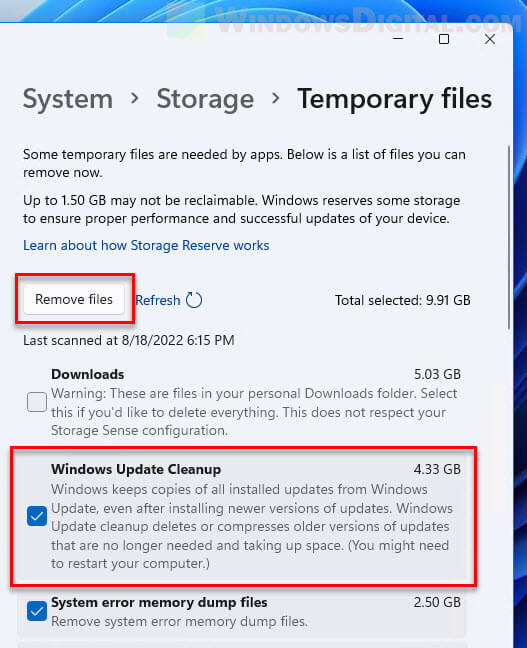
- In Storage settings, it may take a while for Windows to calculate the files and the disk space they took. Once calculated, select the Temporary files category.

- Next, select the checkbox for “Windows Update Cleanup” and, optionally, any other temp files you want to delete. Then, click the Remove files button to remove the selected files.
Doing so will delete the copies of all installed updates from Windows Update, freeing up a significant amount of disk space, depending on how long since you last cleared the Windows Update files.