When you play around in the Storage settings in Windows 11, you might notice that there is a type of temporary files called “Delivery Optimization Files”, which can sometimes take up a significant amount of disk space. In this guide, we’ll talk about what those files actually are, if it’s okay to delete them, and how to get rid of them safely if you want to.
Also see: Windows 11 Delivery Optimization High Network Usage
Page Contents
What is Delivery Optimization?
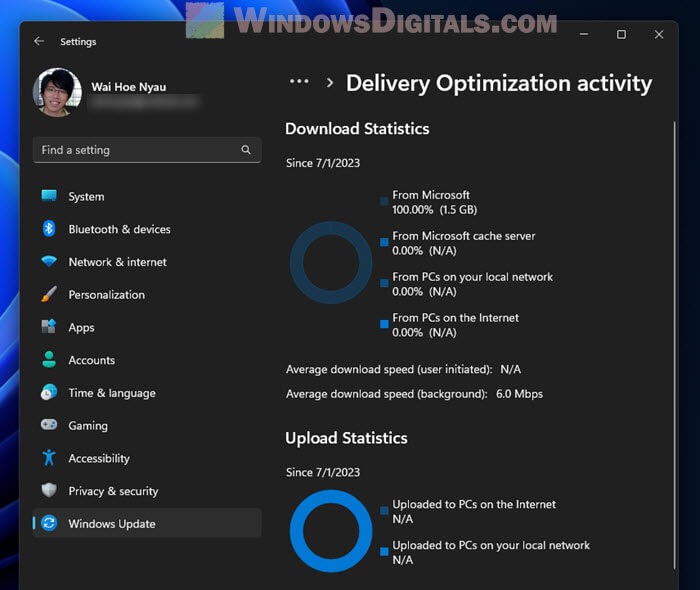
Delivery Optimization is responsible for how updates are downloaded (and uploaded) on Windows. Instead of every computer downloading updates on its own, Delivery Optimization lets updates and apps be shared across multiple devices in your local network and even on the Internet.
This means if one PC in the network downloads an update, other PCs can get the update from it, instead of downloading all over again from Microsoft. This cuts down on the internet data used and makes updates faster to install.
However, it will also create temporary files that can end up taking a lot of your precious disk space if you don’t clean them up regularly.
Pro tip: How to Delete Windows Update Files in Windows 11
Can you delete Delivery Optimization files?
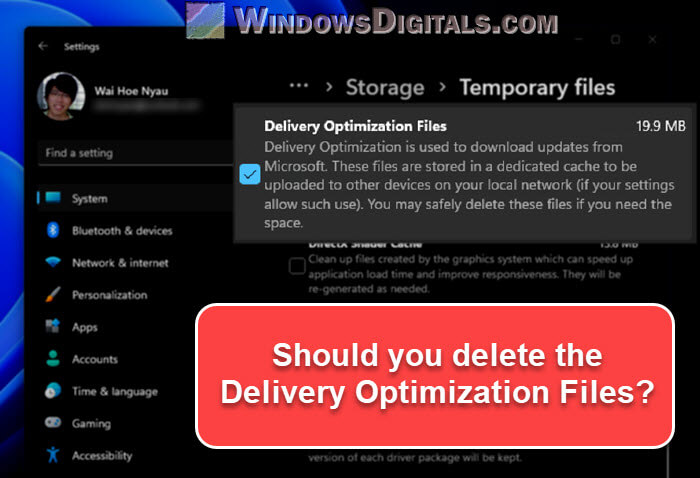
Yes, you can totally delete the “Delivery Optimization” files on your PC. These files are just temporary stuff created when downloading and installing updates. They don’t have any important system or personal info. Thus, getting rid of them won’t really mess up your computer.
But note that these files are pretty useful for the update process. They work as a local storage for updates, which helps make the installation faster, especially for computers on the same network. If you delete these files, your next updates might take a bit longer to download and install since they’ll have to be downloaded from Microsoft all over again.
Useful guide: How to Clean C: Drive in Windows 11
How to delete Delivery Optimization files in Windows 11
Getting rid of the Delivery Optimization files in Windows 11 is pretty easy. You can do it in two ways: using the Windows Settings or the Disk Cleanup utility.
Using Windows Settings
Windows 11 has a Storage settings where you can manage things like temporary files. To delete Delivery Optimization files using Windows Settings, follow the steps below:
- Open Windows Settings by pressing Win + i on your keyboard. Or, right-click the Start button and select “Settings” from the menu.
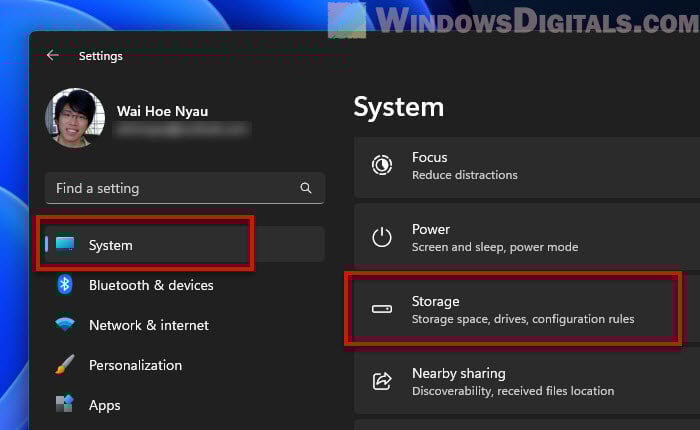
- In Settings, click on “System” on the left. This shows you different system settings.
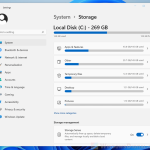
- Click on “Storage”. Here, you’ll see how your storage is being used, with different types of data and how much space they’re taking.
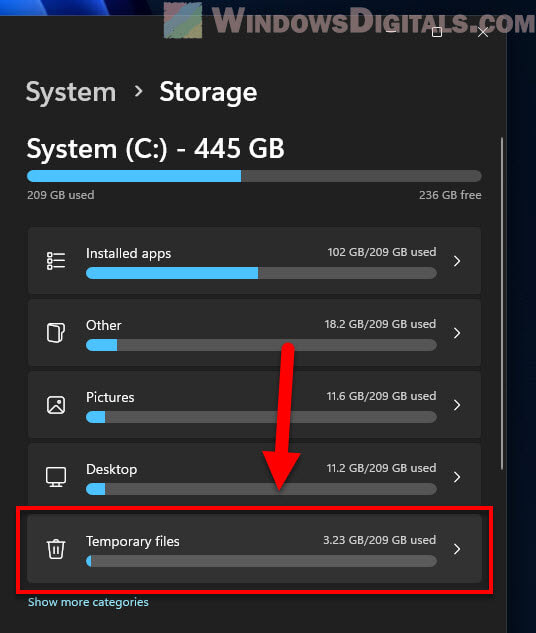
- Scroll down and click on “Temporary files”.
- Now, you’ll see a list of temporary files you can delete. Find “Delivery Optimization Files” and tick the box next to it.
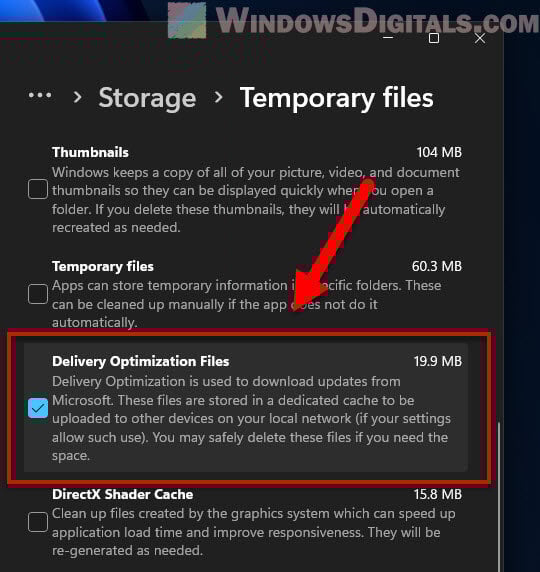
- After choosing what to delete, click on “Remove files” to get rid of them.
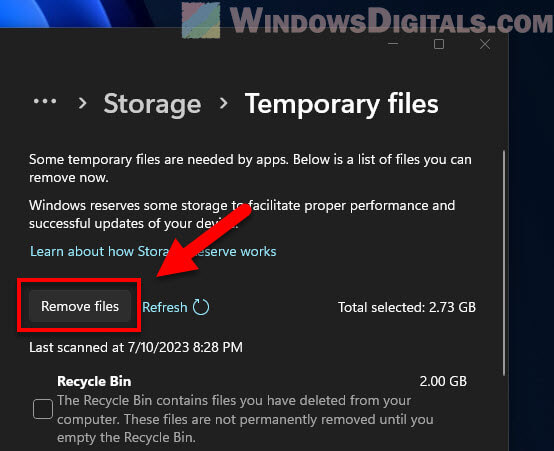
Note that if you don’t see the “Delivery Optimization Files” option, it means your computer doesn’t have any right now.
Related resource: How to Clean Up AppData Folder in Windows 11
Using Disk Cleanup
Another method would be to use the Disk Cleanup tool. This tool, as you may have already known, can help clean up your disk by removing unnecessary files, including the Delivery Optimization files (only when selected).
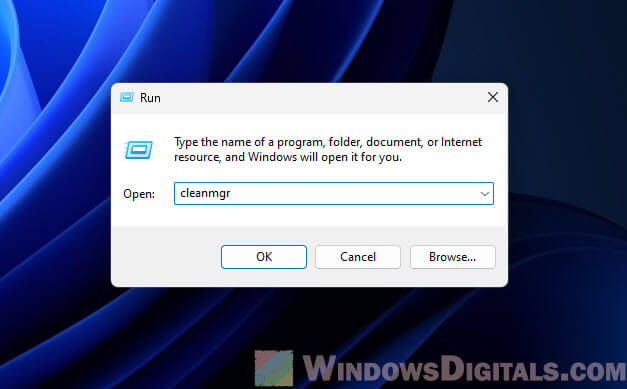
- Open the “Run” box by pressing Win + R.
- Type “cleanmgr” and press Enter. This opens the Disk Cleanup tool.
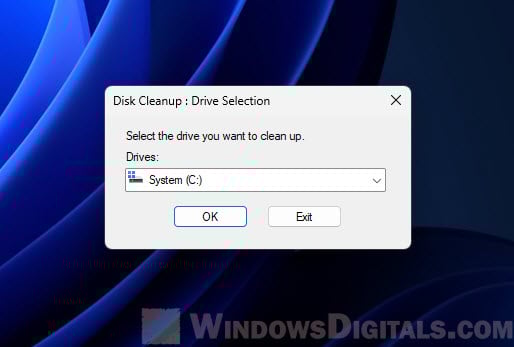
- Choose the drive you want to clean, usually the C: drive, and click “OK”.
- The tool will show a list of files you can delete to free up space. Find “Delivery Optimization Files” and tick its box to choose it for deletion.
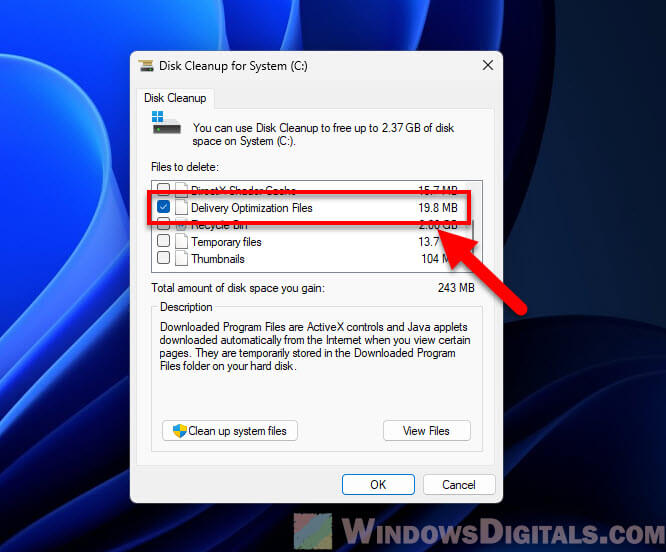
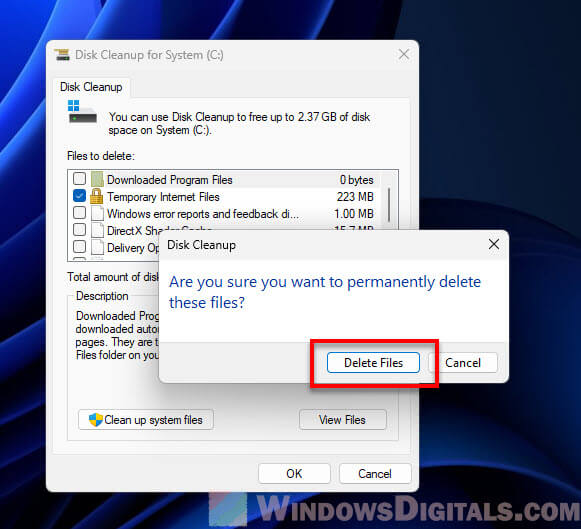
- Click on “OK”, then “Delete Files” in the pop-up to confirm and delete these files.
Note: Just like the first method, if “Delivery Optimization Files” isn’t an option, then there are none to delete on your PC right now.
Linked issue: Delete Windows.Old Folder in Windows 11/10, Access Denied?
Some final thoughts
Delivery Optimization in Windows 11 is a legit feature that helps manage your internet data smartly and actually makes updates quicker. Although it’s okay to delete the temporary files it creates, note that these files help make updates download and install much faster. Therefore, it’s good to reconsider if you really want to delete these files.