There is a common issue when updating to a newer version of Windows 11, such as 24H2, 25H2 or 26H2, where Windows Setup or Windows Update stops with “This PC doesn’t currently meet Windows 11 system requirements” and gives “We couldn’t update the system reserved partition” as the reason, even on a PC that already runs Windows 11 just fine. This guide will explain which partition it’s talking about, why it’s full and how to make room on it so the update can go through.
Also see: Windows Needs More Space for Windows 10/11 Update
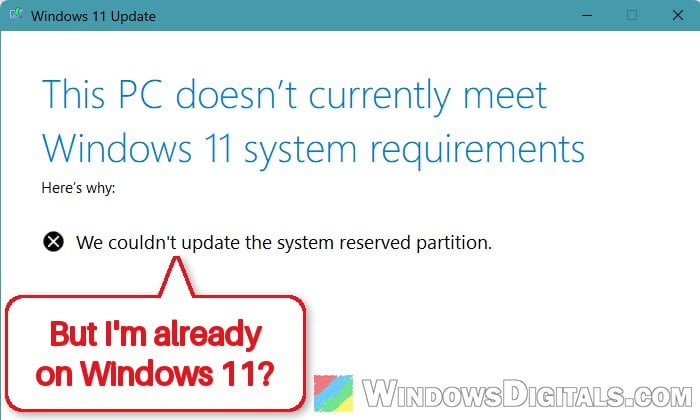
What does “We couldn’t update the system reserved partition” mean?
Despite the wording, this has nothing to do with your CPU, TPM or other Windows 11 requirements. It’s about a small hidden partition on your system drive.
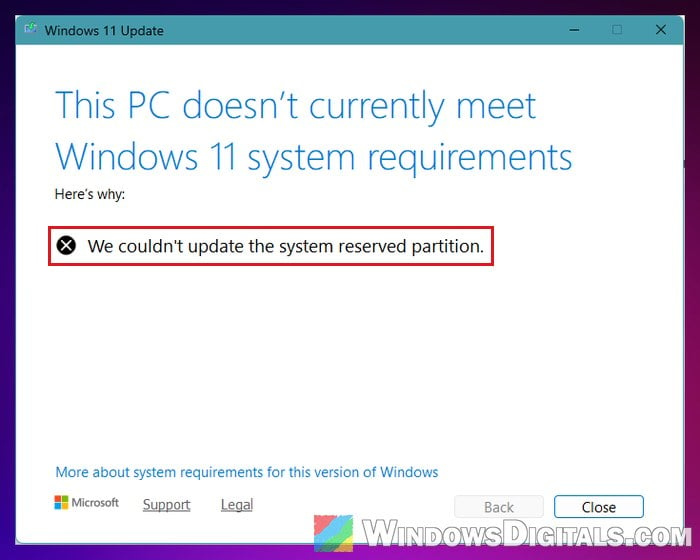
On a Windows 11 PC, that “system reserved partition” is the EFI System Partition, a small partition near the start of the disk that holds the files your PC boots from. On many PCs it’s only 100 MB. A new version of Windows has to write new boot files to it, and when there isn’t enough free space, setup stops with this message. Microsoft’s older instructions for this error asked for at least 13 MB free for an upgrade, and 15 MB for a clean install.
What usually fills it up:
- BIOS update files from your PC’s maker. HP, Dell and Lenovo PCs keep copies of BIOS and firmware updates on this partition and often never clean them up.
- Boot font files that Windows itself keeps there, which take up several MB.
- Leftover files from another system, such as Linux, if you used to dual-boot.
Don’t mix it up with the 16 MB “Microsoft Reserved” partition or the Recovery partition. This error isn’t about either of them. The fixes below are what worked most often for people on Reddit and Microsoft’s forums.
Check how full the EFI partition is
First, see how much space is left and what’s using it. The partition has no drive letter, so we’ll give it one.
Be warned: Everything below happens on the partition that starts Windows, so a wrong delete can leave your PC unable to boot. Copy the commands carefully and remove nothing this guide doesn’t name. If you use BitLocker, have your recovery key ready, since your PC may ask for it after boot files change. If command lines aren’t your thing, ask someone who knows their way around them.
Here’s how to do it:
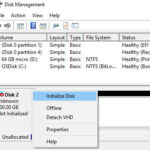
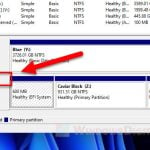
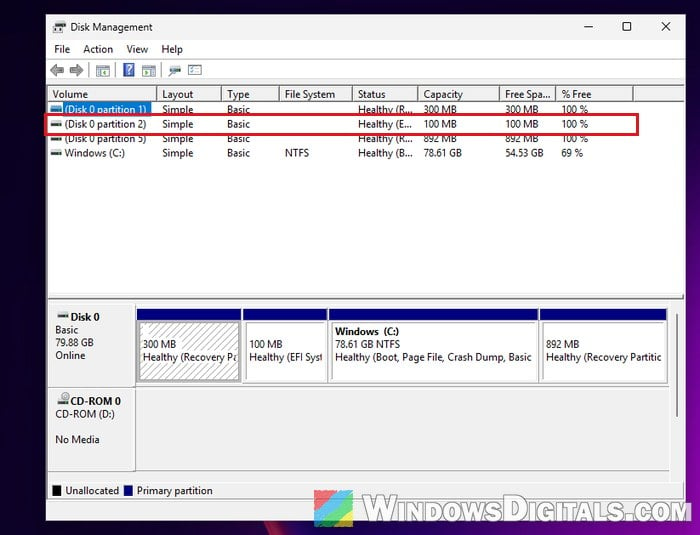
- Right-click the Start button and select Disk Management. On Disk 0, find the small partition whose status reads “Healthy (EFI System Partition)” and note its size. The free space it lists there can be far off.
- Search for “cmd” in the Start menu, choose Run as administrator under Command Prompt (not PowerShell), and allow it.
- Type the following commands one by one, and press Enter after each:
mountvol Y: /s
dir Y:\
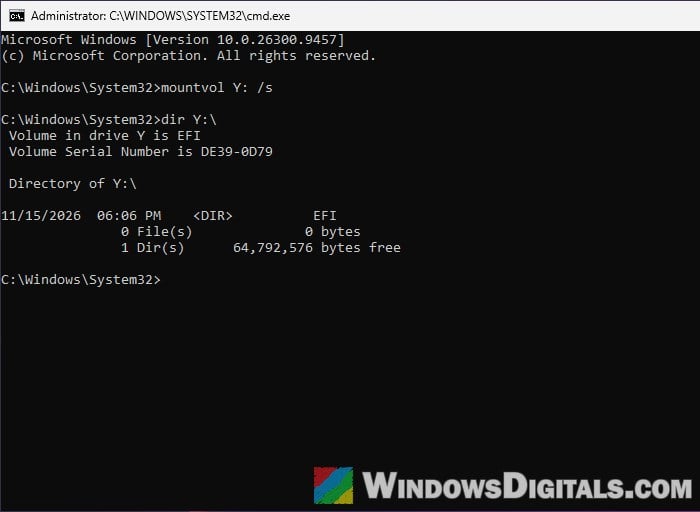
- The first command mounts the EFI partition as the Y: drive. If Y: is taken, swap in a free letter wherever Y: appears.
- If
mountvolsays “The parameter is incorrect“, it couldn’t find an EFI partition to mount, so skip to the last section. - The last line of
dirshows the bytes free. Under about 15 MB (15,000,000 bytes) is very likely your problem.
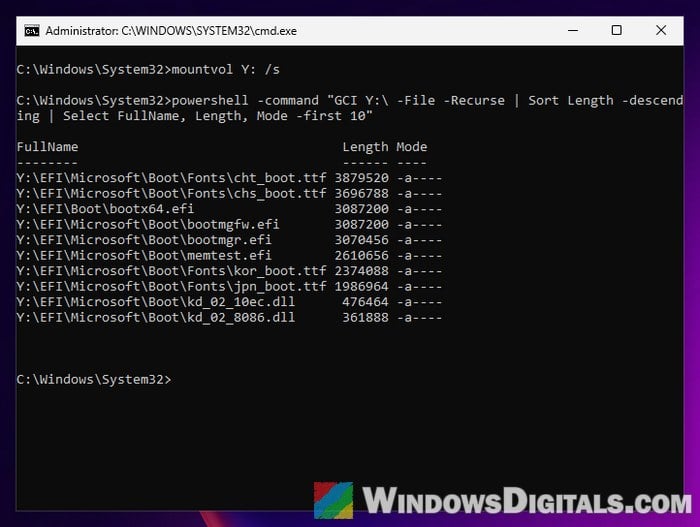
- To see which files take the most space, type this line and press Enter:
powershell -command "GCI Y:\ -File -Recurse | Sort Length -descending | Select FullName, Length, Mode -first 10"
- To see which folders are on it, type the following and press Enter:
dir Y:\EFI
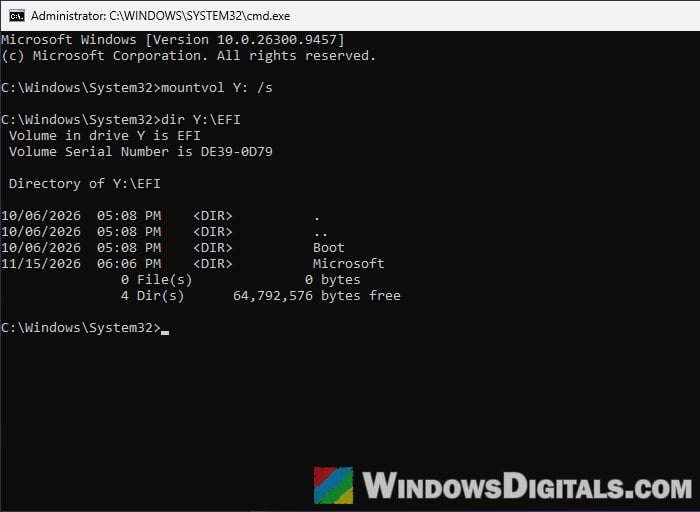
A clean Windows 11 PC has only a Boot and a Microsoft folder there. An HP, Dell or Lenovo folder comes from your PC’s maker, and that’s usually where the space went. No such folder? Run mountvol Y: /d to remove the letter and go to the boot fonts section.
Delete old BIOS update files from your PC maker’s folder
These are copies of BIOS and firmware updates your PC’s maker saved to the EFI partition. Your PC doesn’t need the old copies to start, and on HP, Dell and Lenovo PCs they’re a very common reason the partition is full.
In the same administrator Command Prompt, run the lines for your PC’s maker, one by one:
- HP: delete the old and current BIOS copies.
rmdir /s /q Y:\EFI\HP\BIOS\Previous
rmdir /s /q Y:\EFI\HP\BIOS\Current
- Dell: move the previous BIOS recovery file to your C: drive.
cd /d Y:\EFI\Dell\Bios\Recovery
move BIOS_PRE.rcv C:\
- Lenovo: delete the Lenovo folder.
rmdir /s /q Y:\EFI\Lenovo
- A removed Linux install: if you used to dual-boot Linux and have since removed it, it probably left a folder named after the distribution (the
dir Y:\EFIlist from step 5 shows it). Delete it only if that system is really gone, or that system won’t start anymore.rmdir /s /q Y:\EFI\<folder name>
Never delete the Microsoft or Boot folders, since those are what Windows boots from. Run dir Y:\ again to check the free space, then remove the drive letter:
C:
mountvol Y: /d
Restart your PC and run the update or setup again. A later BIOS update may fill the partition again, so you might have to repeat this.
Related concern: BitLocker Recovery Key Not in Your Microsoft Account
Delete the boot font files
No maker’s folder, or still short of space? The boot font files can go next. Windows only uses them to draw text on its startup and recovery screens, and Microsoft’s old instructions for this error removed them too.
Please note that if you type a BitLocker PIN when your PC starts, skip this fix. The PIN screen uses these fonts, and without them it can show up without any text.
Here’s what you should do:
- Open Command Prompt as administrator again.
- Type the following commands one by one, and press Enter after each:
mountvol Y: /s
del /q Y:\EFI\Microsoft\Boot\Fonts\*.ttf
dir Y:\
mountvol Y: /d
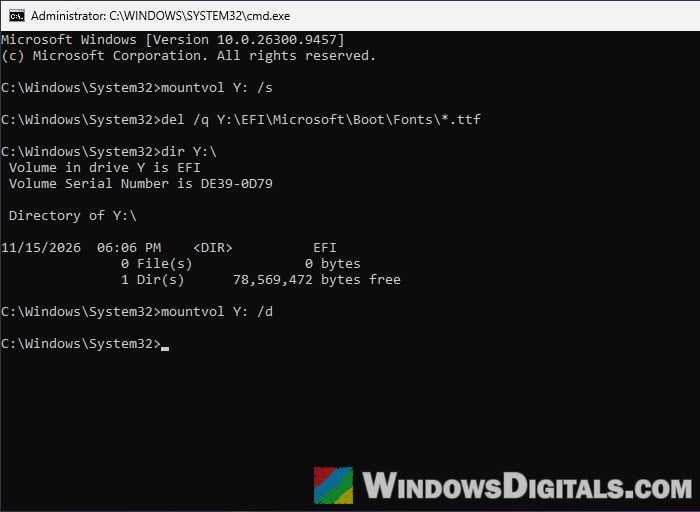 Compare the free space with what you saw before. Here it went up by close to 14 MB.
- Restart your PC and try the update again.
If it now gets past the error, that was it. On some PCs the fonts don’t free enough, and then the partition itself is too small.
Linked issue: Error 0x800f0922 When Installing Windows 11 or 10 Updates
Make the EFI partition bigger
Deleting files only helps until the next BIOS or Windows update fills the partition again, so the lasting fix is to make it bigger. Microsoft now asks PC makers for an EFI partition of at least 200 MB (300 MB on drives with 4K sectors), so 300–500 MB leaves plenty of room.
Disk Management can’t do it, because the 16 MB reserved partition and your C: drive sit right after the EFI partition. A free partition tool such as MiniTool Partition Wizard or AOMEI Partition Assistant Standard can do it in three moves:
- Shrink C: by a few hundred MB.
- Move C: and the reserved partition to the right, so the free space sits next to the EFI partition.
- Extend the EFI partition into that space.
Don’t delete the reserved partition to make room.
Be warned: Moving and resizing partitions is risky. A power cut or a mistake halfway can leave your PC unable to start or cost you your files. Back up everything important first, and if you use BitLocker, suspend it and keep your recovery key at hand. If you’re not sure what you’re doing, ask someone who knows.
Once the partition is bigger, run the update or Windows 11 setup again.
Reinstall Windows as a last resort
If nothing else works, or you’d rather not resize partitions, a clean install of Windows 11 gets you past it. When you delete the old partitions on the system drive during setup and install to the unallocated space, Windows Setup creates a fresh EFI partition with nothing else on it.
You’ll need a Windows 11 USB drive for it. This erases everything on the drive, so back up your files first.