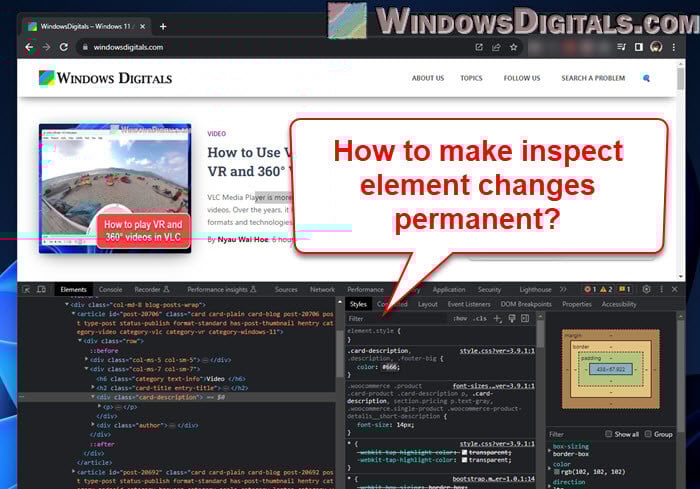
Modern web browsers come with a quite useful tool called “Inspect Element” that lets you peek into and edit the HTML and CSS of a webpage. But, these changes will vanish when as soon as refresh the page. To save the changes you made through the developer tools permanent, a popular method is using the Tampermonkey browser extension.
This article will show you how to make your “Inspect Element” changes actually permanent using Tampermonkey.
Page Contents
Saving Inspect element changes permanently (even after refresh)
The following steps will show you how to save your HTML or CSS changes of a website made with the “Inspect Element” tool permanently, so they’ll stay even after you refresh the page.
Also see: How to Check When a Web Page Was Last Updated
Step 1: Install Tampermonkey
Tampermonkey is a user script manager available for browsers like Chrome, Firefox, and Microsoft Edge. It lets you create, edit, and run user scripts, which are bits of code that tweak web page content as it loads.
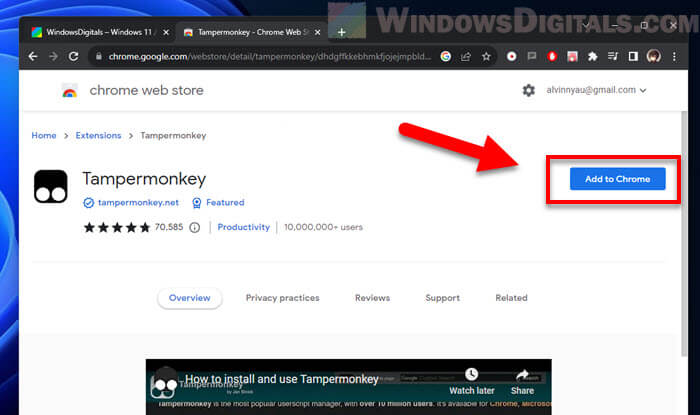
- Open your browser and head to the extensions or add-ons marketplace. For instance, Chrome users would go to https://chrome.google.com/webstore/category/extensions.
- Type Tampermonkey in the search bar and pick the extension from the search results.
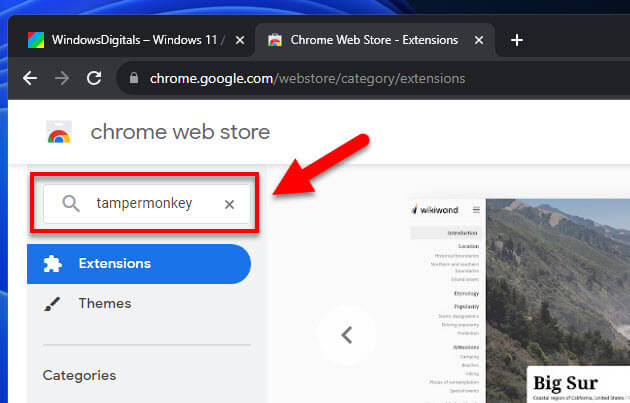
- Hit “Add to Chrome” and follow the instructions on the screen to install Tampermonkey.
Step 2: Note down the changes you want to make
Decide what you want to change on the webpage using the “Inspect Element” tool. For example, changing a website’s background color.
- Go to the web page you want to change.
- Right-click on the part you want to change and pick “Inspect” or “Inspect Element”.
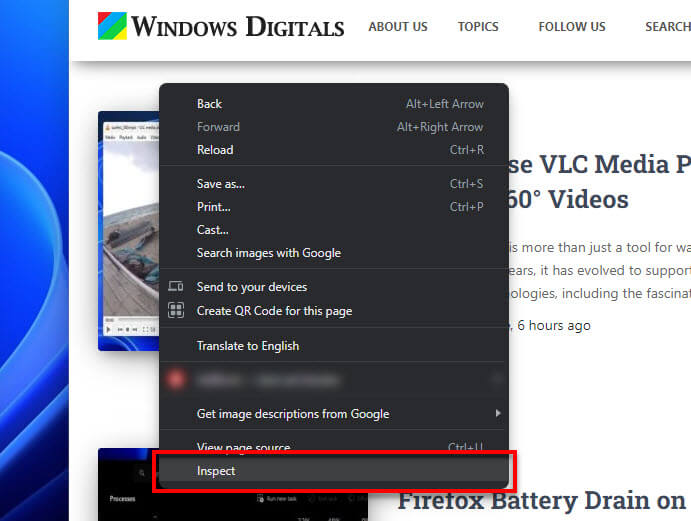
- A developer tools panel will open, showing the website’s code. You can now edit the HTML or CSS code on the spot to see your changes in action.
Now, note down or copy your changes, as you’ll need to add these to your Tampermonkey script.
Pro tip: How to Access High Traffic and Very Busy Websites
Step 3: Create a new user script in Tampermonkey
Once you know what changes you want to make, the next step is to set up a user script to apply these changes every time the page loads.
- Click the Tampermonkey icon in your browser’s toolbar.
- In the dropdown menu, pick “Create a new script…”.
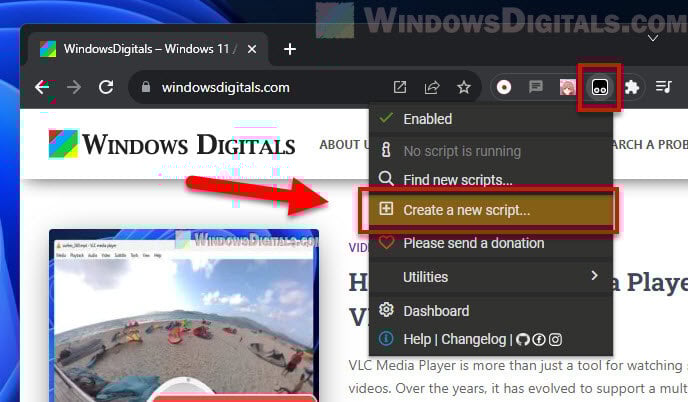
- A new tab will open with a text editor. Here, you can type in your custom script.
Related resource: Downloading HTML from a Website
Step 4: Write your user script
Start with the default template from Tampermonkey. You need to customize the header part to make sure your script works on the website you want.
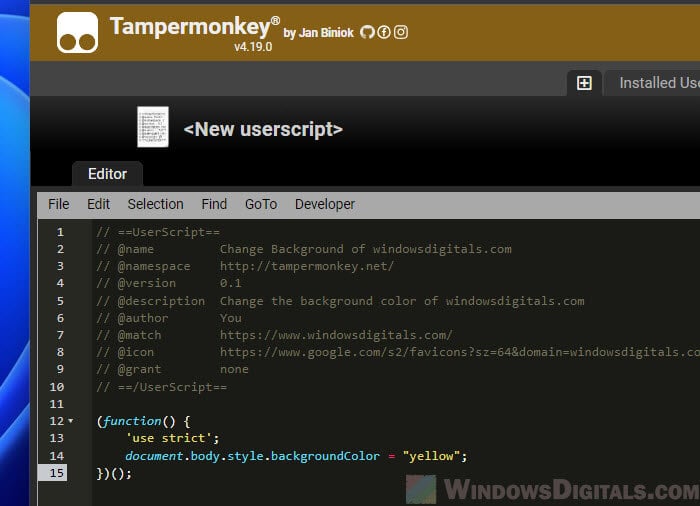
The following is a sample script header if you’re trying to change the background color of example.com:
// ==UserScript==
// @name        Change Background of Example
// @namespace   http://tampermonkey.net/
// @version     0.1
// @description Change the background color of example.com
// @author      You
// @match       https://www.example.com/*
// @grant       none
// ==/UserScript==
Note that this metadata is very important. For example, the @match directive makes sure the script only runs on https://www.example.com/*.
After setting up the metadata, you need to add the changes you noted from the “Inspect Element” tool into your script. Below is a simple example:
(function() {
   'use strict';
   // Here's where you add your changes. For example:
   document.body.style.backgroundColor = "yellow";
   // Continue adding any other modifications.
})();
Another example:
The line document.body.style.backgroundColor = "yellow"; turns the entire <body> element of the webpage yellow.
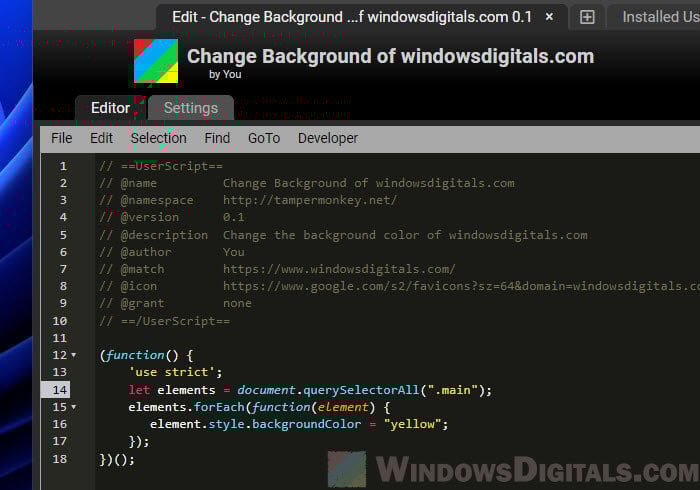
If you want to change the background color of all items with a class named “main”, you’d do it like this:
(function() {
   'use strict';
   let elements = document.querySelectorAll(".main");
   elements.forEach(function(element) {
      element.style.backgroundColor = "yellow";
   });
})();
Getting the hang of Tampermonkey scripts is not that hard, especially if you know some JavaScript. If you’re new to this, the official Tampermonkey documentation is a good place to start. It has all the info you need on how to make scripts, use the API, and more. Other than that, you can find a lot of help and tips on online forums and communities like Reddit and Stack Overflow.
Useful guide: DNS Servers to Unblock Websites and Possibly Everything
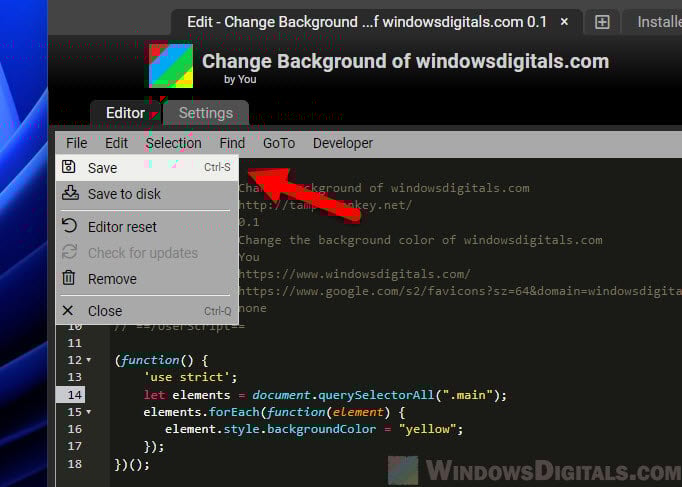
Step 4: Saving and testing your script
After you’ve crafted your script and added your tweaks, don’t forget to save your work. You can either go to “File” in the Tampermonkey editor and choose “Save”, or just click the floppy disk icon.
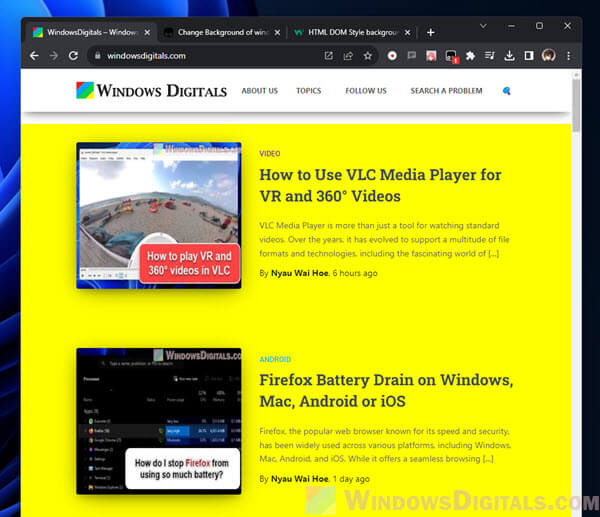
Head over to the website you’ve set to run the script on. If you did everything right, your changes should show up and stay even after you refresh the page.
Step 5: Modifying your scripts
Since websites often update, your script might eventually stop working, which should be expected. If this happens, just revisit the website and use the “Inspect Element” tool to spot any new changes in the code. You can then modify your Tampermonkey script so that it works again.
One last thing
The amazing part is, all these changes you make with Tampermonkey are just for you. They don’t change the website for everyone else, so you can go ahead and adjust things however you like to make browsing the web a lot more fun for yourself.