Google Maps remains the most used map app globally, whether it’s for smartphones, tablets or even computers. It provides services like driving directions, satellite views, street maps, 360° views, and ways to plan your routes. One important feature Google has added is the ability to add multiple stops on your route. This is absolutely what we need when planning trips. However, Google Maps allows only a maximum of 10 stops to be added on a route. Thus, this guide will show you two workarounds on how you can get past the usual limit of 10 stops on Google Maps, making the app show you more than just 10 stops at once.
Also see: How to Download Google Maps for Windows 11 or 10
Page Contents
Getting started with adding stops in Google Maps
If you don’t already know how, the following steps show you how to add multiple stops (up to 10 stops) in a route on Google Maps:
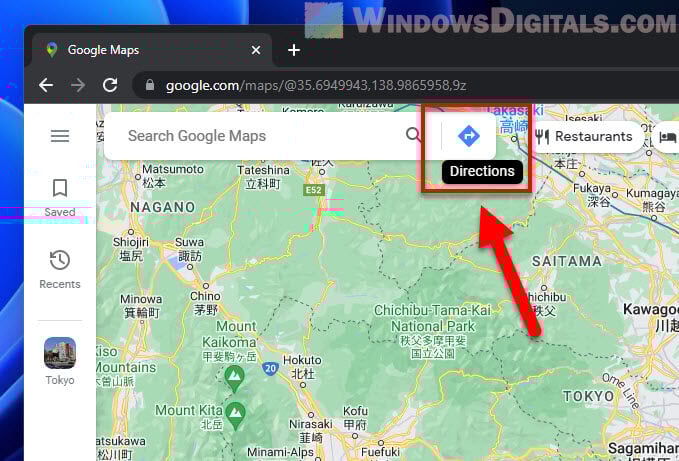
- Open up Google Maps on your device.
- Hit the “Directions” button, which looks like a blue right-arrow icon.
- Tell it where you’re starting and where you’re ending.
- If you want to add a stop, click “Add destination” just below your final destination.
- Add up to 10 stops as needed.
If you’ve hit the 10 stop limit and need to add more, proceed to the workarounds below to find out how to get past this limit on Google Maps.
Useful tip: Create Website or Application Shortcut on Desktop using Chrome
How to add more than 10 stops on Google Maps
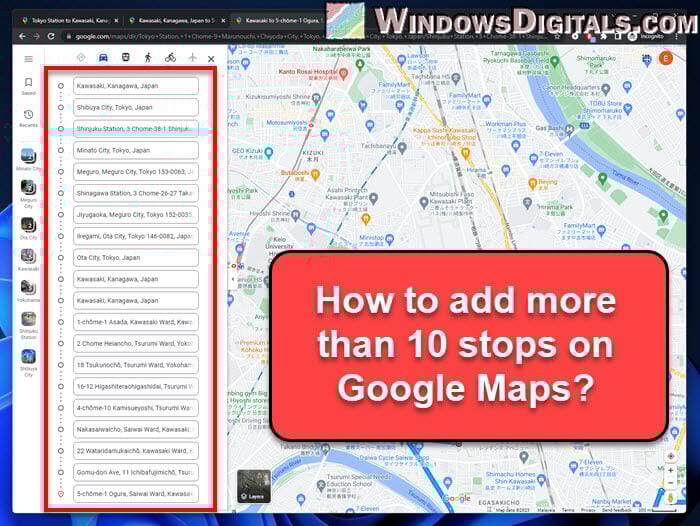
The main trick to add more than 10 stops is by creating separate URLs for each set of 10 or fewer stops and then combining these URLs together to map out your extended route. This basically tricks Google Maps into showing all your stops at once. Follow the steps below to do so:
Step 1: Map out the beginning of your route
Start by plotting the first part of your trip with up to 10 stops:
- Open Google Maps on your device.
- Press the “Directions” button.
- Enter where you’re starting and where you’re ending.
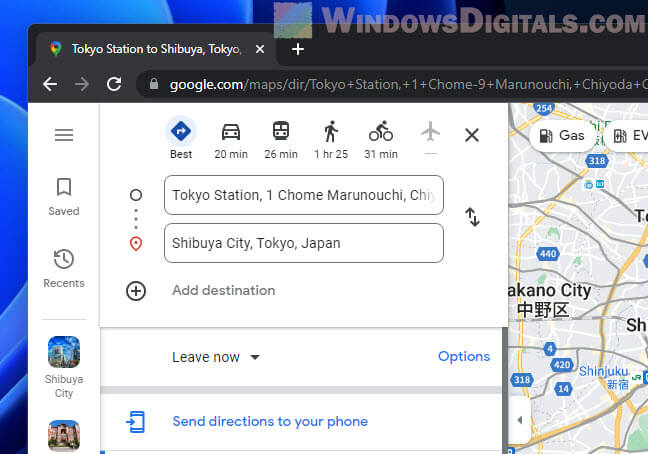
- To throw in a stop, click “Add destination” at the bottom of the destination list.
- Add up to 9 more stops.

- Once you’ve got all your stops, move on to the next step.
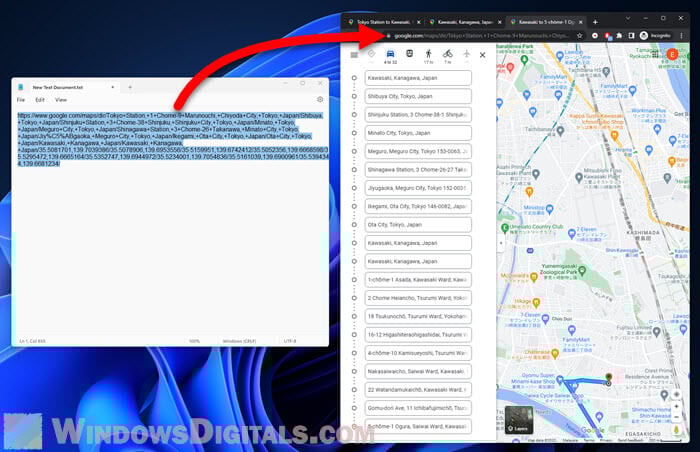
Step 2: Copy the URL
After you’ve got the first part of your route sorted:
- Copy the URL of the current Google Map page from your browser’s address bar.
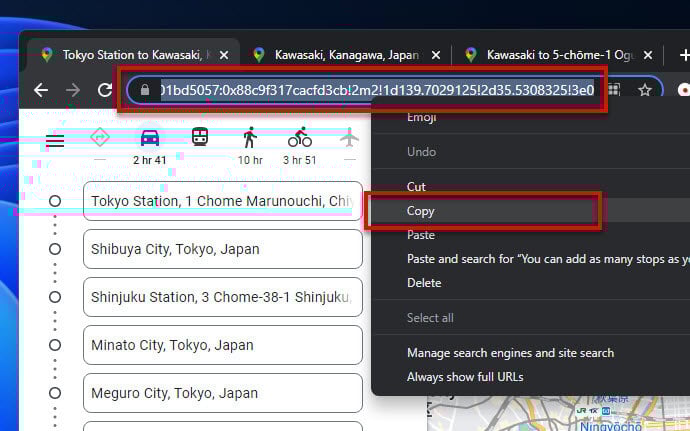
- Open something like Notepad.
- Paste the URL in there for later use.
Step 3: Continue the next bit of your trip
Now, plan the second part of your trip:
- Use the last stop of your first part as the starting point for this leg of your trip.
- Hit the “Directions” button again.
- Put in your starting and ending spots.
- Add up to 9 more stops.
- Once done, proceed to the next step.
Step 4: Save the second URL
Just like before, save this second URL:
- Copy the link from your browser.
- Open that Notepad again where you saved the first link.
- Paste this second link there too, right under or next to the first.
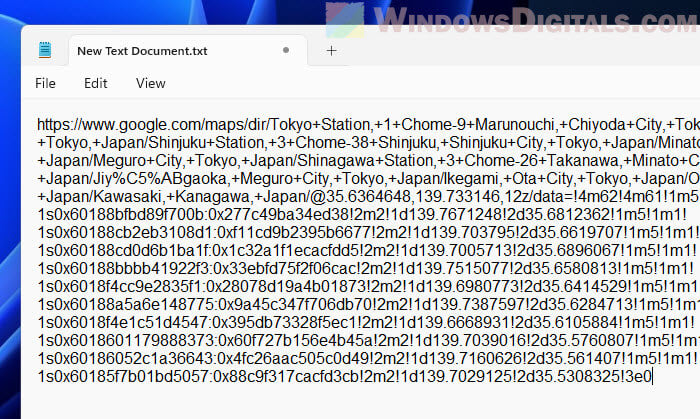
Step 5: Combine the URLs
Now you’ve got two URLs, each for a different part of your trip. Follow the steps below to combine them correctly:
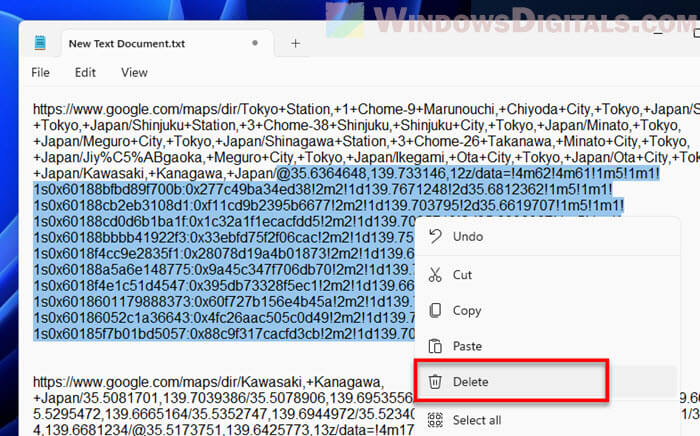
- Open that Notepad with your URLs.
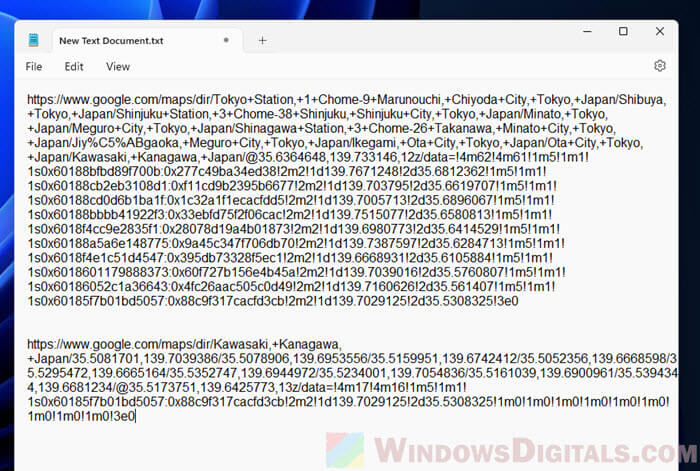
- Each URL should look like this:
https://www.google.com/maps/dir/Current+Location/Stop1/Stop2/Stop3/... - Chop off everything from the “@” symbol in both links. This part is just the extra stuff we don’t need.
- Take the part that lists the stops from the second link (like
/Stop1/Stop2/Stop3/...) and paste it onto the end of the first link.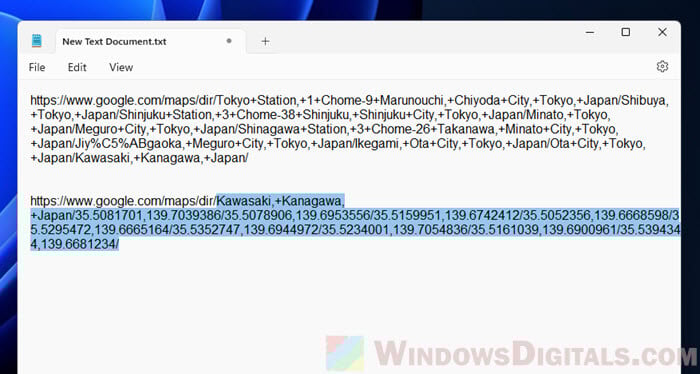
- Your final URL should now look something like this:
https://www.google.com/maps/dir/Current+Location/Stop1/Stop2/.../Stop10/Stop11/Stop12/...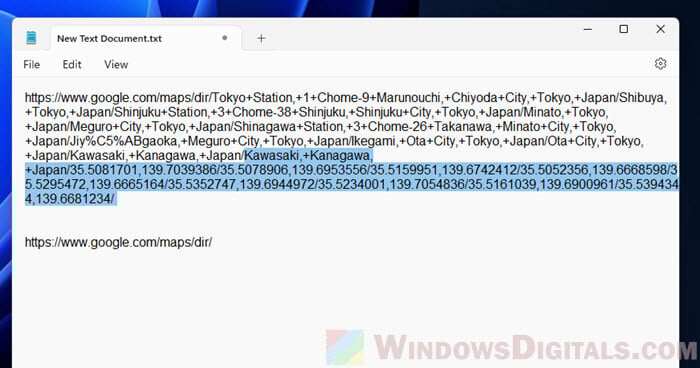
You can keep adding as many stops as you want by repeating the same steps for more sections of your trip. Whenever you hit the 10-stop limit, just create a new link like before and join it with your big combo link.
Related resource: Downloading HTML from a Website
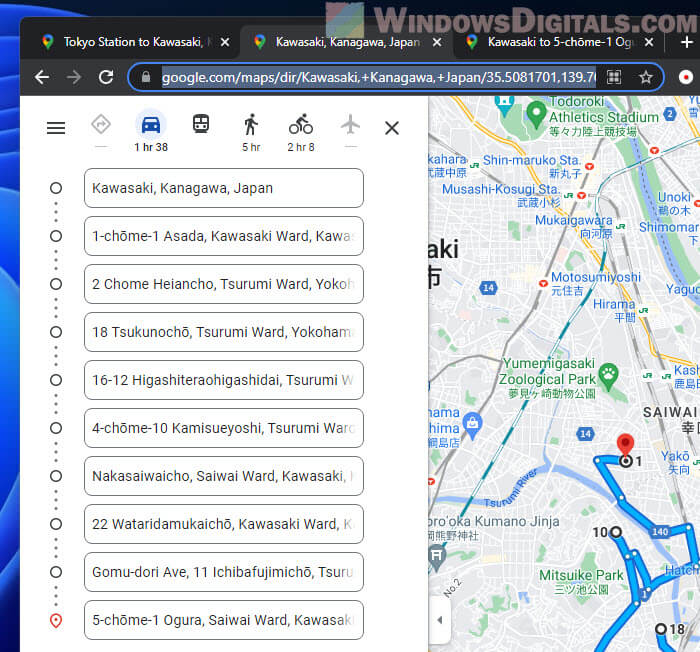
Step 6: Use your combined URL
Just copy your combined URL and paste it into your browser’s address bar. Press Enter, and voila, Google Maps will show your route with all those extra stops you added.
Another way: Save and follow multiple routes
If playing around with URLs isn’t your thing, there’s a simpler method. This involves saving separate trips for each group of 10 stops and then following them one by one. Here’s how:
Step 1: Start your first trip
It begins just like the other method. Map out your first route with up to 10 stops.
Step 2: Save your route
Then, save it for easy access later on:
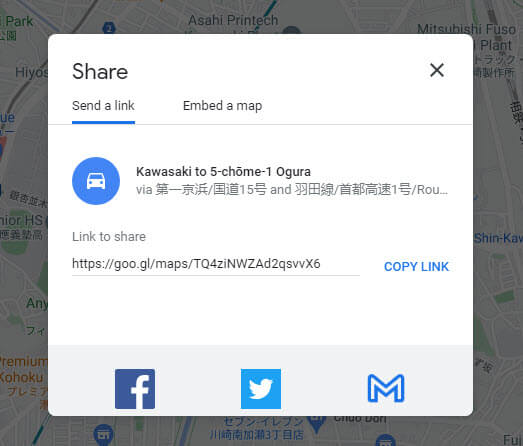
- Click on the menu icon at the top-left corner.
- Pick “Share or embed map.”
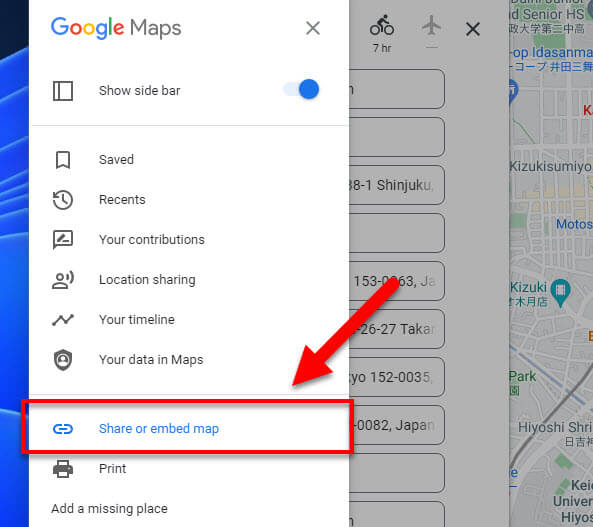
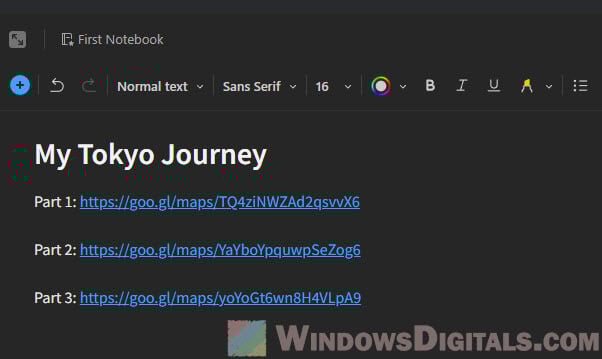
- Send the directions (link) to your email or a note app you can easily get to.
Step 3: Make the next part of your trip
This next part is just a continuation:
- Use the last stop from your first trip as the starting point for this leg.
- Hit the “Directions” button.
- Enter where you’re starting and ending.
- Add up to 9 more stops.
Step 4: Save this route too
Do the same as Step 2 to save this route.
If you’ve got more than 20 stops, just rinse and repeat until you’ve mapped out your whole adventure.
Step 5: Hit the road
When you’re all set:
- Open the first route from where you saved it.
- Start your journey.
- After you finish the first part, open the next part and keep going.
- Keep this up until you’ve finished your whole route.
Some final words
Being able to add more than the standard 10 stops on Google Maps opens up a ton of possibilities for those of us who need detailed trip planning. These methods are good for if you’re setting up a long road trip, organizing deliveries, or just trying to hit up multiple spots in one go.
Just a heads up, though, these are unofficial workarounds. They work now because of how Google Maps is currently set up, but future updates might change how things work. Hopefully, Google will keep making their map service even better and maybe even add easier ways to plan trips with loads of stops.
For now, these workarounds can help you get around the limits and add more stops to your map. Also, keep an eye on travel times, traffic, and everything else that could affect your trip to make sure everything goes smoothly.