Many of us who use Google Photos on Android have noticed a tricky issue: even when we set the app to only back up photos from our camera, it still saves screenshots automatically. I’ve seen this happen on both Redmi Note, Xiaomi and Samsung Galaxy devices, so it seems to be a widespread problem. This guide will explain why this happens and show you how to keep Google Photos from saving screenshots you don’t want to keep.
Also see: Share Files From Android to PC Wirelessly

Page Contents
Why does Google Photos keep backing up screenshots?
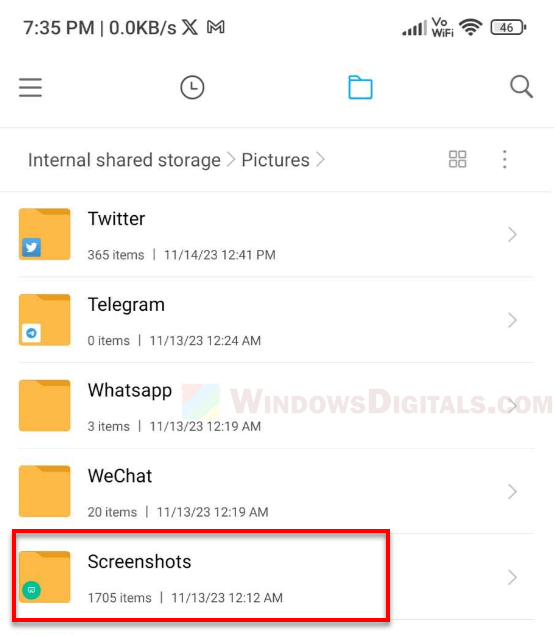
Google Photos usually saves images from the DCIM (Digital Camera Images) folder, where camera photos are typically stored. But some Android phones also put screenshots in this folder, sometimes in a special “Screenshots” subfolder. Since Google Photos doesn’t separate these from regular camera photos, it backs them up too.
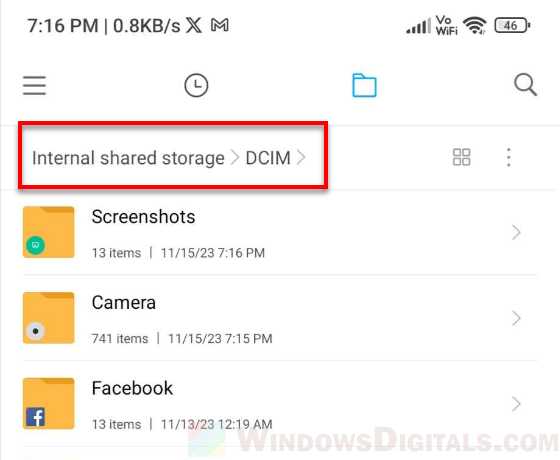
This happens whether the screenshots are alone in their subfolder or mixed with other images in the DCIM folder. Not all Android devices do this, but for those that do, it means your Google Photos might get filled with screenshots you don’t really want to save, especially if they’re sensitive or personal.
Change the default screenshot location
The first workaround to stop Google Photos from saving your screenshots is to try changing where your phone saves these screenshots. However, not all Android devices let you do this. For example, models like the Redmi Note 12 save screenshots right to the DCIM folder, and you can’t change that.
If your phone lets you change the screenshot save location, move them to a new folder like “Pictures” or a separate “Screenshots” folder somewhere else on your device.
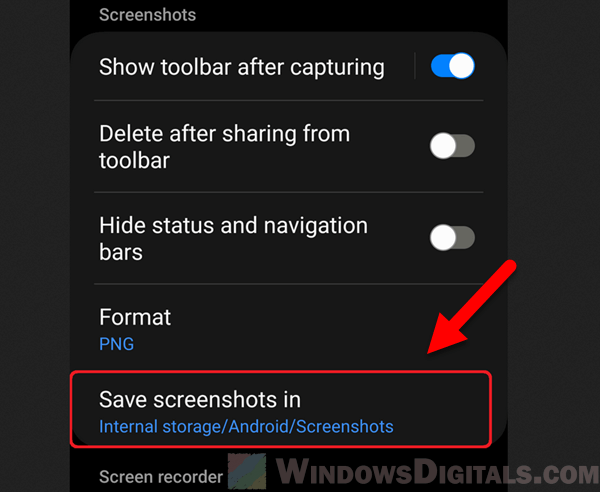
Moving screenshots to these new places can help keep them from being backed up by Google Photos, which usually only checks the DCIM folder.
You might also like: How to Find Someone By a Picture
What happens when you manually move the Screenshots folder?
- Google Photos won’t back up any new screenshots that are no longer in the DCIM folder. But if your screenshots were already backed up before you moved them, they’ll stay in your Google Photos library.
- Your Android device will automatically make a new “Screenshots” folder in the DCIM directory when you take a new screenshot. So, even after you move the folder, new screenshots will end up there and get backed up by Google Photos.
- Moving the screenshots out of the DCIM folder can also change how other gallery apps on your device show these images. Some gallery apps might not display the screenshots if they’re not in the usual place.
Thus, manually moving the screenshots folder might stop existing screenshots from being backed up to Google Photos, but it won’t stop your device from putting new ones in the DCIM folder. And it might make it harder to view your screenshots in other apps.
Manual sync and deletion using a folder synchronization app
A more active way to stop Google Photos from saving your screenshots is to use a folder synchronization app. This method lets you set up a task in the app to move screenshots from the DCIM/Screenshots folder to a different directory, like Pictures/Screenshots.
- Choose a folder synchronization app that lets you set up regular syncs. Make sure it’s a reliable app that lets you choose how often to sync and where to move your files.
- In the app, create a sync task that checks the “DCIM/Screenshots” folder regularly. Set it to move files from this folder to another place outside the DCIM folder, like “Pictures/Screenshots”. You can choose how often this sync happens, maybe every minute or so, to make sure Google Photos doesn’t back them up first.
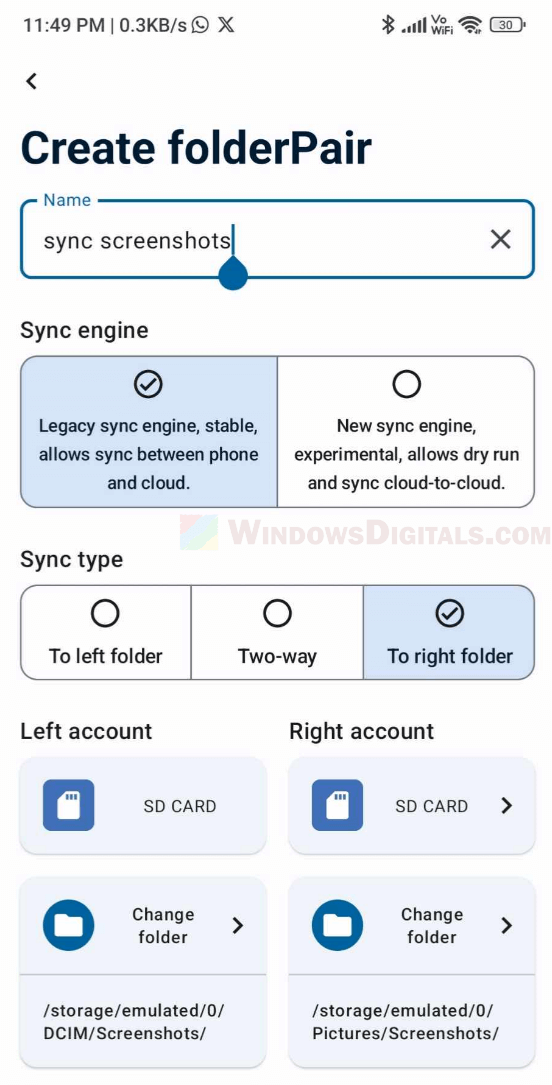
- Make sure the app deletes screenshots from the DCIM folder after syncing. This will effectively stop Google Photos from backing them up.
- Find a good balance for how often the app syncs. You want it to move the screenshots quickly enough so they don’t get backed up, but not so often that it drains your battery or slows down your phone.
Related resource: Sync Files Between Two Folders or Computers
Add a .nomedia file in the Screenshots folder
A lot of Android users, especially on sites like Reddit, talk about using a .nomedia file to fix this problem. Putting a .nomedia file in the Screenshots folder tells apps like Google Photos to ignore the images in that folder.
Below are some things you need to know:
- Create a
.nomediafile using a file manager or text editor. It’s just a blank file. You can make it on your PC and then move it to the Screenshots folder on your phone.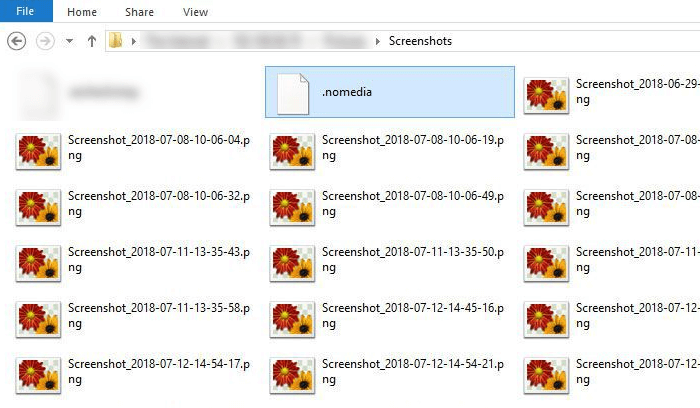
- Once you’ve got the
.nomediafile, put it in the Screenshots folder inside the DCIM directory. This stops Google Photos from seeing and backing up new screenshots in this folder. - The
.nomediafile also stops other media apps, like your gallery app, from showing the screenshots. If you use this method, you’ll have to use a file manager to view your screenshots, which might not be as convenient.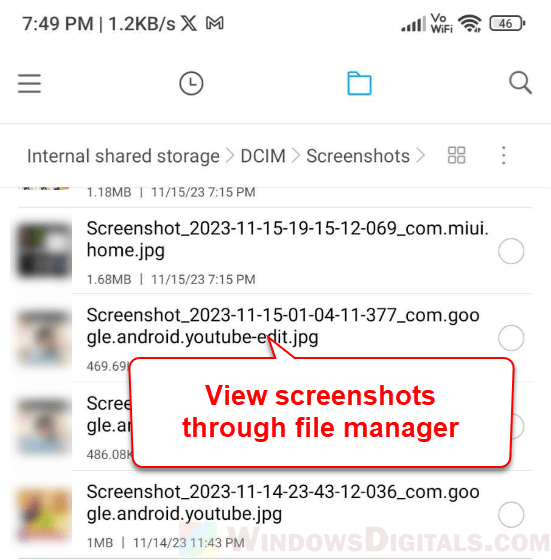
The .nomedia file is a simple and effective way to control what gets backed up and shown on your Android device. But it also means you can’t see your screenshots as easily through regular apps.
Manually remove screenshots from Google Photos
Even though it’s not a way to stop screenshots from being backed up in the first place, manually removing them from Google Photos can help clean out any that you don’t want. Here’s what to do:
- Open Google Photos and use the search bar to find “screenshot”. This should show all the images it recognizes as screenshots.
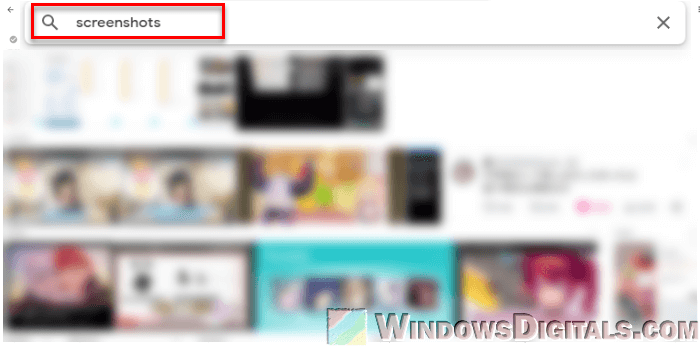
- Pick the screenshots you want to delete. Google Photos lets you select many at once. To do this, click the first image, then hold the Shift key and click the last image.
- Double-check your selection to make sure you’re not about to delete something important or something that’s been wrongly labeled as a screenshot.
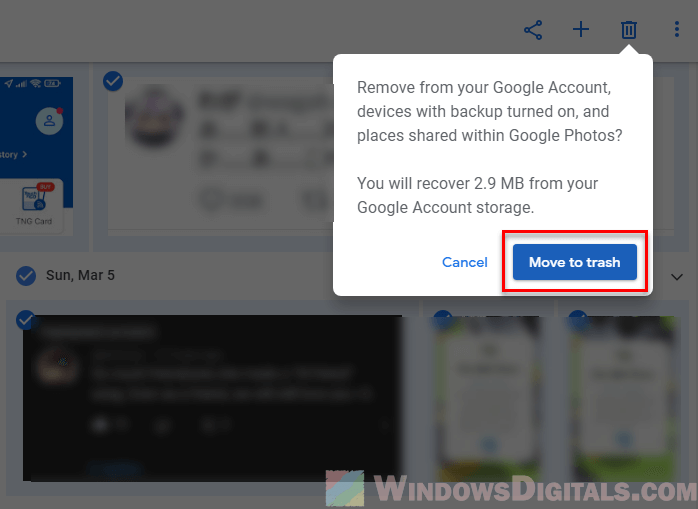
- Once you’re sure, delete the screenshots. They’ll be removed from your Google Photos backup but will stay on your device unless you delete them there too.