Are your screenshots always blurry (both text and pictures) and low quality in Windows 11 regardless of what screenshot app you use and how fine it looks on the actual monitor screen?
Do the screenshots look low resolution, pixelated and sometimes high-contrast or overexposed (over-exposure), causing the text to be almost unreadable? This post is intended to help you resolve the issue.
Also see: Why did all my Screenshots come out Black in Windows 11?
Page Contents
Why are my screenshots blurry in Windows 11?
If the screenshots you take in Windows 11 always come out blurry, poor quality, and do not match what you see on the screen, try the following solutions to resolve the problem.

Turn off HDR in Windows 11
In most cases, the blurry screenshots issue in Windows 11 is caused by a display settings called HDR. HDR, shorts for High Dynamic Range, is a feature in Windows that can provide you a brighter, more vibrant, and more detailed picture compared to a standard dynamic range (SDR) display.
If your monitor or TV supports HDR display, Windows 11 will automatically enable the HDR feature. This may be the reason why your screenshots come out blurry and different than what you actually see on the screen.
Try turning off the HDR feature and see if that fixes the blurry screenshot problem. To turn off HDR in Windows 11, follow the steps below.
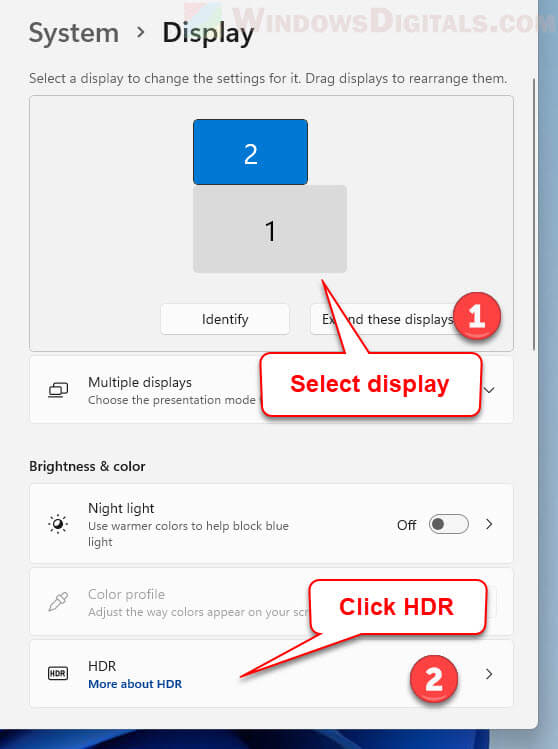
- In Windows 11, press Win + i keys to open Settings.
- Select System from the left pane.
- Next, select Display on the right.
- Select the display (if you have multiple displays) you would like to change the settings for.
- Then, select the HDR (More about HDR) settings.
- In the HDR settings, click the toggle next to “Use HDR” to turn it off.
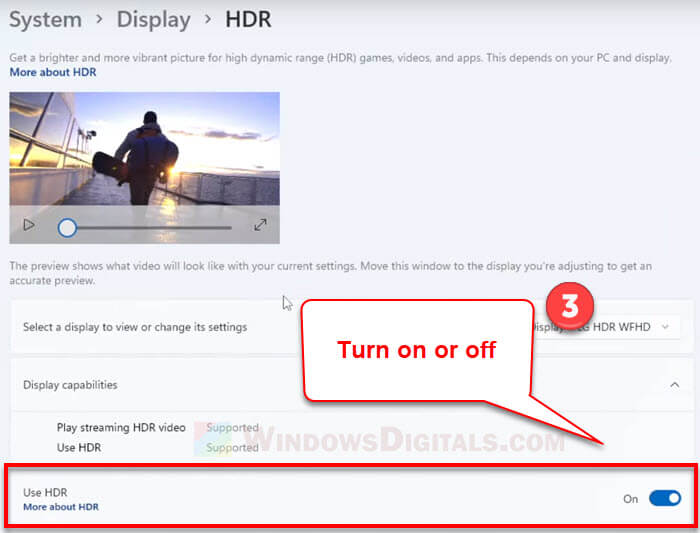
After turning off the HDR, retry taking a screenshot again and see if the blurry screenshot problem persists.
Read next: How to Screenshot Only One Monitor on Windows 11
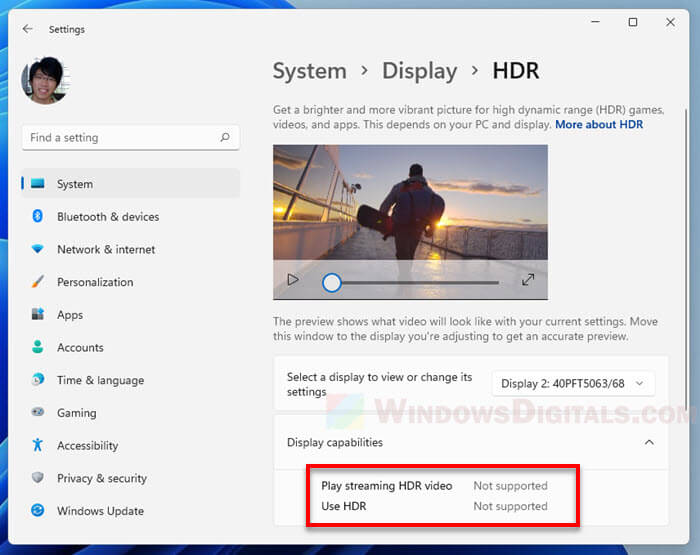
If your monitor doesn’t support HDR, the “Display capabilities” section in the HDR settings will show you that “Use HDR” is not supported by the display you selected. If so, the problem of blurred screenshots may be caused by other reasons.
Check display scaling setting
Check the display scale setting to see if it is causing screenshot to be blurry. If you have a display scaling that is not 100%, Windows will try to change the size of objects such as text and app’s windows so that they fit the scaling.
For this reason, screenshots you take may come out blurry and different. Try to change the scaling back to 100% and if that resolves the issue.
You can change the display scaling setting by opening Settings (press Win + i) and navigate to System > Display. Under “Scale & layout“, click the drop-down menu next to “Scale” to change the display scaling percentage.
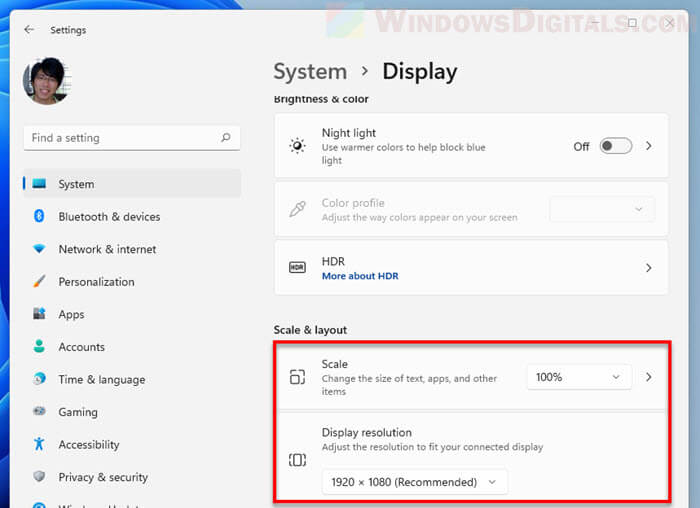
In the meantime, also check that if you have the correct display resolution that fit your monitor or TV. You can adjust the screen resolution in the same settings page under “Scale & layout”.
Related: How to Screenshot Games on Windows 11
Adjust ClearType Text Tuner
Due to how certain monitors work, text and fonts may look blurry and pixelated on some monitors. For this reason, Windows introduces a feature called ClearType to help user adjust the text and make them easier to read.
To learn how to use ClearType in Windows 11, see: How to Make Text Darker And Easier to Read in Windows 11.
If the text in screenshots you took is so blurry that they are difficult to read, you can try to use the ClearType feature to smooth the text and make them darker and easier to read in Windows 11.
Use a different screenshot taking app
If you haven’t already done so, try using a different screenshot taking approach and see if the results are the same. There are plenty of ways to take a screenshot in Windows 11:
- Try the Win + PrtScn method. Screenshots taken this way can be found from the This PC > Pictures > Screenshots folder.
- Use Snipping Tool – a built-in screenshot taking app in Windows 11 and Windows 10. You can find Snipping Tool by searching for it via the Start menu.
- Use the classic PrtScn + Paint method. After pressing the PrtScn key, open Paint in Windows and press Ctrl + V to paste the screenshot into Paint.
- If you have NVIDIA GeForce Experience, use the NVIDIA Share (Shadowplay) screenshot feature to take screenshot. You can open the NVIDIA Share interface by pressing Alt + Z.
- Use a third-party screenshot app such as Greenshot or Fraps.